Relocating SCCD database

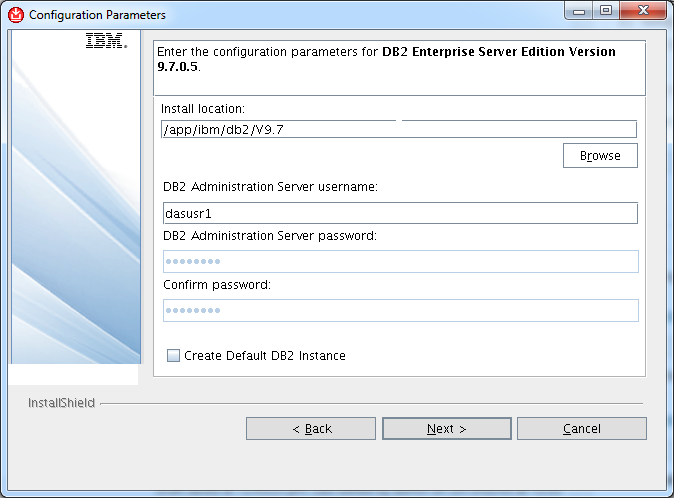
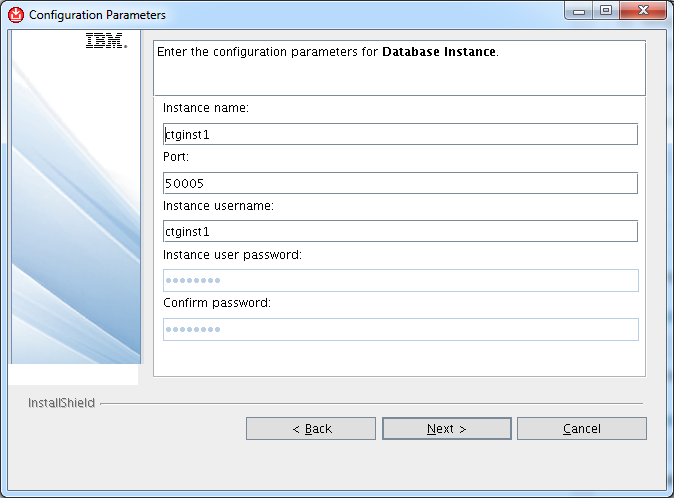
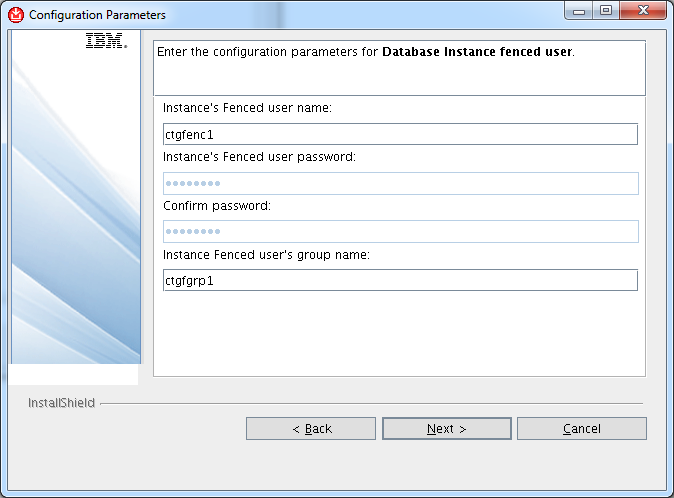
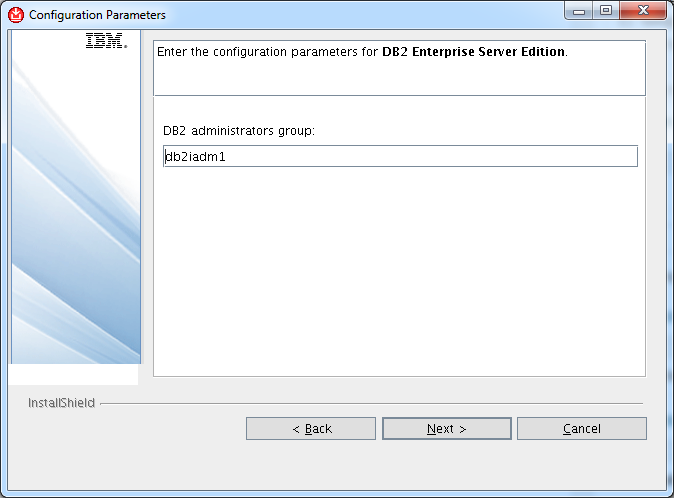
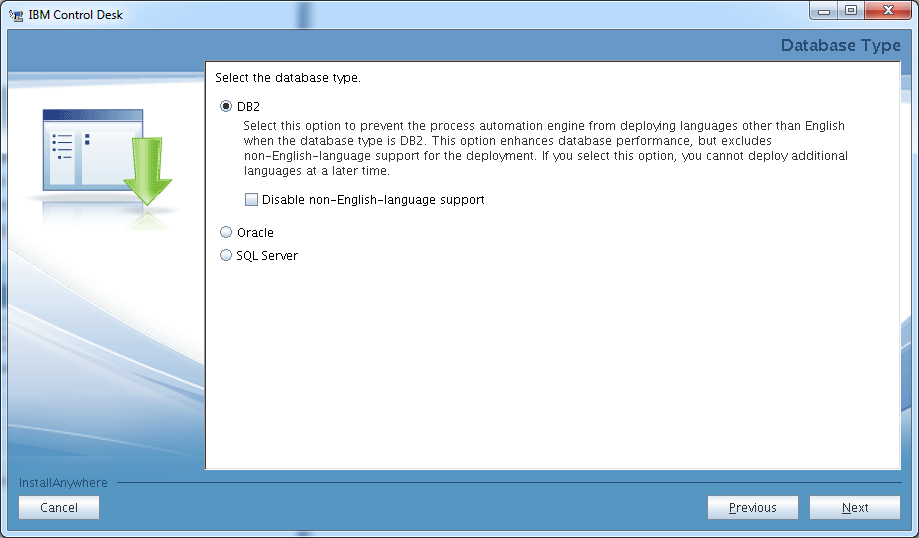
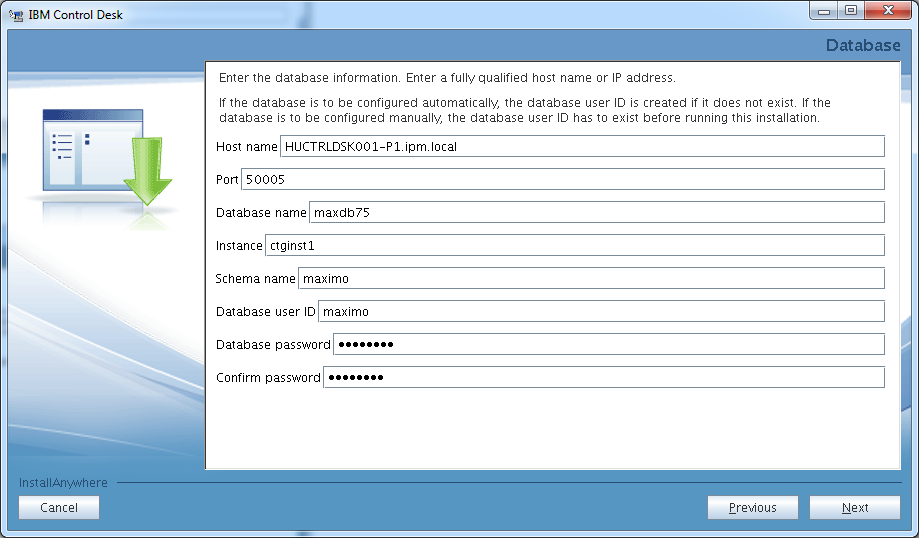
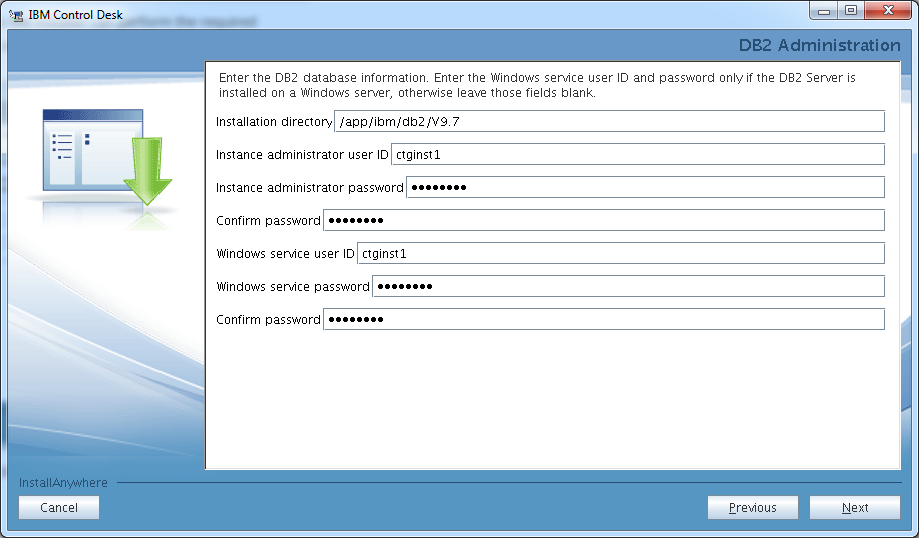
When we install SmartCloud Control Desk in a Unix/Linux box using middleware installer, it only asks for db instance user. (If we accept the default value, it’s ctginst1)

The installer then creates the user, and places the db in it’s home directory.

In lots of cases there is a dedicated filesystem to hold business critical data, ( and usually it’s not /home)  so we have to move database to that location.

db2relocatedb is the tool to use. First, copy/move  /home/ctginst1/ctginst1 directory to the new location (for eg.: /data/ctginst1 ), then create a config file for db2relocatedb. ( Keep in mind that we have to move tablespace containers as well )

so the command is:

db2relocatedb -f relocate.cfg

relocate.cfg is :

DB_NAME=maxdb75
DB_PATH=/home/ctginst1,/data/ctginst1
INSTANCE=ctginst1
STORAGE_PATH=/home//ctginst1/,/data/ctginst1/

(don’t forget, the instance should be stopped ! )

The locale codeset (cp1252) isn’t one that perl can decode…

We encountered this error while compiling a perl script:

The locale codeset (cp1252) isn’t one that perl can decode, stopped at Encode/Lo
cale.pm line 94. Compilation failed in require at LWP/UserAgent.pm line 1001.

The solution to this is to include the following use statement on the top of your script:

use Encode::Byte;

This will include the mentioned library in the complied exe file.

Perl lib version (5.20.2) doesn’t match executable ‘perl.exe’ version (5.20.1) at C:/Perl/lib/Config.pm line 62.

When using Active Perl 5.20.2 and PP to compile perl files we faced the following error:

Perl lib version (5.20.2) doesn’t match executable ‘perl.exe’ version (5.20.1) at C:/Perl/lib/Config.pm line 62.
Compilation failed in require at C:/Perl/lib/Errno.pm line 8.
BEGIN failed–compilation aborted at C:/Perl/lib/Errno.pm line 8.
Compilation failed in require at C:/Perl/lib/File/Temp.pm line 17.
BEGIN failed–compilation aborted at C:/Perl/lib/File/Temp.pm line 17.
Compilation failed in require at C:/Perl/lib/Archive/Zip.pm line 11.
BEGIN failed–compilation aborted at C:/Perl/lib/Archive/Zip.pm line 11.
Compilation failed in require at -e line 228.
C:\Perl\site\bin/pp: Failed to extract a parl from ‘PAR::StrippedPARL::Static’ t
o file ‘C:\Users\zveress\AppData\Local\Temp\parlMVgYDUi.exe’ at C:/Perl/site/lib
/PAR/Packer.pm line 1158, line 1.

This apparently is a bug. The solution for us was to download and install Active Perl 5.20.1. Since this version is no longer available on the Activeperl website you can get it from download.com


Installing IBM Monitoring 8.1 on CentOS 6.6

Since IBM Monitoring 8.1 server is only supported on RHEL 6 I have attempted to install the product on the CentOS equivalent of RHEL 6. I used CentOS version 6.6 which can be downloaded from here.

Try assigning at least 8 gigabytes of memory for your VM. I attempted the installation on a 4 gig VM and it went painfully slow as it was swapping all the time. Select the desktop installation option when installing CentOS that image has most of the required packaged already. Additionally you will need to yum install the following packages:

  • yum install ksh
  • yum install gcc
  • yum install pam.i686

Before starting the installation turn off the prereq checker as it will fail your installation due to an “unsupported” platform.

export SKIP_PRECHECK=1

Stop the local firewall if running:

  • service iptables save
  • service iptables stop

You will also need to make sure that your hostname and ip address is defined in /etc/hosts otherwise the installation will fail.

The installation is pretty much done automatically. You will have to specify the apmadmin user password at some point and select if you want to pre-configure agent packages. I set the password but unselected the agent package pre-configuration I will do this step later manually.

The installer then kicks in and installs DB2, Websphere and the required ITM packages such as the Summarization and Pruning agent. it also installs support for all agents it could possibly connect to the server. The list of these agent and their images can be found here. Once the core installation is done it will create the required DB2 databases, then starts and configures the server.

To start the installation go to the directory where you unpacked the server bundle to and execute the following:

root@huim001-p1 server]# ./install.sh
Follow the license instructions to install IBM Monitoring

International Program License Agreement

Part 1 – General Terms

BY DOWNLOADING, INSTALLING, COPYING, ACCESSING, CLICKING ON
AN “ACCEPT” BUTTON, OR OTHERWISE USING THE PROGRAM,
LICENSEE AGREES TO THE TERMS OF THIS AGREEMENT. IF YOU ARE
ACCEPTING THESE TERMS ON BEHALF OF LICENSEE, YOU REPRESENT
AND WARRANT THAT YOU HAVE FULL AUTHORITY TO BIND LICENSEE
TO THESE TERMS. IF YOU DO NOT AGREE TO THESE TERMS,

* DO NOT DOWNLOAD, INSTALL, COPY, ACCESS, CLICK ON AN
“ACCEPT” BUTTON, OR USE THE PROGRAM; AND

* PROMPTLY RETURN THE UNUSED MEDIA, DOCUMENTATION, AND
PROOF OF ENTITLEMENT TO THE PARTY FROM WHOM IT WAS OBTAINED

Press Enter to continue viewing the license agreement, or
enter “1” to accept the agreement, “2” to decline it, “3”
to print it, or “99” to go back to the previous screen.
1
License agreement was accepted, installation will proceed…

Do you want to change the default password for the administrator account [ 1-yes or 2-no; “no” is default ]? 1
Enter the password:
Confirm the password:
The password was accepted and will be used for the administrator account.

Agent installation images must be pre-configured to connect to this server. If you have downloaded the agent images to the same system as the server, you can pre-configure the agent images now.

Do you want to pre-configure agent installation images now [ 1-yes or 2-no; “yes” is default ]? 2

No further user input is required. The installation and configuration of components is now starting and may take up to one hour to complete.

Installing DB2. Please wait…

Installing Summarization and Pruning agent. Please wait…

Preparing…                ##################################################
smai                        ##################################################
Preparing…                ##################################################
smai-liberty                ##################################################
Applying fix to Liberty install directory at /opt/ibm/wlp now.
lib/com.ibm.ws.eba.bundle.repository_1.0.3.cl50320140901-1741.jar
Fix has been applied successfully.
Successfully extracted all product files.
Applying fix to Liberty install directory at /opt/ibm/wlp now.
lib/com.ibm.ws.eba.app.runtime.services_1.0.6.cl50320141023-2202.jar
Fix has been applied successfully.
Successfully extracted all product files.
Applying fix to Liberty install directory at /opt/ibm/wlp now.
lib/com.ibm.ws.eba.bundle.repository_1.0.3.cl50320140901-1741.jar
lib/com.ibm.ws.org.apache.aries.subsystem.core.1.0.0_1.0.1.cl50320141223-1416.jar
Fix has been applied successfully.
Successfully extracted all product files.
Preparing…                ##################################################
smai-shared                 ##################################################
smai-server1                ##################################################
smai-scr                    ##################################################
smai-oslc-pm                ##################################################
smai-upgrade-tool           ##################################################
smai-min                    ##################################################
smai-itmcdp-shared          ##################################################
smai-itmcdp                 ##################################################
smai-iehs                   ##################################################
smai-asfrest                ##################################################
smai-apmui-resource-monitori##################################################
smai-apmui                  ##################################################
smai-itportal-resource-monit##################################################
smai-itportal               ##################################################
smai-ai-apmui               ##################################################
smai-smccs-ui               ##################################################
smai-smccs-server           ##################################################
smai-rtss                   ##################################################
smai-ftma                   ##################################################
smai-cscs-ui                ##################################################
smai-cscs-rest              ##################################################
smai-cscs                   ##################################################
smai-kafka                  ##################################################
Preparing packages for installation…
smai-windows_os-smccs-agent-06.35.08.00-1.el6
smai-windows_os-oslc-support-06.35.08.00-1.el6
smai-windows_os-ehs-06.35.08.00-1.el6
smai-windows_os-dp-support-06.35.08.00-1.el6
smai-windows_os-asf-support-06.35.08.00-1.el6
smai-windows_os-apmui-dashboard-06.35.08.00-1.el6
smai-wim-smccs-agent-08.00.01.00-1.el6
smai-wim-oslc-support-08.00.01.00-1.el6
smai-wim-ehs-08.00.01.00-1.el6
smai-wim-dp-support-08.00.01.00-1.el6
smai-wim-asf-support-08.00.01.00-1.el6
smai-wim-apmui-dashboard-08.00.01.00-1.el6
smai-vmware_vi-smccs-agent-07.20.02.03-1.el6
smai-vmware_vi-oslc-support-07.20.02.03-1.el6
smai-vmware_vi-ehs-07.20.02.03-1.el6
smai-vmware_vi-dp-support-07.20.02.03-1.el6
smai-vmware_vi-asf-support-07.20.02.03-1.el6
smai-vmware_vi-apmui-dashboard-07.20.02.03-1.el6
smai-unix_os-smccs-agent-06.35.08.00-1.el6
smai-unix_os-oslc-support-06.35.08.00-1.el6
smai-unix_os-ehs-06.35.08.00-1.el6
smai-unix_os-dp-support-06.35.08.00-1.el6
smai-unix_os-asf-support-06.35.08.00-1.el6
smai-unix_os-apmui-dashboard-06.35.08.00-1.el6
smai-tomcat-smccs-agent-06.40.00.12-1.el6
smai-tomcat-oslc-support-06.40.00.12-1.el6
smai-tomcat-ehs-06.40.00.12-1.el6
smai-tomcat-dp-support-06.40.00.12-1.el6
smai-tomcat-asf-support-06.40.00.12-1.el6
smai-tomcat-apmui-dashboard-06.40.00.12-1.el6
smai-ruby-smccs-agent-01.00.08.00-1.el6
smai-ruby-oslc-support-01.00.08.00-1.el6
smai-ruby-ehs-01.00.08.00-1.el6
smai-ruby-dp-support-01.00.08.00-1.el6
smai-ruby-asf-support-01.00.08.00-1.el6
smai-ruby-apmui-dashboard-01.00.08.00-1.el6
smai-response_time-smccs-agent-08.10.00.00-1.el6
smai-response_time-oslc-support-08.10.00.00-1.el6
smai-response_time-ehs-08.10.00.00-1.el6
smai-response_time-dp-support-08.10.00.00-1.el6
smai-response_time-asf-support-08.10.00.00-1.el6
smai-response_time-apmui-dashboard-monitoring-08.10.00.00-1.el6
smai-python-smccs-agent-01.00.08.00-1.el6
smai-python-oslc-support-01.00.08.00-1.el6
smai-python-ehs-01.00.08.00-1.el6
smai-python-dp-support-01.00.08.00-1.el6
smai-python-asf-support-01.00.08.00-1.el6
smai-python-apmui-dashboard-01.00.08.00-1.el6
smai-postgresql-smccs-agent-01.00.07.00-1.el6
smai-postgresql-oslc-support-01.00.07.00-1.el6
smai-postgresql-ehs-01.00.07.00-1.el6
smai-postgresql-dp-support-01.00.07.00-1.el6
smai-postgresql-asf-support-01.00.07.00-1.el6
smai-postgresql-apmui-dashboard-01.00.07.00-1.el6
smai-php-smccs-agent-01.00.08.00-1.el6
smai-php-oslc-support-01.00.08.00-1.el6
smai-php-ehs-01.00.08.00-1.el6
smai-php-dp-support-01.00.08.00-1.el6
smai-php-asf-support-01.00.08.00-1.el6
smai-php-apmui-dashboard-01.00.08.00-1.el6
smai-oracle_database-smccs-agent-06.31.05.00-1.el6
smai-oracle_database-oslc-support-06.31.05.00-1.el6
smai-oracle_database-ehs-06.31.05.00-1.el6
smai-oracle_database-dp-support-06.31.05.00-1.el6
smai-oracle_database-asf-support-06.31.05.00-1.el6
smai-oracle_database-apmui-dashboard-06.31.05.00-1.el6
smai-node.js-smccs-agent-01.00.08.00-1.el6
smai-node.js-oslc-support-01.00.08.00-1.el6
smai-node.js-ehs-01.00.08.00-1.el6
smai-node.js-dp-support-01.00.08.00-1.el6
smai-node.js-asf-support-01.00.08.00-1.el6
smai-node.js-apmui-dashboard-01.00.08.00-1.el6
smai-mysql-smccs-agent-01.00.07.00-1.el6
smai-mysql-oslc-support-01.00.07.00-1.el6
smai-mysql-ehs-01.00.07.00-1.el6
smai-mysql-dp-support-01.00.07.00-1.el6
smai-mysql-asf-support-01.00.07.00-1.el6
smai-mysql-apmui-dashboard-01.00.07.00-1.el6
smai-mongodb-smccs-agent-01.00.07.00-1.el6
smai-mongodb-oslc-support-01.00.07.00-1.el6
smai-mongodb-ehs-01.00.07.00-1.el6
smai-mongodb-dp-support-01.00.07.00-1.el6
smai-mongodb-asf-support-01.00.07.00-1.el6
smai-mongodb-apmui-dashboard-01.00.07.00-1.el6
smai-microsoft_sql_server-smccs-agent-06.31.05.00-1.el6
smai-microsoft_sql_server-oslc-support-06.31.05.00-1.el6
smai-microsoft_sql_server-ehs-06.31.05.00-1.el6
smai-microsoft_sql_server-dp-support-06.31.05.00-1.el6
smai-microsoft_sql_server-asf-support-06.31.05.00-1.el6
smai-microsoft_sql_server-apmui-dashboard-06.31.05.00-1.el6
smai-microsoft_.net-smccs-agent-06.23.08.01-1.el6
smai-microsoft_.net-oslc-support-06.23.08.01-1.el6
smai-microsoft_.net-ehs-06.23.08.01-1.el6
smai-microsoft_.net-dp-support-06.23.08.01-1.el6
smai-microsoft_.net-asf-support-06.23.08.01-1.el6
smai-microsoft_.net-apmui-dashboard-deepdive-06.23.08.01-1.el6
smai-microsoft_.net_framework-apmui-dashboard-06.31.03.00-1.el6
smai-microsoft_iis-smccs-agent-06.31.05.00-1.el6
smai-microsoft_iis-oslc-support-06.31.05.00-1.el6
smai-microsoft_iis-ehs-06.31.05.00-1.el6
smai-microsoft_iis-dp-support-06.31.05.00-1.el6
smai-microsoft_iis-asf-support-06.31.05.00-1.el6
smai-microsoft_iis-apmui-dashboard-06.31.05.00-1.el6
smai-microsoft_hyper-v_server-smccs-agent-06.31.05.00-1.el6
smai-microsoft_hyper-v_server-oslc-support-06.31.05.00-1.el6
smai-microsoft_hyper-v_server-ehs-06.31.05.00-1.el6
smai-microsoft_hyper-v_server-dp-support-06.31.05.00-1.el6
smai-microsoft_hyper-v_server-asf-support-06.31.05.00-1.el6
smai-microsoft_hyper-v_server-apmui-dashboard-06.31.05.00-1.el6
smai-microsoft_exchange_server-smccs-agent-06.31.05.00-1.el6
smai-microsoft_exchange_server-oslc-support-06.31.05.00-1.el6
smai-microsoft_exchange_server-ehs-06.31.05.00-1.el6
smai-microsoft_exchange_server-dp-support-06.31.05.00-1.el6
smai-microsoft_exchange_server-asf-support-06.31.05.00-1.el6
smai-microsoft_exchange_server-apmui-dashboard-06.31.05.00-1.el6
smai-linux_os-smccs-agent-06.35.08.00-1.el6
smai-linux_os-oslc-support-06.35.08.00-1.el6
smai-linux_os-ehs-06.35.08.00-1.el6
smai-linux_os-dp-support-06.35.08.00-1.el6
smai-linux_os-asf-support-06.35.08.00-1.el6
smai-linux_os-apmui-dashboard-06.35.08.00-1.el6
smai-linux_kvm-smccs-agent-07.21.02.00-1.el6
smai-linux_kvm-oslc-support-07.21.02.00-1.el6
smai-linux_kvm-ehs-07.21.02.00-1.el6
smai-linux_kvm-dp-support-07.21.02.00-1.el6
smai-linux_kvm-asf-support-07.21.02.00-1.el6
smai-linux_kvm-apmui-dashboard-07.21.02.00-1.el6
smai-jboss-smccs-agent-01.02.08.00-1.el6
smai-jboss-oslc-support-01.02.08.00-1.el6
smai-jboss-ehs-01.02.08.00-1.el6
smai-jboss-dp-support-01.02.08.00-1.el6
smai-jboss-asf-support-01.02.08.00-1.el6
smai-jboss-apmui-dashboard-01.02.08.00-1.el6
smai-http_server-smccs-agent-01.00.01.00-1.el6
smai-http_server-oslc-support-01.00.01.00-1.el6
smai-http_server-ehs-01.00.01.00-1.el6
smai-http_server-dp-support-01.00.01.00-1.el6
smai-http_server-asf-support-01.00.01.00-1.el6
smai-http_server-apmui-dashboard-01.00.01.00-1.el6
smai-hmc_base-smccs-agent-06.22.04.00-1.el6
smai-hmc_base-oslc-support-06.22.04.00-1.el6
smai-hmc_base-dp-support-06.22.04.00-1.el6
smai-hmc_base-asf-support-06.22.04.00-1.el6
smai-hmc_base-apmui-dashboard-06.22.04.00-1.el6
smai-db2-smccs-agent-07.10.02.00-1.el6
smai-db2-oslc-support-07.10.02.00-1.el6
smai-db2-ehs-07.10.02.00-1.el6
smai-db2-dp-support-07.10.02.00-1.el6
smai-db2-asf-support-07.10.02.00-1.el6
smai-db2-apmui-dashboard-07.10.02.00-1.el6
smai-datapower-smccs-agent-07.10.02.01-1.el6
smai-datapower-oslc-support-07.10.02.01-1.el6
smai-datapower-ehs-07.10.02.01-1.el6
smai-datapower-dp-support-07.10.02.01-1.el6
smai-datapower-asf-support-07.10.02.01-1.el6
smai-datapower-apmui-dashboard-07.10.02.01-1.el6
smai-apd-smccs-agent-07.30.08.00-1.el6
smai-apd-oslc-support-07.30.08.00-1.el6
smai-apd-ehs-resource-07.30.08.00-1.el6
smai-apd-dp-support-07.30.08.00-1.el6
smai-apd-asf-support-07.30.08.00-1.el6
smai-apd-apmui-dashboard-resource-07.30.08.00-1.el6

Creating the Metric Cache database…
Creating partitions
Creating the Topology database…
Finalizing database creation…

Configuring Summarization and Pruning agent…
Configuring Messaging Broker…

Starting server components of IBM Monitoring…

Configuring server components of IBM Monitoring…

All server components were successfully configured.

Agent installation images must be pre-configured to connect to this server.
Use the /opt/ibm/ccm/make_configuration_packages.sh and /opt/ibm/ccm/configure_agent_images.sh scripts to pre-configure the agent images. Note that if you are installing Hybrid Gateway, that image must also be configured using the same scripts.

The server size has been configured as ‘extra_small’ based on the number of CPUs, amount of memory and free disk space. To reconfigure the server size, run script /opt/ibm/ccm/server_size.sh with the desired size as a parameter. Valid sizes are: extra_small, small, medium.
Please review the documentation at http://ibm.biz/mon_doc for more information.
To begin using the product, copy the pre-configured agent images to the systems running the applications you want to monitor and install the agents. Log in to the Performance Management console using https://<server-name>:9443 and review the topics on the “Getting Started” page.

After the installation just go to http://localhost:8080 and the IBM Monitoring APM console 8.1 should open.

APMui

Please note that this only covers the installation, the product was not tested on CentOS any further ( yet ).


Installing the IBM Tivoli Integration Composer

This article will help you install the IBM Tivoli Integration Composer. As usual we will use SLES 11 SP3 as an installation OS. We used 6 gigabyte of RAM, 2 CPU cores and 50 gigabytes of disk space in this scenario.

Start the installation from /Install/ITIC/setup.bin command from the IBM Control Desk root installation directory. You need to have java installed in order to be able to start the installation process. We recommend to use the java that is supplied with Control Desk and it is located in /app/IBM/SMP/sdk/ directory in our environment.

HUCTRLDSK001-P1:/Downloads/TIVOLI-IMAGES/CONTROLDESK753/Install/ITIC # ./setup.bin
Preparing to install…
Extracting the installation resources from the installer archive…
Configuring the installer for this system’s environment…

Launching installer…

Select your desired installation language then click OK.

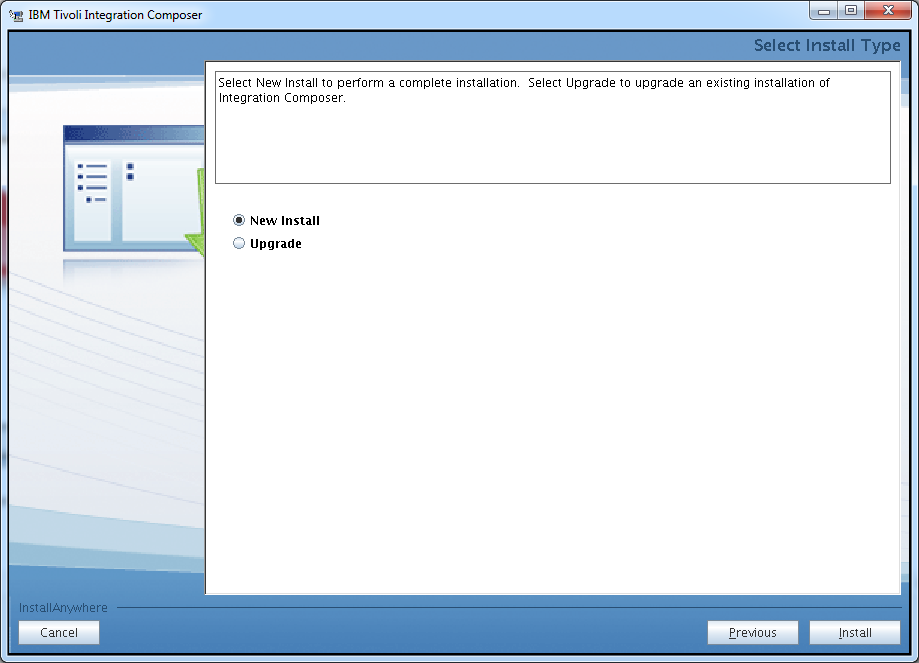
ibm-tivoli-integration-composer-select-install-languageClick Next at the installation Welcome screen then select New Install at the next screen, then click Install.

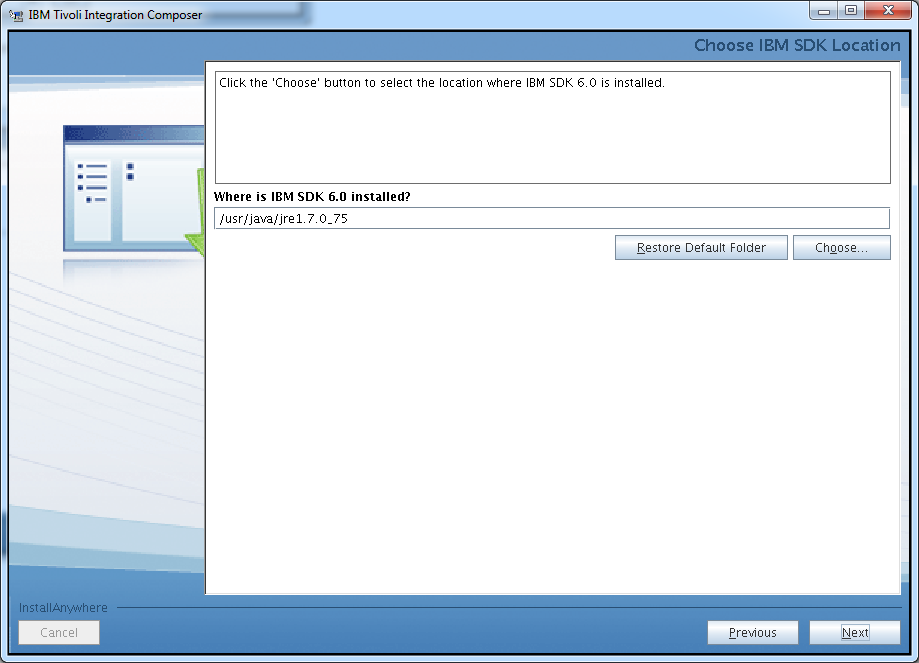
ibm-tivoli-integration-composer-new-installThe installer will detect the java version and location on the box.

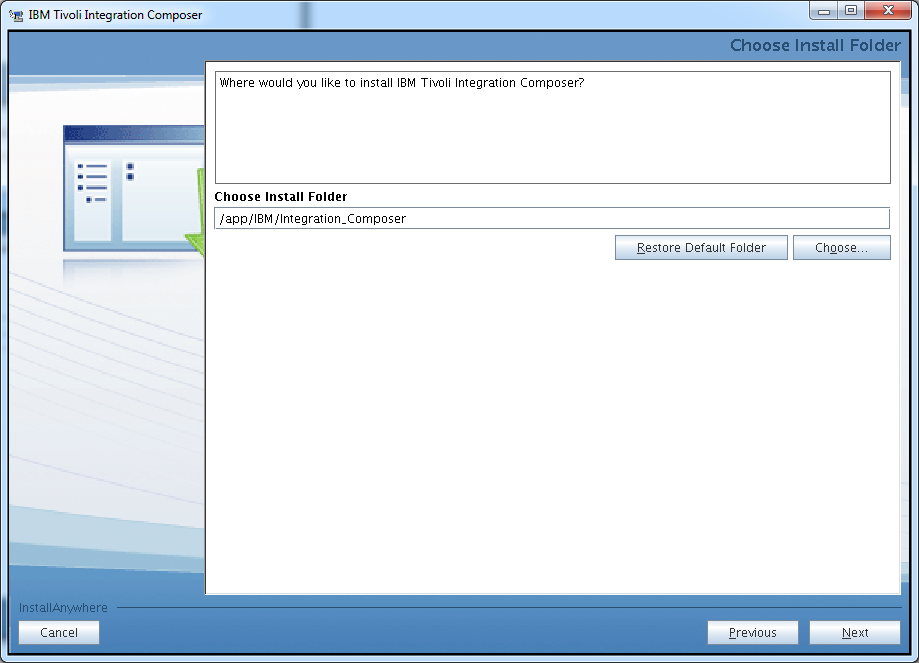
ibm-tivoli-integration-composer-java-locationWe changed the installation folder to go under /app/IBM. Specify the directory you want to product to be installed then click Next.

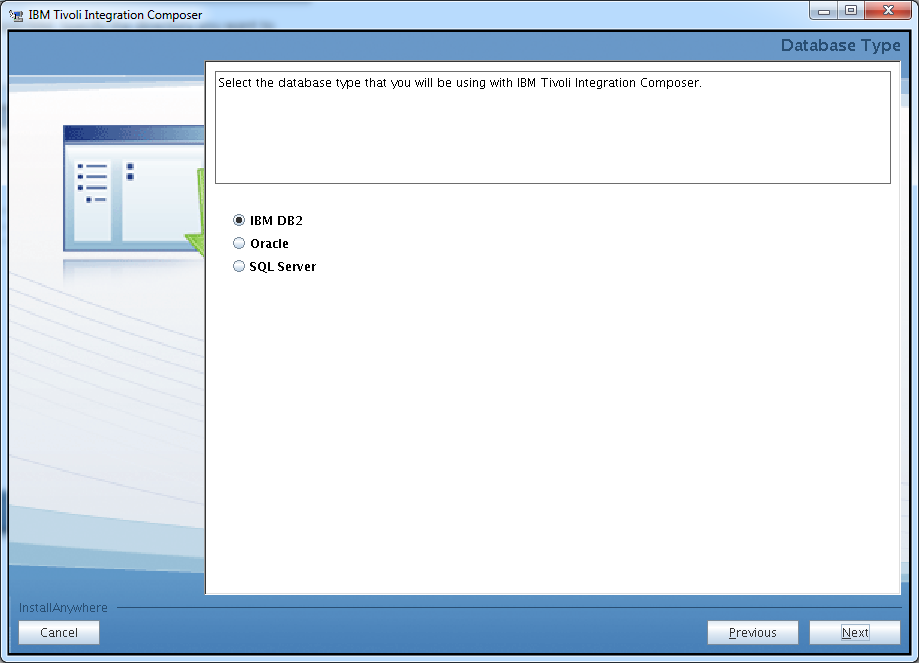
ibm-tivoli-integration-composer-install-locationjSelect DB2 as the database type for this installation, then click Next.

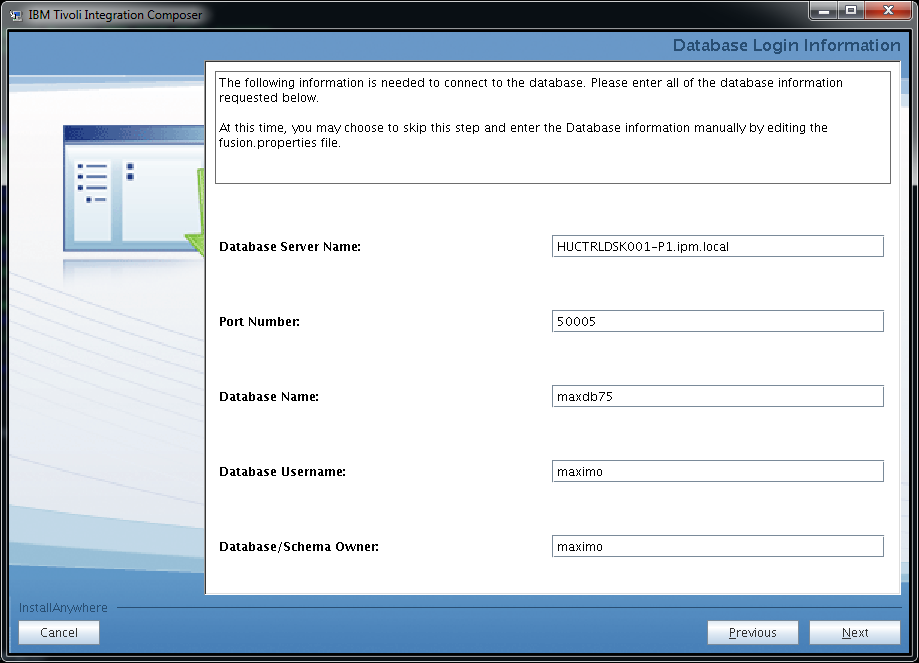
ibm-tivoli-integration-composer-db2Specify the hostname and the DB2 connection parameters, then click Next.

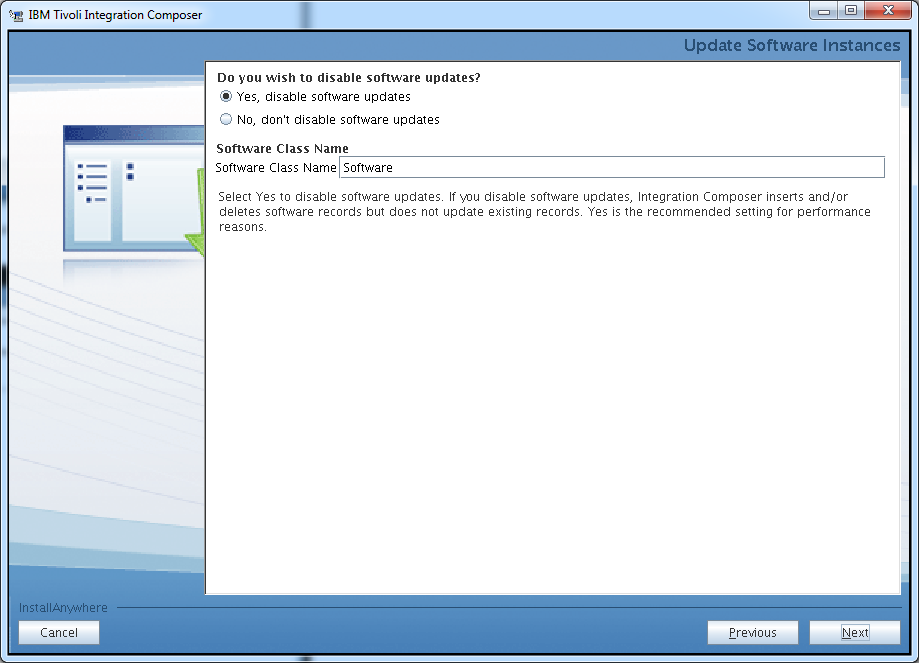
ibm-tivoli-integration-composer-db2-detailsSelect Disable software updates then click Next.

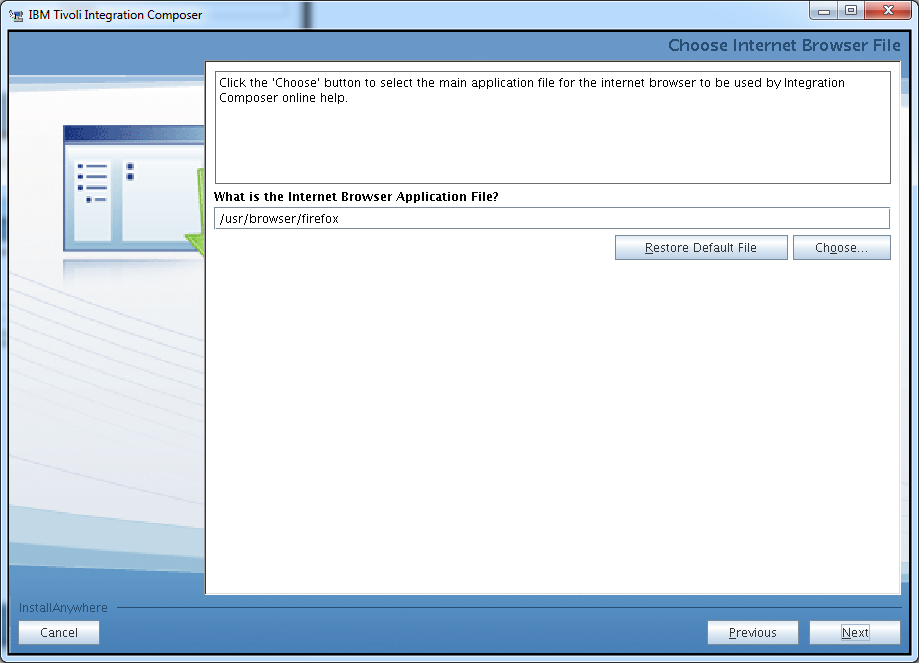
ibm-tivoli-integration-composer-disable-software-instancesSpecify the location of your web browser or just leave it default if the installer detects it correctly. Click Next to continue the installation process.

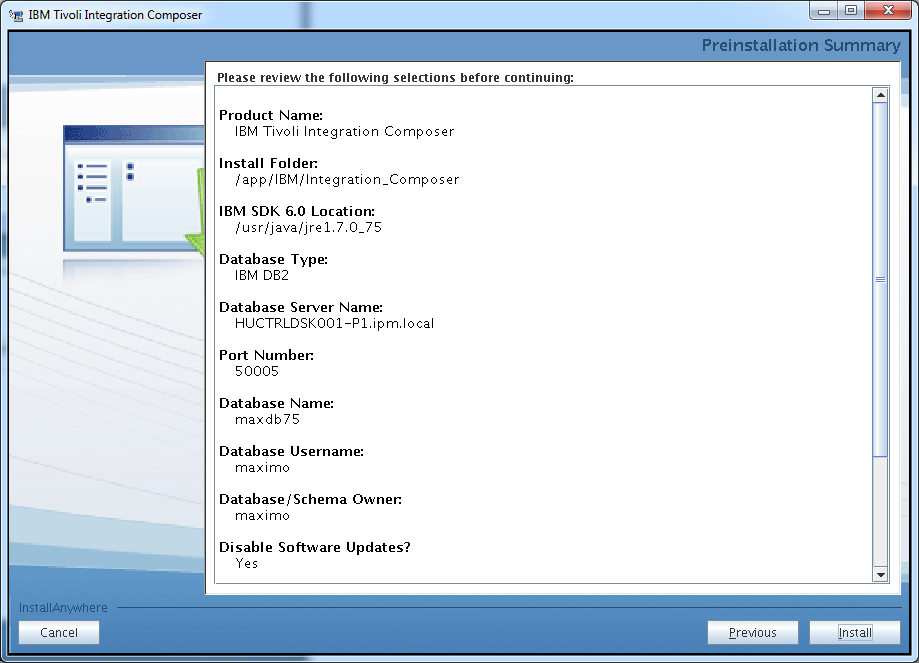
ibm-tivoli-integration-composer-browser-settingReview the pre-installation summary then click Install to kick off the product installation.

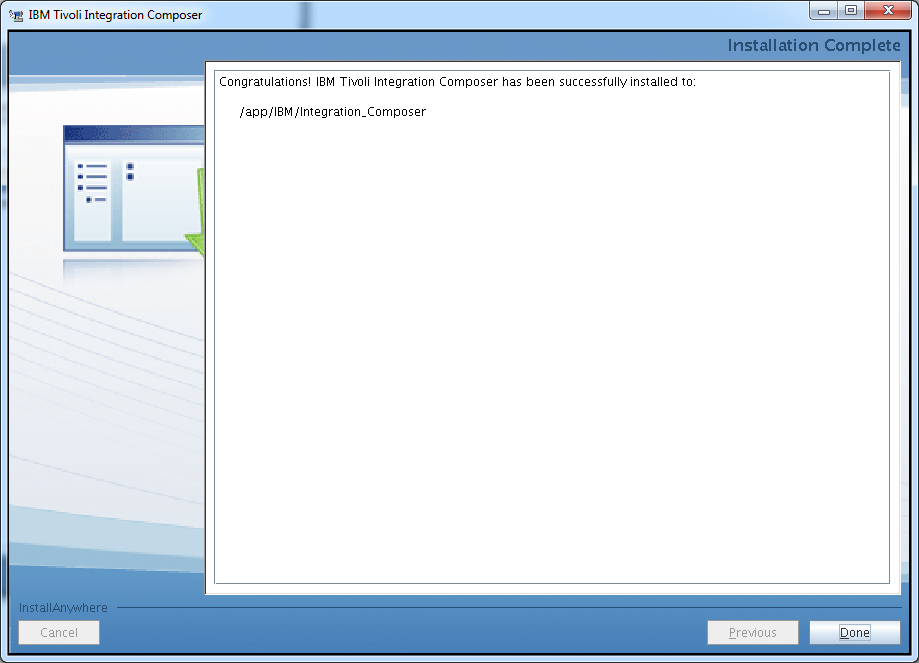
ibm-tivoli-integration-composer-pre-installation-summaryIf the installation was successful you should see the following window.

ibm-tivoli-integration-composer-installation-doneEdit the init.sh file located in ./bin directory of your Integration Composer directory. Change the JAVA_HOME variable ( it if is not already done ) to the java directory that is supplied with Control Desk.

# ===============
# SPECIFY THE JDK
# ===============
JAVA_HOME=/app/IBM/SMP/sdk/

Please note that Integration Composer is very sensitive on the java versions. If you have Oracle java or a different version if might not work with it properly.

Integrating TADDM and Control Desk using Integration Composer

In this example we will use the Integration Composer to get CMDB data out from TADDM and populate that data into Control Desk’s CMDB. We are basically setting up data translation between TADDM and Control Desk’s CMDB.

We will have the following steps:

  1. Create data source for TADDM CIType ( Configuration Item )
  2. Create data source for TADDM Actual CI ( Configuration Item )
  3. Create target data source for Control Desk CIType ( Configuration Item )
  4. Create target data source for Control Desk Actual CI ( Configuration Item )
  5. Create mappings between TADDM CIType and Control Desk CIType
  6. Create mapping between TADDM Actual CI and TADDM Actual CI
  7. Run executeMapping.sh on the CIType mapping to populate the Control Desk CIType database
  8. Activate CIs Types on Control Desk
  9. Run executeMapping.sh on the Actual CI mapping to populate the Control Desk Actual CI database

Before we start the procedure we will copy the taddm api files to the ./lib directory in the Integration Composer root directory.

scp platform-model.jar root@huctrldsk001-p1:/app/IBM/Integration_Composer/lib/
Password:
platform-model.jar                                                                                                                                                                                         100%   16MB  16.2MB/s   00:00
scp taddm-api-client.jar root@huctrldsk001-p1:/app/IBM/Integration_Composer/lib/
Password:
taddm-api-client.jar
100%  117MB  39.1MB/s   00:03

Make sure that the JAVA_PATH variable is set correctly in the init.sh file. We used the java version that comes with the Control Desk installation.

# ===============
# SPECIFY THE JDK
# ===============
JAVA_HOME=/app/IBM/SMP/sdk/

Start the Integration Composer using the startFusion.sh command from ./bin directory of your Integration composer installation root.

HUCTRLDSK001-P1:/app/IBM/Integration_Composer/bin # ./startFusion.sh
09 Feb 2015 11:13:01:274 [INFO] IBM Tivoli Integration Composer 7.5.3.0 Build 201411111713 logger started.  (This should only happen once.)
09 Feb 2015 11:13:01:276 [INFO] Java version: JRE 1.6.0 IBM J9 2.4 Linux amd64-64 jvmxa6460sr10-20111207_96808 (JIT enabled, AOT enabled)
J9VM – 20111207_096808
JIT  – r9_20111107_21307ifx1
GC   – 20110519_AA
09 Feb 2015 11:13:01:276 [INFO] Java vendor: IBM Corporation
09 Feb 2015 11:13:01:345 [INFO] Mediator created. (This should only happen once.)

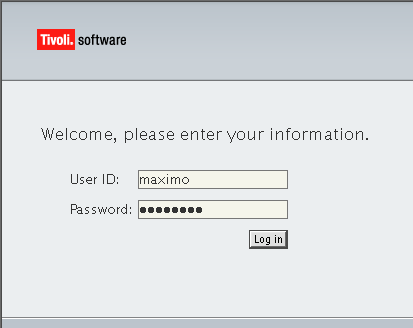
Log in to Integration Composer using your maxdb75 database credentials.

integration-composer-login

Create data source for TADDM CIType ( Configuration Item )

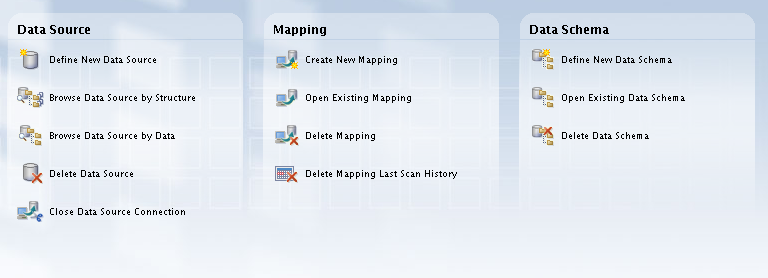
Click Define New Data Source on the Integration Composer Console.

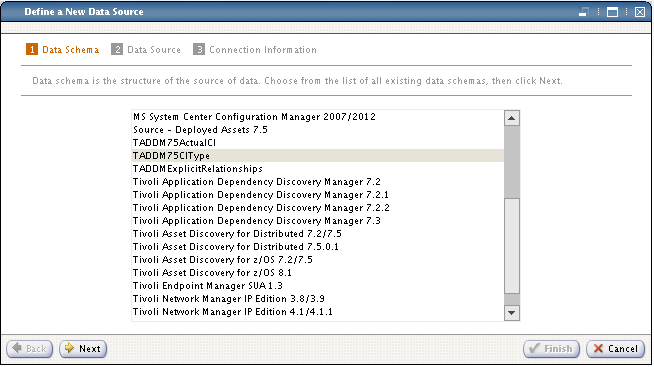
integration-composer-define-new-datasourceSelect TADDM75CIType from the data schemes, then click Next.

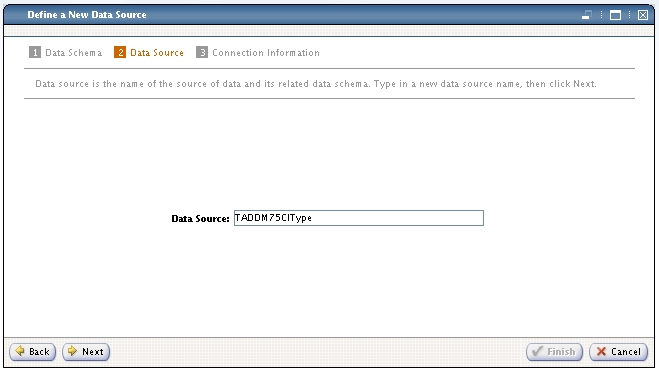
integration-composer-define-new-datasource-TADDM75CITypeSpecify the data source name then click Next.

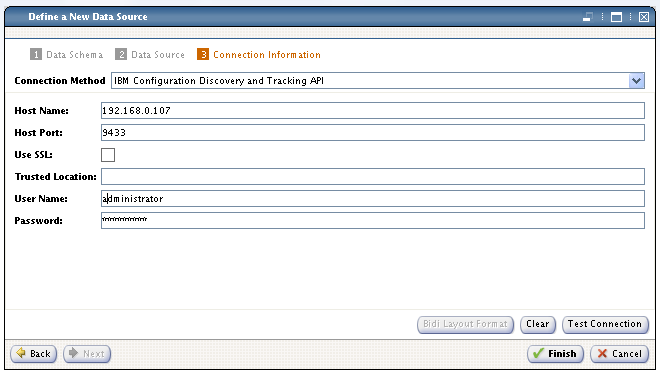
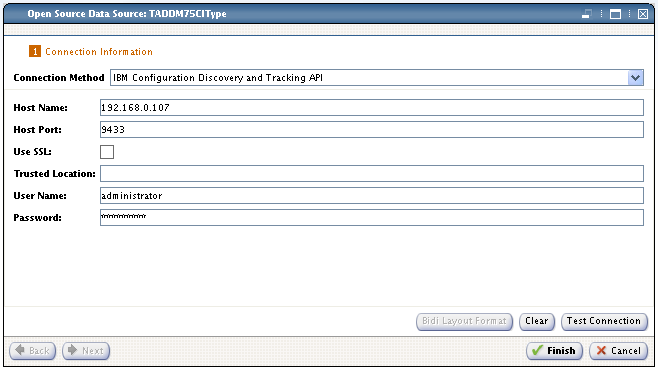
integration-composer-define-new-datasource-TADDM75CITypeDefine your TADDM server connection details. Specify the hostname or ip address, TADDM port, username and password. Please note that TADDM Version 7.2.1 or earlier uses 9530 for host port. TADDM Version 7.2.2 or later uses 9433 port for host port.

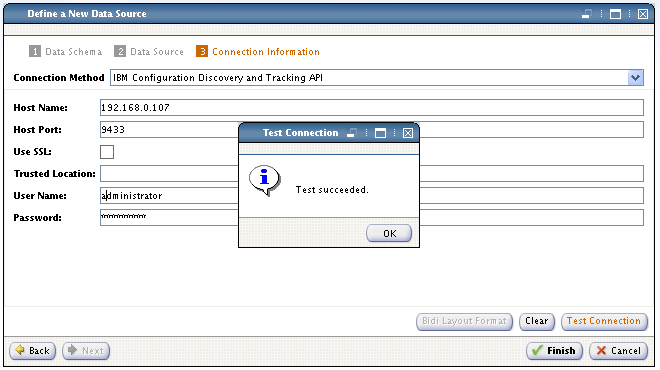
integration-composer-define-new-datasource-TADDM75CIType-config-valuesTest the connection then click OK if the connection is successful. Please note that the User Name is case sensitive.

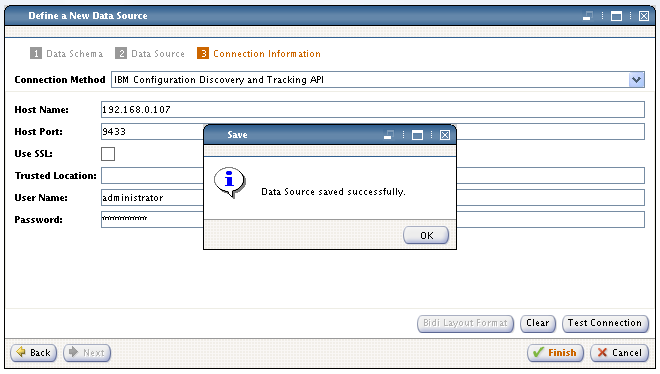
integration-composer-define-new-datasource-TADDM75CIType-connection-successfulClick Finish to save the Data Source.

integration-composer-define-new-datasource-TADDM75CIType-saved

Create data source for TADDM Actual CI ( Configuration Item )

Click Define New Data Source on the Integration Composer Console.

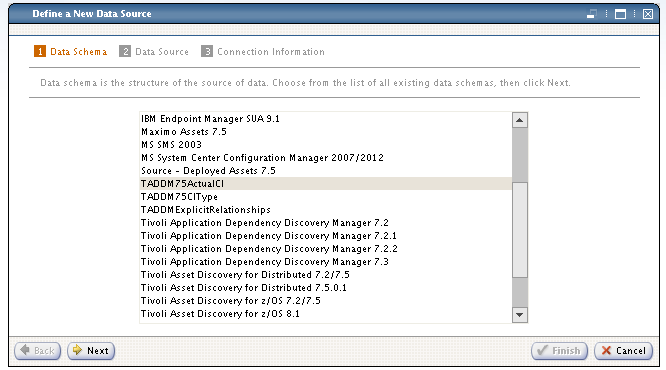
integration-composer-define-new-datasourceSelect TADDM75ActualCI from the data schemes, then click Next.

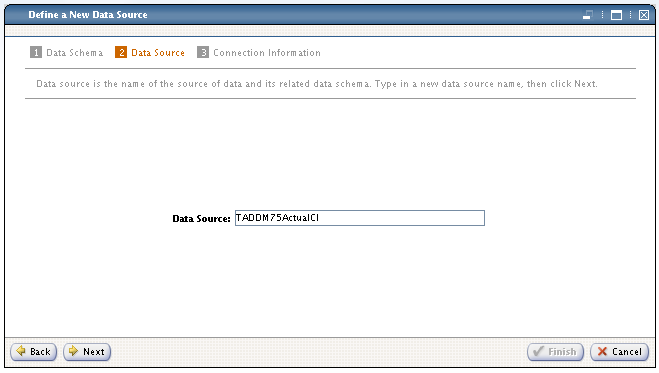
integration-composer-define-new-datasource-TADDM75ActualCISpecify the data source name then click Next.

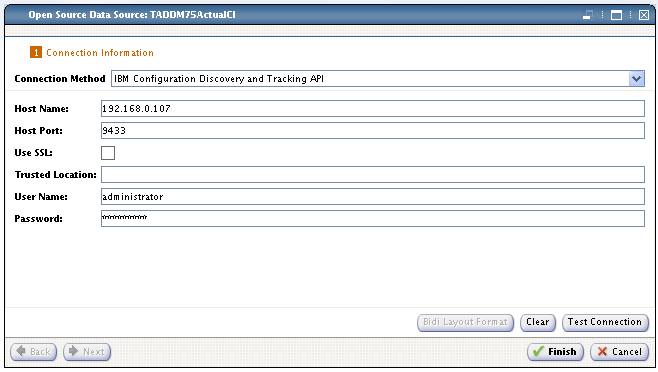
integration-composer-define-new-datasource-TADDM75ActualCIDefine your TADDM server connection details. Specify the hostname or ip address, TADDM port, username and password. Please note that TADDM Version 7.2.1 or earlier uses 9530 for host port. TADDM Version 7.2.2 or later uses 9433 port for host port.

integration-composer-define-new-datasource-TADDM75CIType-config-valuesTest the connection then click OK if the connection is successful. Please note that the User Name is case sensitive.

integration-composer-define-new-datasource-TADDM75CIType-connection-successfulClick Finish to save the Data Source.

integration-composer-define-new-datasource-TADDM75CIType-saved

Create target data source for Control Desk CIType ( Configuration Item )

Click Define New Data Source on the Integration Composer Console.

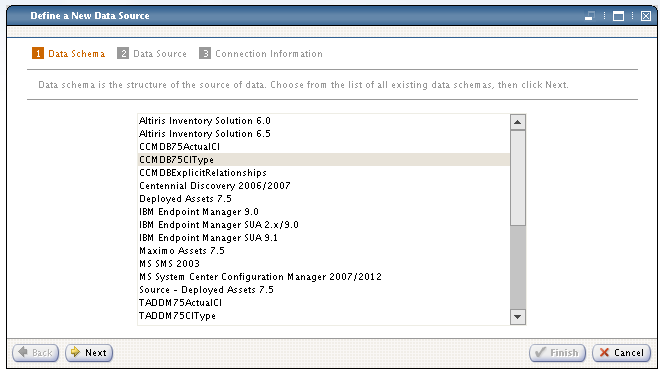
integration-composer-define-new-datasourceSelect CCMDB75CIType from the data schemes, then click Next.

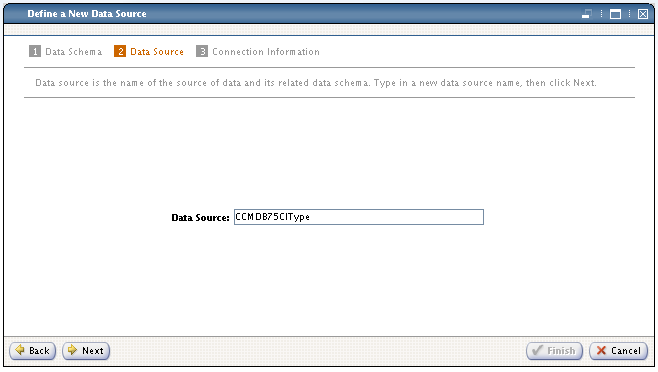
integration-composer-define-new-datasource-CCMDB75CITypeSpecify the data source name then click Next.

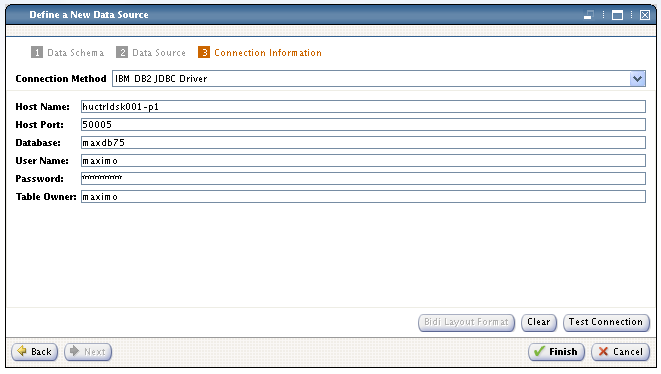
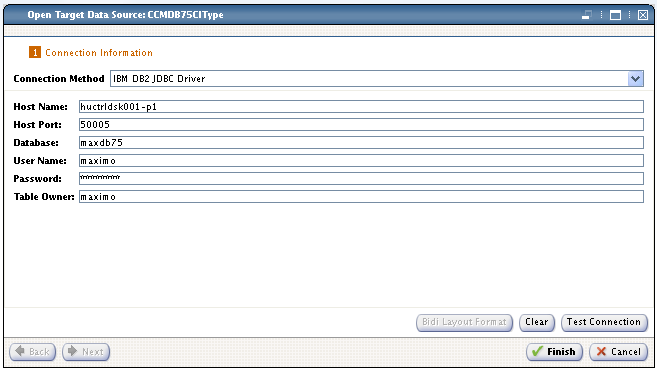
integration-composer-define-new-datasource-CCMDB75CIType-namingSpecify your DB2 server connection details.

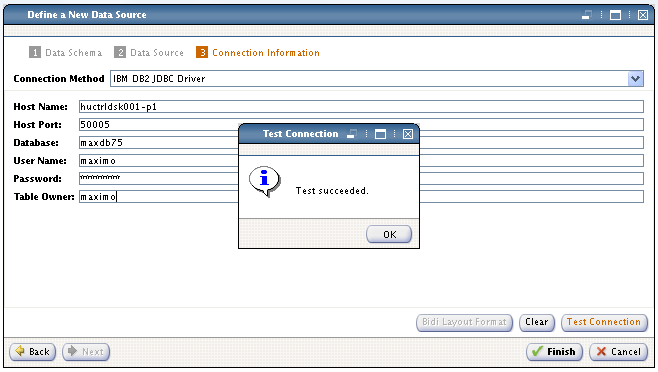
integration-composer-define-new-datasource-CCMDB75CIType-config-valuesTest the database connection, then click OK once the connection is successful.

integration-composer-define-new-datasource-CCMDB75CIType-test-successfulClick Finish to save the data source.

integration-composer-define-new-datasource-CCMDB75CIType-saved-successful

Create target data source for Control Desk Actual CI ( Configuration Item )

Click Define New Data Source on the Integration Composer Console.

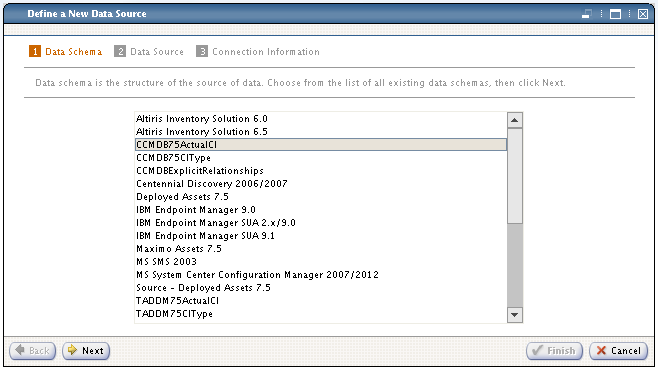
integration-composer-define-new-datasourceSelect CCMDB75ActualCI from the data schemes, then click Next.

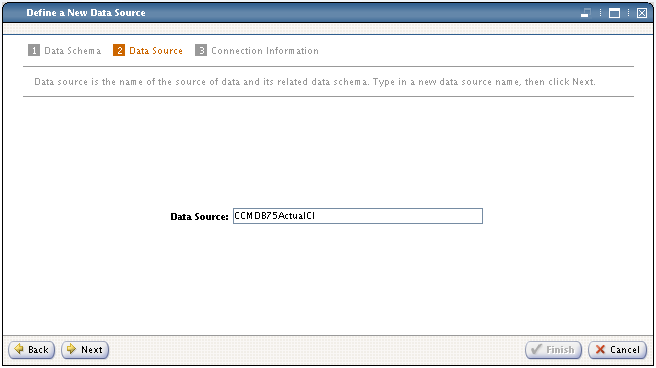
integration-composer-define-new-datasource-CCMDB75AcualCISpecify the data source name then click Next.

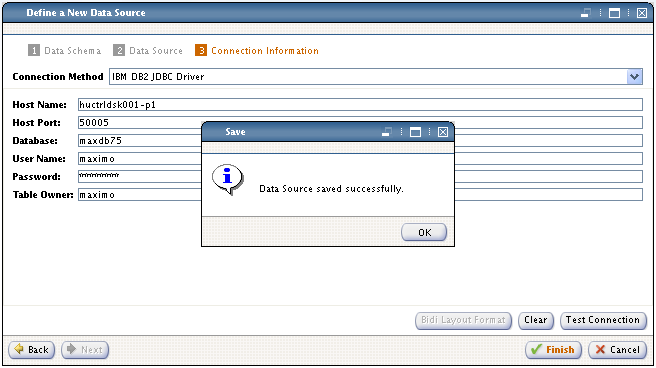
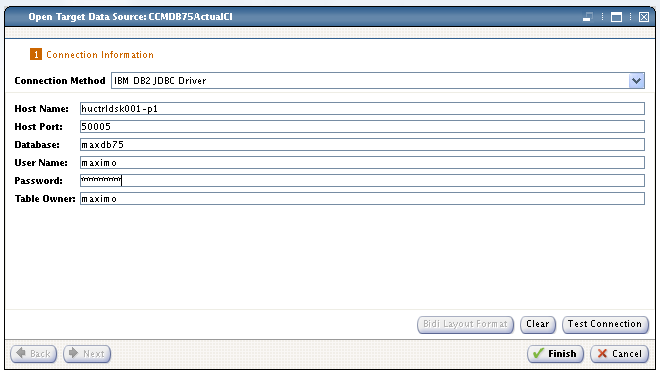
integration-composer-define-new-datasource-CCMDB75AcualCI-namingSpecify your DB2 server connection details.

integration-composer-define-new-datasource-CCMDB75CIType-config-valuesTest the database connection, then click OK once the connection is successful.

integration-composer-define-new-datasource-CCMDB75CIType-test-successfulClick Finish to save the data source.

integration-composer-define-new-datasource-CCMDB75CIType-saved-successful

Create mappings between TADDM CIType and Control Desk CIType

Click Create New Mapping on the Integration Composer Console.

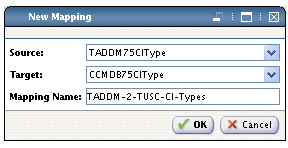
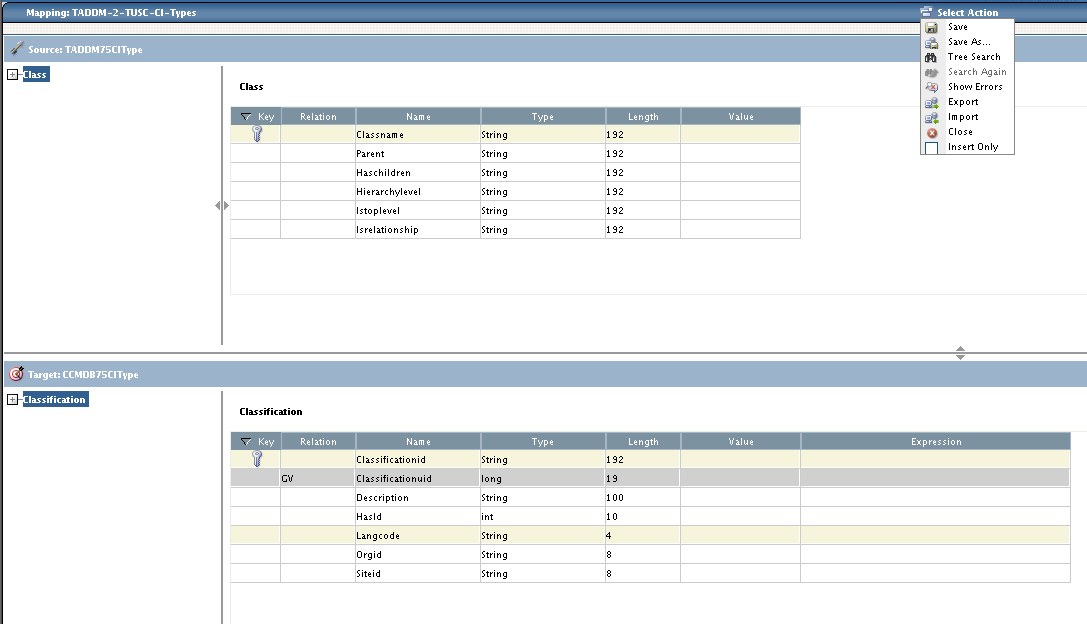
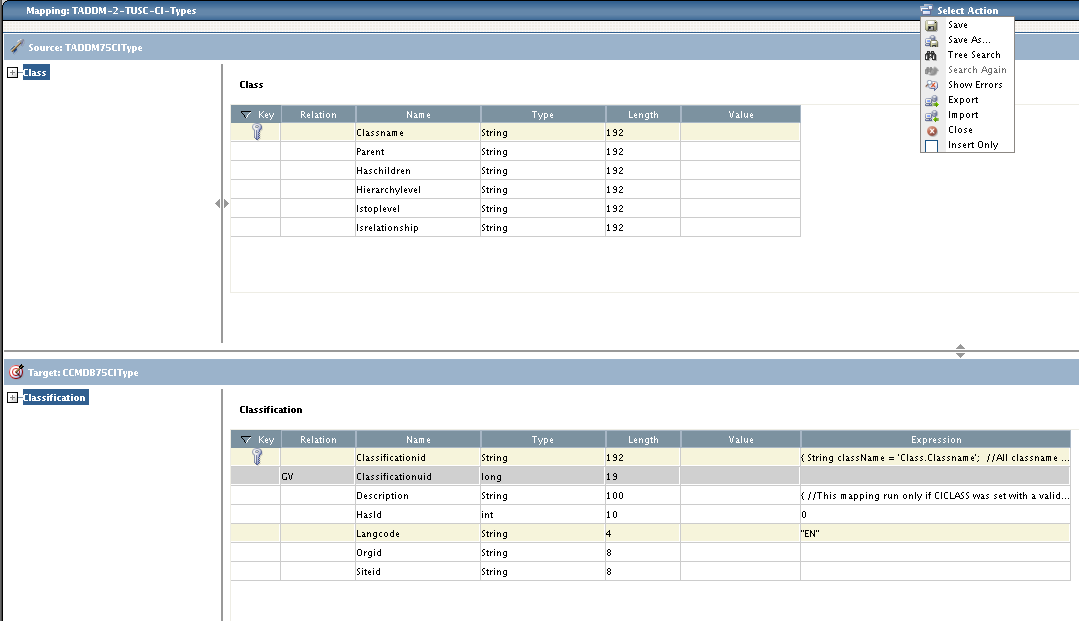
integration-composer-define-new-datasourceSelect TADDM75CIType as Source then select CCMDB75CIType as Target. Name the mapping to TADDM-2-TUSC-CI-Types then click OK.

integration-composer-create-new-mapping-TADDM-2-TUSC-CI-Types

Click specify the Password then click Finish at the TADDM75CIType data source selection.

integration-composer-create-new-mapping-TADDM-2-TUSC-CI-Types-taddm-selectionClick specify the Password then click Finish at the CCMDB75CIType data source selection.

integration-composer-create-new-mapping-TADDM-2-TUSC-CI-Types-cmdb-selectionSelect Import from the upper Select Action menu.

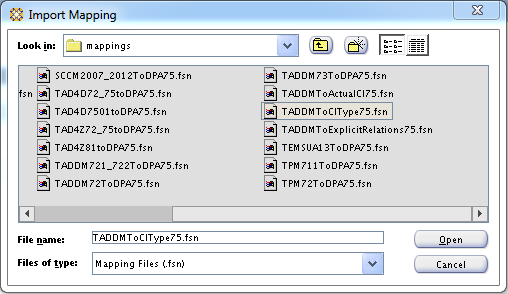
integration-composer-create-new-mapping-TADDM-2-TUSC-CI-Types-importSelect TADDMToCIType75.fsn from the list then click Open.

integration-composer-create-new-mapping-TADDM-2-TUSC-CI-Types-TADDMToCIType75

Select Save from the upper Select Action menu.

integration-composer-create-new-mapping-TADDM-2-TUSC-CI-Types-saveSelect Close from the upper Select Action menu then click Yes to close the mapping window.

integration-composer-create-new-mapping-TADDM-2-TUSC-CI-Types-close

Create mapping between TADDM Actual CI and TADDM Actual CI

Click Create New Mapping on the Integration Composer Console.

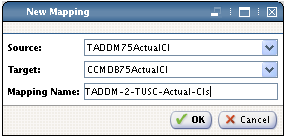
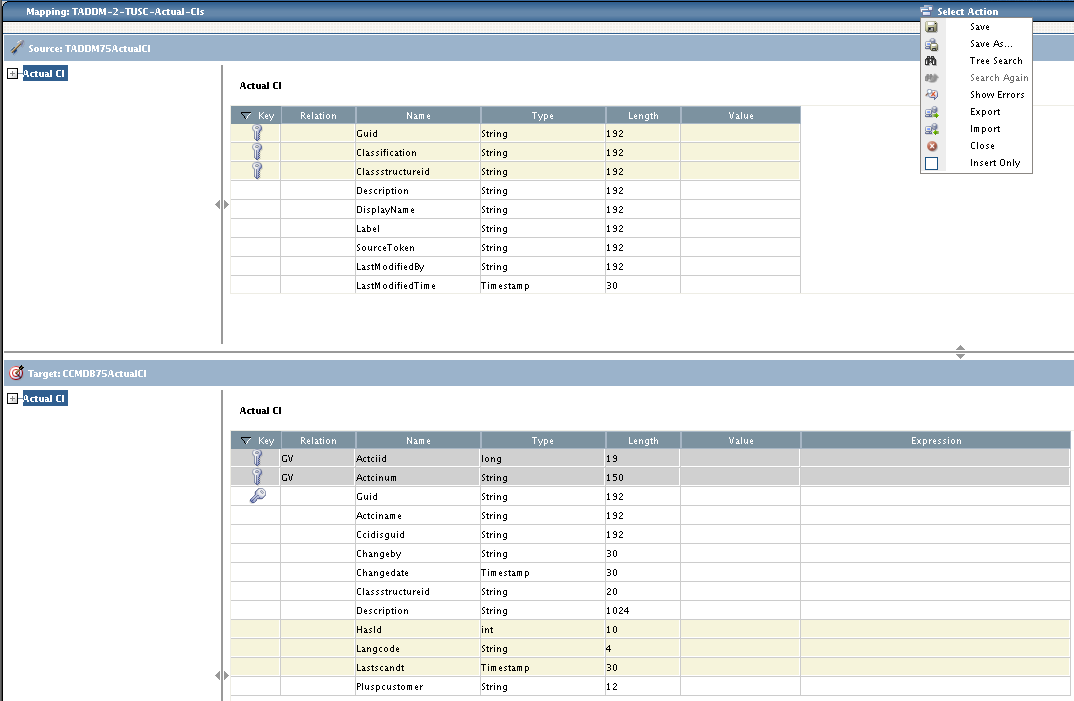
integration-composer-define-new-datasourceSelect TADDM75ActualCI as Source then select CCMDB75ActualCI as Target. Name the mapping to TADDM-2-TUSC-Actual-CIs then click OK.

integration-composer-create-new-mapping-TADDM-2-TUSC-Actual-CIs

Click specify the Password then click Finish at the TADDM75ActualCI data source selection.

integration-composer-create-new-mapping-TADDM-2-TUSC-Actual-CIs-source1Click specify the Password then click Finish at the CCMDB75ActualCI data source selection.

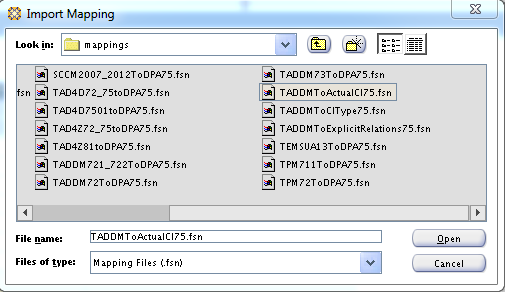
integration-composer-create-new-mapping-TADDM-2-TUSC-Actual-CIs-source2Select Import from the upper Select Action menu.

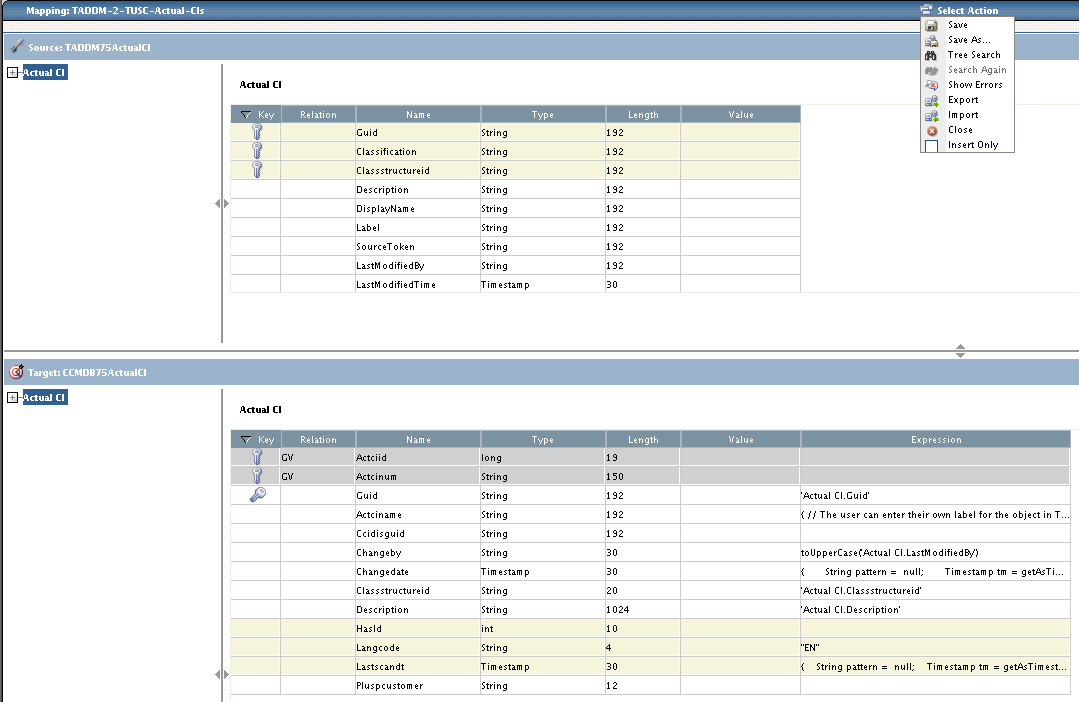
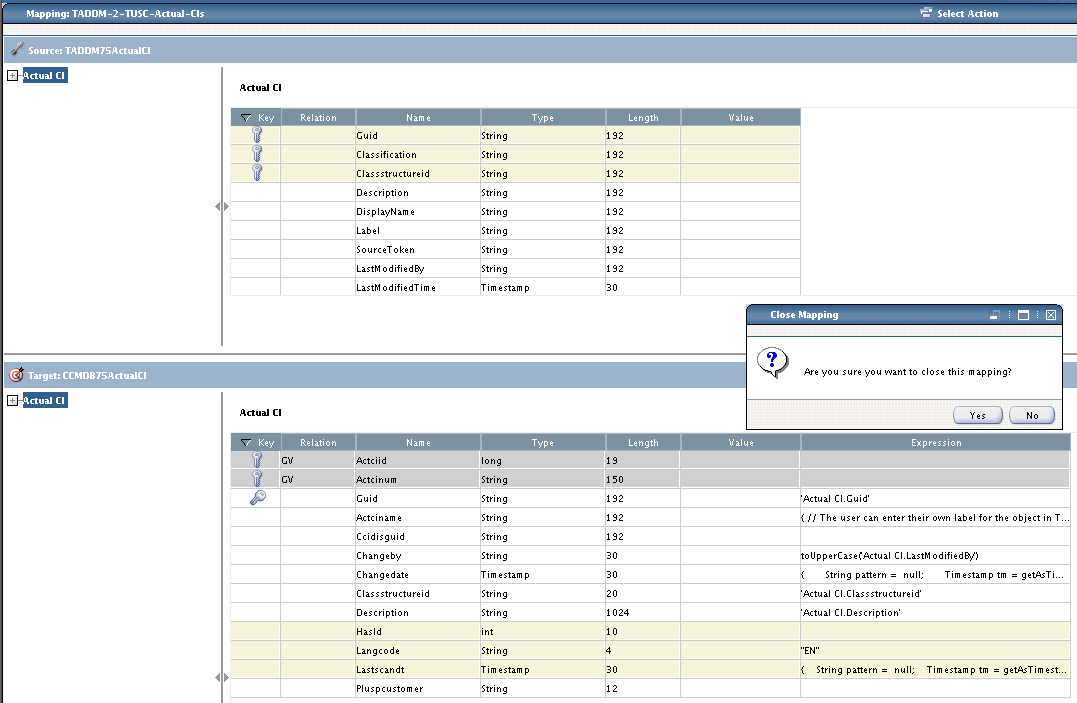
integration-composer-create-new-mapping-TADDM-2-TUSC-Actual-CIs-importSelect TADDMtoActualCI75.fsn then click Open.

integration-composer-create-new-mapping-TADDM-2-TUSC-Actual-CIs-fsn

Select Save from the upper Select Action menu.

integration-composer-create-new-mapping-TADDM-2-TUSC-Actual-CIs-saveSelect Close from the upper Select Action menu then click Yes to close the mapping window.

integration-composer-create-new-mapping-TADDM-2-TUSC-Actual-CIs-close

Run executeMapping.sh on the CIType mapping to populate the Control Desk CIType database

executeMapping.sh is located in ./bin directory of your Integration Composer root directory. Run the command with the following syntax:

./executeMapping.sh TADDM-2-TUSC-CI-Types maximo yourpassword administrator yourpassword   maximo yourpassword

If the procedure completes successfully you should be seeing this:

09 Feb 2015 13:25:41:640 [INFO]
========================================================
Mapping execution completed
Mapping: TADDM-2-TUSC-CI-Types
Execution time: 00:46:28
Classifications created: 88
Records created: 109947
Records updated: 41808
Records deleted: 1583
Errors: 0

NRS GUIDs created: 0
NRS errors: 0
NRS records updated on Alternate Keys: 0
NRS records found as duplicate: 0
NRS records deleted because of duplicate: 0
NRS warnings due to duplicate data: 0
========================================================

Done
Mapping completed successfully.
Integration Composer has finished.

Activate CIs Types on Control Desk

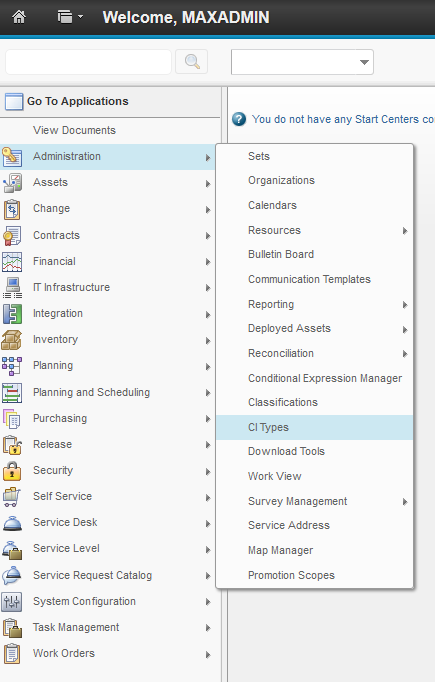
Log in to your Control Desk console and navigate to Administrator->CI Types

sccd-ci-types

It is important to point out here that you should only activate a very small number of CI Types at first then try to expand the list later on. We only enabled the Linux system specific Configuration Item Types such as:

  • SYS.LINUX.LINUXUNITARYCOMPUTERSYSTEM
  • SYS.UNITARYCOMPUTERSYSTEM
  • SYS.COMPUTERSYSTEM
  • SYS.LINUX.LINUX

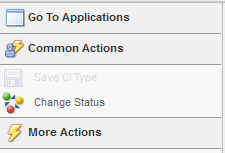
sccd-ci-activationYou can Activate a CI by selecting it then clicking on the Change Status option in the left menu.

sccd-ci-activate

Run executeMapping.sh on the Actual CI mapping to populate the Control Desk Actual CI database

Prior to import the Actual Configuration items su over to ctginst1 and run the following command against your db2 database:

/app/ibm/db2/V9.7/bin/db2jdbcbind  -url jdbc:db2://huctrldsk001-p1.ipm.local:50005/maxdb75 -user maximo -password yourpassword -size 15
Binder performing action “add” to “jdbc:db2://huctrldsk001-p1.ipm.local:50005/maxdb75” under collection “NULLID”:
Package “SYSSTAT”: Already exists (No need to bind).
Package “SYSSH100”: Already exists (No need to bind).
Package “SYSSH200”: Already exists (No need to bind).
Package “SYSSH300”: Already exists (No need to bind).
Package “SYSSH400”: Already exists (No need to bind).
Package “SYSSN100”: Already exists (No need to bind).
Package “SYSSN200”: Already exists (No need to bind).
Package “SYSSN300”: Already exists (No need to bind).
Package “SYSSN400”: Already exists (No need to bind).
Package “SYSSH101”: Already exists (No need to bind).
Package “SYSSH201”: Already exists (No need to bind).
Package “SYSSH301”: Already exists (No need to bind).
Package “SYSSH401”: Already exists (No need to bind).
Package “SYSSN101”: Already exists (No need to bind).
Package “SYSSN201”: Already exists (No need to bind).
Package “SYSSN301”: Already exists (No need to bind).
Package “SYSSN401”: Already exists (No need to bind).
Package “SYSSH102”: Already exists (No need to bind).
Package “SYSSH202”: Already exists (No need to bind).
Package “SYSSH302”: Already exists (No need to bind).
Package “SYSSH402”: Already exists (No need to bind).
Package “SYSSN102”: Already exists (No need to bind).
Package “SYSSN202”: Already exists (No need to bind).
Package “SYSSN302”: Already exists (No need to bind).
Package “SYSSN402”: Already exists (No need to bind).
Package “SYSLH100”: Already exists (No need to bind).
Package “SYSLH200”: Already exists (No need to bind).
Package “SYSLH300”: Already exists (No need to bind).
Package “SYSLH400”: Already exists (No need to bind).
Package “SYSLN100”: Already exists (No need to bind).
Package “SYSLN200”: Already exists (No need to bind).
Package “SYSLN300”: Already exists (No need to bind).
Package “SYSLN400”: Already exists (No need to bind).
Package “SYSLH101”: Already exists (No need to bind).
Package “SYSLH201”: Already exists (No need to bind).
Package “SYSLH301”: Already exists (No need to bind).
Package “SYSLH401”: Already exists (No need to bind).
Package “SYSLN101”: Already exists (No need to bind).
Package “SYSLN201”: Already exists (No need to bind).
Package “SYSLN301”: Already exists (No need to bind).
Package “SYSLN401”: Already exists (No need to bind).
Package “SYSLH102”: Already exists (No need to bind).
Package “SYSLH202”: Already exists (No need to bind).
Package “SYSLH302”: Already exists (No need to bind).
Package “SYSLH402”: Already exists (No need to bind).
Package “SYSLN102”: Already exists (No need to bind).
Package “SYSLN202”: Already exists (No need to bind).
Package “SYSLN302”: Already exists (No need to bind).
Package “SYSLN402”: Already exists (No need to bind).
Package “SYSLH103”: Bind succeeded.
Package “SYSLH203”: Bind succeeded.
Package “SYSLH303”: Bind succeeded.
Package “SYSLH403”: Bind succeeded.
Package “SYSLN103”: Bind succeeded.
Package “SYSLN203”: Bind succeeded.
Package “SYSLN303”: Bind succeeded.
Package “SYSLN403”: Bind succeeded.
Package “SYSLH104”: Bind succeeded.
Package “SYSLH204”: Bind succeeded.
Package “SYSLH304”: Bind succeeded.
Package “SYSLH404”: Bind succeeded.
Package “SYSLN104”: Bind succeeded.
Package “SYSLN204”: Bind succeeded.
Package “SYSLN304”: Bind succeeded.
Package “SYSLN404”: Bind succeeded.
Package “SYSLH105”: Bind succeeded.
Package “SYSLH205”: Bind succeeded.
Package “SYSLH305”: Bind succeeded.
Package “SYSLH405”: Bind succeeded.
Package “SYSLN105”: Bind succeeded.
Package “SYSLN205”: Bind succeeded.
Package “SYSLN305”: Bind succeeded.
Package “SYSLN405”: Bind succeeded.
Package “SYSLH106”: Bind succeeded.
Package “SYSLH206”: Bind succeeded.
Package “SYSLH306”: Bind succeeded.
Package “SYSLH406”: Bind succeeded.
Package “SYSLN106”: Bind succeeded.
Package “SYSLN206”: Bind succeeded.
Package “SYSLN306”: Bind succeeded.
Package “SYSLN406”: Bind succeeded.
Package “SYSLH107”: Bind succeeded.
Package “SYSLH207”: Bind succeeded.
Package “SYSLH307”: Bind succeeded.
Package “SYSLH407”: Bind succeeded.
Package “SYSLN107”: Bind succeeded.
Package “SYSLN207”: Bind succeeded.
Package “SYSLN307”: Bind succeeded.
Package “SYSLN407”: Bind succeeded.
Package “SYSLH108”: Bind succeeded.
Package “SYSLH208”: Bind succeeded.
Package “SYSLH308”: Bind succeeded.
Package “SYSLH408”: Bind succeeded.
Package “SYSLN108”: Bind succeeded.
Package “SYSLN208”: Bind succeeded.
Package “SYSLN308”: Bind succeeded.
Package “SYSLN408”: Bind succeeded.
Package “SYSLH109”: Bind succeeded.
Package “SYSLH209”: Bind succeeded.
Package “SYSLH309”: Bind succeeded.
Package “SYSLH409”: Bind succeeded.
Package “SYSLN109”: Bind succeeded.
Package “SYSLN209”: Bind succeeded.
Package “SYSLN309”: Bind succeeded.
Package “SYSLN409”: Bind succeeded.
Package “SYSLH10A”: Bind succeeded.
Package “SYSLH20A”: Bind succeeded.
Package “SYSLH30A”: Bind succeeded.
Package “SYSLH40A”: Bind succeeded.
Package “SYSLN10A”: Bind succeeded.
Package “SYSLN20A”: Bind succeeded.
Package “SYSLN30A”: Bind succeeded.
Package “SYSLN40A”: Bind succeeded.
Package “SYSLH10B”: Bind succeeded.
Package “SYSLH20B”: Bind succeeded.
Package “SYSLH30B”: Bind succeeded.
Package “SYSLH40B”: Bind succeeded.
Package “SYSLN10B”: Bind succeeded.
Package “SYSLN20B”: Bind succeeded.
Package “SYSLN30B”: Bind succeeded.
Package “SYSLN40B”: Bind succeeded.
Package “SYSLH10C”: Bind succeeded.
Package “SYSLH20C”: Bind succeeded.
Package “SYSLH30C”: Bind succeeded.
Package “SYSLH40C”: Bind succeeded.
Package “SYSLN10C”: Bind succeeded.
Package “SYSLN20C”: Bind succeeded.
Package “SYSLN30C”: Bind succeeded.
Package “SYSLN40C”: Bind succeeded.
Package “SYSLH10D”: Bind succeeded.
Package “SYSLH20D”: Bind succeeded.
Package “SYSLH30D”: Bind succeeded.
Package “SYSLH40D”: Bind succeeded.
Package “SYSLN10D”: Bind succeeded.
Package “SYSLN20D”: Bind succeeded.
Package “SYSLN30D”: Bind succeeded.
Package “SYSLN40D”: Bind succeeded.
Package “SYSLH10E”: Bind succeeded.
Package “SYSLH20E”: Bind succeeded.
Package “SYSLH30E”: Bind succeeded.
Package “SYSLH40E”: Bind succeeded.
Package “SYSLN10E”: Bind succeeded.
Package “SYSLN20E”: Bind succeeded.
Package “SYSLN30E”: Bind succeeded.
Package “SYSLN40E”: Bind succeeded.
DB2Binder finished.

Once that is done run the executeMapping.sh against the Actual CI mapping like this:

HUCTRLDSK001-P1:/app/IBM/Integration_Composer/bin # ./executeMapping.sh TADDM-2-TUSC-Actual-CIs maximo yourpassword administrator yourpassword maximo yourpassword
Integration Composer will now start.
IBM Tivoli Integration Composer 7.5.3.0 Build 201411111713
09 Feb 2015 13:35:55:371 [INFO] IBM Tivoli Integration Composer 7.5.3.0 Build 201411111713
Mapping: TADDM-2-TUSC-Actual-CIs
Creating data source Fusion…  done
IBM Tivoli Integration Composer database version: V7507-40
Retrieving mapping definition TADDM-2-TUSC-Actual-CIs…        done
Creating source data source TADDM75ActualCI…  done
Connecting to source data source TADDM75ActualCI…
09 Feb 2015 13:35:56:371 [INFO] ResourceManager : Loading resource file /app/IBM/Integration_Composer/data/properties/jdbcinfo.properties : 39 resource(s) loaded.
09 Feb 2015 13:35:56:992 [INFO] Collation version: 2.2, build: null, home: /app/IBM/Integration_Composer
09 Feb 2015 13:35:57:001 [INFO] TADDMActualCI._loadResources: TADDM global depth value set at 3
09 Feb 2015 13:35:57:001 [INFO] TADDMActualCI._loadResources: TADDM deleted GUIDs will not be logged; Actual CI deletion is disabled.
09 Feb 2015 13:35:57:002 [INFO] TADDMActualCI._loadResources: Authorized space filtering enabled.
09 Feb 2015 13:35:57:125 [INFO] AppServer Exclusions Filtering will be turned off. TADDM version is 7.3 or greater.
09 Feb 2015 13:35:57:125 [INFO] TADDMActualCI._loadResources: Relationships marked for deletion will only be deleted if ITIC processed both the target and source during this run.
09 Feb 2015 13:35:57:126 [INFO] …TADDMActualCI._loadResources: 10 threads will be used to gather TADDM data.
… … A maximum of 50 objects will be queued at one time.
Connecting to source data source TADDM75ActualCI…     done
Creating target data source CCMDB75ActualCI…  done
Connecting to target data source CCMDB75ActualCI…
Connecting to target data source CCMDB75ActualCI…     done
Retrieving mapping expressions…       done
Retrieving mapping deciding classes…  done
retrieving mapping expressions 44
finished mapping expressions 1
finished mapping expressions 2
finished mapping expressions 3
finished mapping expressions 4
finished mapping expressions 5
finished mapping expressions 6
finished mapping expressions 7
finished mapping expressions 8
finished mapping expressions 9
finished mapping expressions 10
finished mapping expressions 11
finished mapping expressions 12
finished mapping expressions 13
finished mapping expressions 14
finished mapping expressions 15
finished mapping expressions 16
finished mapping expressions 17
finished mapping expressions 18
finished mapping expressions 19
finished mapping expressions 20
finished mapping expressions 21
finished mapping expressions 22
finished mapping expressions 23
finished mapping expressions 24
finished mapping expressions 25
finished mapping expressions 26
finished mapping expressions 27
finished mapping expressions 28
finished mapping expressions 29
finished mapping expressions 30
finished mapping expressions 31
finished mapping expressions 32
finished mapping expressions 33
finished mapping expressions 34
finished mapping expressions 35
finished mapping expressions 36
finished mapping expressions 37
finished mapping expressions 38
finished mapping expressions 39
finished mapping expressions 40
finished mapping expressions 41
finished mapping expressions 42
finished mapping expressions 43
finished mapping expressions 44
done mapping expressions
translating mappings 6
finished mappings 1
finished mappings 2
finished mappings 3
finished mappings 4
finished mappings 5
finished mappings 6
done mappings
retrieving deciding classes 6
finished deciding classes 1
finished deciding classes 2
finished deciding classes 3
finished deciding classes 4
finished deciding classes 5
finished deciding classes 6
done deciding classes
generating source code 1
finished source code 1
done source code
generating target code 6
finished target code 1
finished target code 2
finished target code 3
finished target code 4
finished target code 5
finished target code 6
done target code
retrieving file names to compile 6
finished file name 1
finished file name 2
finished file name 3
finished file name 4
finished file name 5
finished file name 6
done file names
Compiling 11 files 11
finished compiling 1
finished compiling 2
finished compiling 3
finished compiling 4
finished compiling 5
finished compiling 6
finished compiling 7
finished compiling 8
finished compiling 9
finished compiling 10
finished compiling 11
done
REMOVELISTENER
09 Feb 2015 13:35:57:806 [INFO]
========================================================
Start mapping execution
Mapping: TADDM-2-TUSC-Actual-CIs
========================================================

09 Feb 2015 13:36:06:589 [INFO] TADDMActualCI.getClassificationDepthSetting():Classification SYS.LINUX.LINUX will be processed at depth level 1 because it is an active non-top-level classification
09 Feb 2015 13:36:07:059 [WARN]
09 Feb 2015 13:36:07:060 [WARN] The following top level classifications are in a promotion scope, but not activated.  CIs with these classifications will only be imported from TADDM if they are related to other active, top-level CIs.
09 Feb 2015 13:36:07:060 [WARN]   SYS.BUSINESSSYSTEM
09 Feb 2015 13:36:07:060 [WARN]   APP.APPLICATION
09 Feb 2015 13:36:07:060 [WARN]   APP.SOFTWAREIMAGE
09 Feb 2015 13:36:07:060 [INFO]
09 Feb 2015 13:36:07:061 [INFO] Querying TADDM for CIs of the classifications that are active…
09 Feb 2015 13:36:07:061 [INFO]
09 Feb 2015 13:36:07:061 [INFO] All TADDM Guids for the active Classifications will be imported.
09 Feb 2015 13:36:07:140 [INFO] Retrieved 0 Authorized CIs for filtering.
09 Feb 2015 13:36:07:187 [INFO] TADDM contains 4 guids for the SYS.LINUX.LINUX classification.
09 Feb 2015 13:36:07:188 [INFO] The number of new and updated SYS.LINUX.LINUX GUIDs to process is 4.  These will be processed at depth level 1.
09 Feb 2015 13:36:07:234 [INFO] TADDM contains 4 guids for the SYS.COMPUTERSYSTEM classification.
09 Feb 2015 13:36:07:234 [INFO] The number of new and updated SYS.COMPUTERSYSTEM GUIDs to process is 4.  These will be processed at depth level 3.
09 Feb 2015 13:36:07:234 [INFO]   The following classifications will be processed as subclasses of SYS.COMPUTERSYSTEM at depth level 3.
09 Feb 2015 13:36:07:235 [INFO]     SYS.LINUX.LINUXUNITARYCOMPUTERSYSTEM
09 Feb 2015 13:36:07:235 [INFO]     SYS.UNITARYCOMPUTERSYSTEM
09 Feb 2015 13:36:07:235 [INFO]
09 Feb 2015 13:36:07:236 [INFO] The total number of active Guids to process is: 8
Actual CI: 3EA8E707D644308A8A3CFB967DB7F726
09 Feb 2015 13:36:11:389 [INFO] NRS initialized.
09 Feb 2015 13:36:11:409 [INFO] MaxSequenceProvider created. (This should only happen once.)
Actual CI: 021E523A62B73A9E9A9017CFCE0DECEA
Actual CI: 9EBC5B2280883ECFA71F03DDB8CA4366
Actual CI: 151EAA4AD64A3E73938800BE3164BEE6
Actual CI: 5867ECDB40603FEDA8ADFAAA9C257300
Actual CI: 021E523A62B73A9E9A9017CFCE0DECEA
Actual CI: E92F23A3DD3836E59EDEFC5438B76168
Actual CI: FBFD45DA10C93EDB8D74D00551F511C1
Actual CI: F437063E046032F59F60A050018F01EC
Actual CI: C084A1E967653AF4940E2A7152C02149
Actual CI: 550246C3B0F83308960EF8330500B680
Actual CI: 28E856A815043FA6887ABB2C5A0E73B7
Actual CI: 803AB968A0783313AC883835A0EDDDA2
Actual CI: 4CA413D13A5E3383A3724EA072F803D8
Actual CI: E4B9E460B82E3DACB7D2912F6A9CCE87
Actual CI: 0B2FBE6FCA4B35B8B93BC244883BEDC4
Actual CI: C824EFE2CA163D5EA95EF79BAB769732
Actual CI: 3EA8E707D644308A8A3CFB967DB7F726
Actual CI: 26BBEF79820B300D9366E5FA7B95D807
Actual CI: 530DB97F996832C291088B4A66055CBB
Actual CI: 72D9B0CD2E733F63A4C75C76104251EF
Actual CI: DEDE63ECA1AE37A1A1A5AE1E28E63857
Actual CI: 56BADF3D751D302694E18DD6AF7990F9
Actual CI: E8BE04B2F9953B798B935F64672BDAB9
Actual CI: 1838453074AA304B8C9EB270B3209CDB
Actual CI: EDA8200495A731AFB48A55228ED51570
Actual CI: 29432FD455E03F43920AED7D29798258
Actual CI: 055E03B89E34320882ABD781A69F9809
Actual CI: 5D9F1A0574333C6EBE33DECA4E09BEC3
Actual CI: 151EAA4AD64A3E73938800BE3164BEE6
Actual CI: 9BEF9EC3D9C3333AB8E3D2BE42433035
Actual CI: DD025C72A0B5391BBC14E0F5458D5093
Actual CI: 78AD41482B143ABA8D6397BC899D1ECD
Actual CI: 28DD04BB28D73BDD8013954A03C1D4F3
Actual CI: 933D9FC7AD373FEFA2A2609AFD2E033C
Actual CI: B310D4FB341B3ECB8B8E3DE61B9769BB
Actual CI: 892B43543AB635249544B74FB2D50238
Actual CI: 9F6B77BB3AF132729EBDB479E926B2A0
Actual CI: BFCE3FB197A435E9B9C39320A6BCB734
Actual CI: 6D738D4A858E3F739EE5019BF6DAE542
09 Feb 2015 13:36:13:913 [INFO] Processed Status —  TopLevel CIs: 8/8  All CIs this Interval: 52  Total CIs: 52
Actual CI: 3605D85E1356342789A8C75555D1753C
Actual CI: 9EBC5B2280883ECFA71F03DDB8CA4366
Actual CI: E89365947C4A3B028E09856A0ECBD001
Actual CI: 29811E1696A23E6DBEFFCACCD48F9CFF
Actual CI: 8332EE5EB64031688E2A8FF94CF8F8FD
Actual CI: 550F4F2A50F6386D9F5C62D8D8078F8B
Actual CI: 992CB812486E3F6994890C610520DB2A
Actual CI: CDC438AE661B3E558BF1C9E3F674D7D5
Actual CI: 7CB0F3129F7538888C6112812FC63919
Actual CI: DF646C6330F4326AA08E66F311BD8748
Actual CI: 97658F61EAB23405BAA76164A00C7342
Actual CI: 352BBACA06E63002AA30DC0D24F106E2
09 Feb 2015 13:36:14:113 [INFO]
========================================================
Mapping execution completed
Mapping: TADDM-2-TUSC-Actual-CIs
Execution time: 00:00:16
Actual CIs created: 8
Records created: 404
Records updated: 0
Records deleted: 0
Errors: 0

NRS GUIDs created: 12
NRS errors: 0
NRS records updated on Alternate Keys: 0
NRS records found as duplicate: 0
NRS records deleted because of duplicate: 0
NRS warnings due to duplicate data: 0
========================================================

Done
Mapping completed successfully.
Integration Composer has finished.

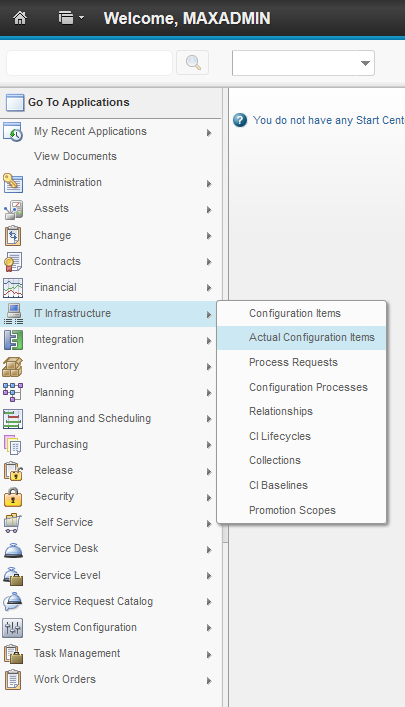
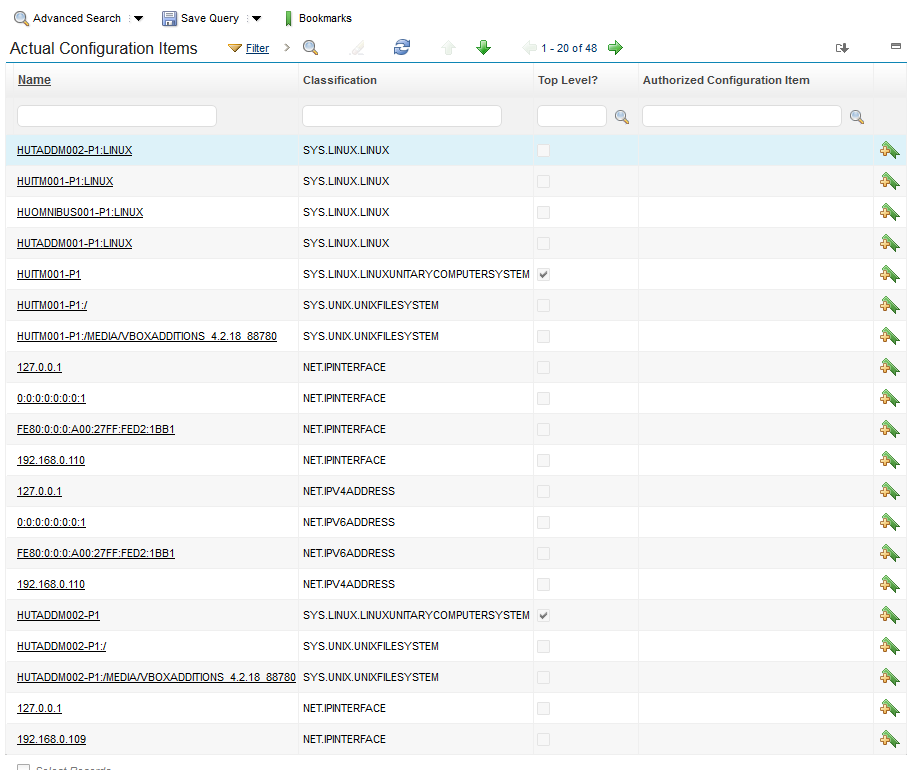
As you can see 8 Actual Configuration items were created using data coming from TADDM. Log in to your Control Desk Console and navigate to:  IT Infrastructure -> Actual Configuration Items

sccd-actual-ci

The Actual Configuration items window now loads, however it is empty. Click on the blue double arrow icon on the top of the screen to reload data from the database.

sccd-actual-ci-emptyIf everything went fine you should be seeing TADDM records showing up here.

sccd-actual-ci-loaded

Installing and Configuring IBM Control Desk Service Provider Edition V7.5.3

This article will help you install and configure IBM Control Desk Service Provider Edition V7.5.3. As usual we will use SLES 11 SP3 as an installation OS. We used 6 gigabyte of RAM, 2 CPU cores and 50 gigabytes of disk space in this scenario.

We downloaded the following packages from Passport Advantage:

  • IBM SmartCloud Control Desk V7.5.1 TDI Integrations Multiplatform Multilingual (CI9CWML )
  • IBM Control Desk Service Provider Edition V7.5.3 for Linux Multilingual (CN2HNML )
  • Tivoli Middleware Installer Images V7.5.0.2, 1 of 3 for Linux x86-64 Multilingual (CI913ML )
  • Tivoli Middleware Installer Images V7.5.0.2, 2 of 3 for Linux x86-64 Multilingual (CI5JBML )
  • Tivoli Middleware Installer Images V7.5.0, 3 of 3 for Linux x86-64 Multilingual (CZX5JML )
  • IBM DB2 Server V10.5 for Linux on AMD64 and Intel EM64T systems (x64) Multilingual (CIK9IML )
  • IBM DB2 ESE Restricted Use, Quick Start and Activation V10.5 for Linux, UNIX and Windows Multilingual (CIK0LML )

We will use the Middleware installer to install & configure the middleware for us. Once all products installed we will gradually upgrade and distribute the middleware components across multiple servers. The middleware installer will install the following software and versions:

  • DB2 9.7
  • WepSphere Application Server Network Deployment 7.0.0.17
  • IBM Tivoli Directory Server 6.3
  • IBM HTTP Server 7.0.0.17

Before the installation we perform the following steps:

Set environment variable for mwi_launchpadroot. This will set the installation location of the installer. Our setting was like this:

export mwi_launchpadroot=/Downloads/TIVOLI-IMAGES/CONTROLDESK753/

Raise the OS open file limit to 8192 by adding the following 2 files:

root hard nofile 8192
root soft nofile 8192
to
/etc/security/limits.conf

Once the file is modified and saved reboot the system for the settings to take effect. Please note that you must have root access to perform this installation.

Installing the Middleware

The middleware installation is started with the setupLinux64.sh command from ./Install/MWI directory if the Control Desk installation media. Alternatively you can use the launchpad application to execute this installation script.

HUCTRLDSK001-P1:/Downloads/TIVOLI-IMAGES/CONTROLDESK753/Install/MWI # ./setupLinux64.sh
————————————————————-
Preparing the IBM Tivoli Middleware Installer. Please wait…
————————————————————-
Operating System: Linux
Linux distribution: suse
Host HUCTRLDSK001-P1 not found: 3(NXDOMAIN)
Hostname HUCTRLDSK001-P1 is a fully qualified domain name.OK.
The library libstdc++.so.5(64-bit) is installed.OK.
Env variable mwi_launchpadroot is set.OK.
Copying the installation files to a temporary location…

Once the installation dialog pops up select the installation language and click OK.

sccd-middleware-installer-select-language

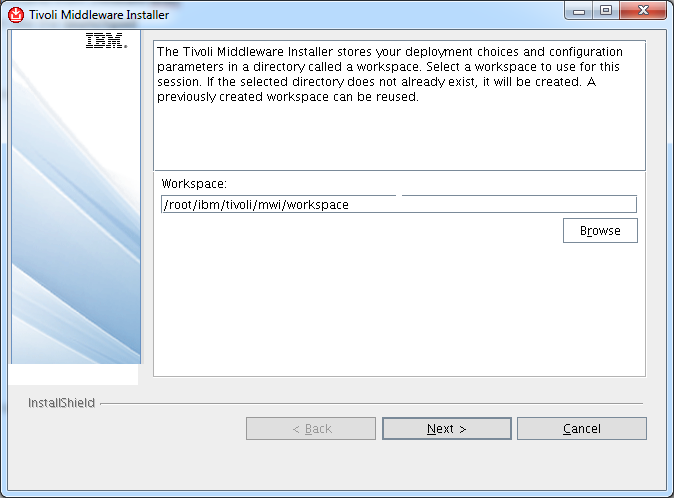
Click Next at the Welcome window accept the license agreement then select the location of the installation plan and click Next.

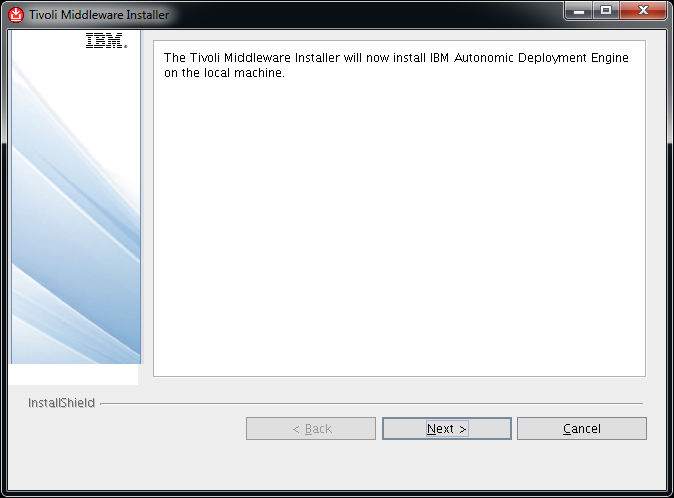
sccd-middleware-installer-select-plan-locationClick Next at the Autonomic Deployment Engine installation window.

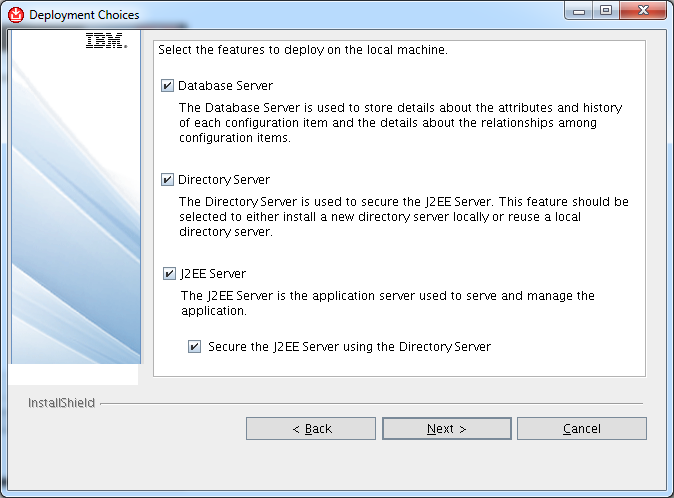
sccd-middleware-installer-autonomic-deployment-engineSelect everything in the next window then click Next.

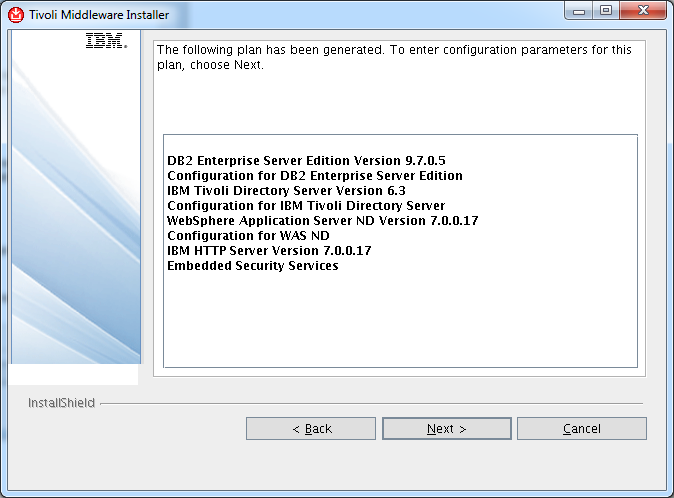
sccd-middleware-installer-select-softwareThe installer is now generating an installation plan based on what was picked. Once ready the plan and installation order is displayed. Review the plan then click Next.

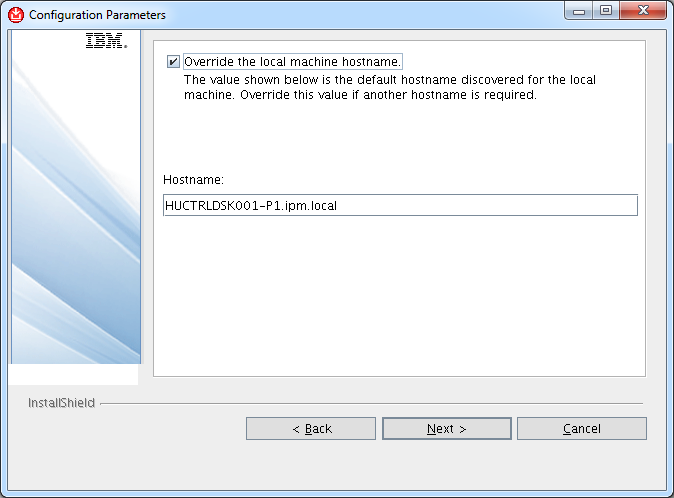
sccd-middleware-installer-generated-planMake sure that you give the fully qualified domain name at the following window then click Next.

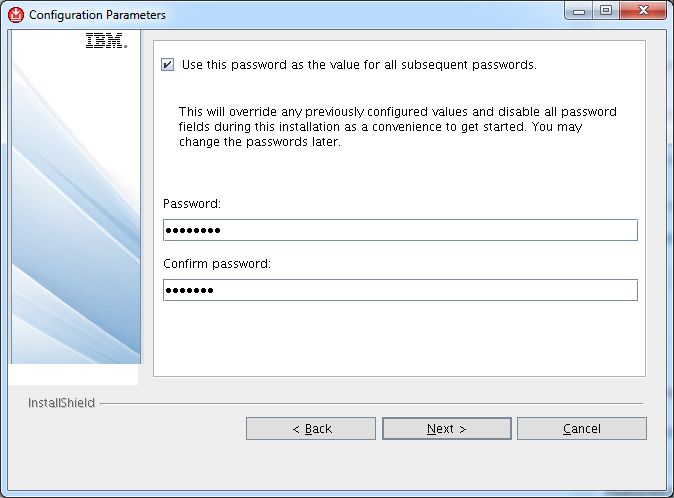
sccd-middleware-installer-local-machine-fqdnDefine the master password in the next window. We used this option as we want all middleware passwords to be the same. You can unselect  this option and type different passwords for different software components as you progress with the installation. Click Next to get to the following installation step.

sccd-middleware-installer-passwordSelect the installation location of DB2 9.7 then click Next.

sccd-middleware-installer-db2Leave the default configuration values for the DB2 instance then click Next.

sccd-middleware-installer-db2-instanceLeave the default configuration values for the DB2 fenced user then click Next.

sccd-middleware-installer-db2-fencedLeave the default configuration values for the DB2 admin group user then click Next.

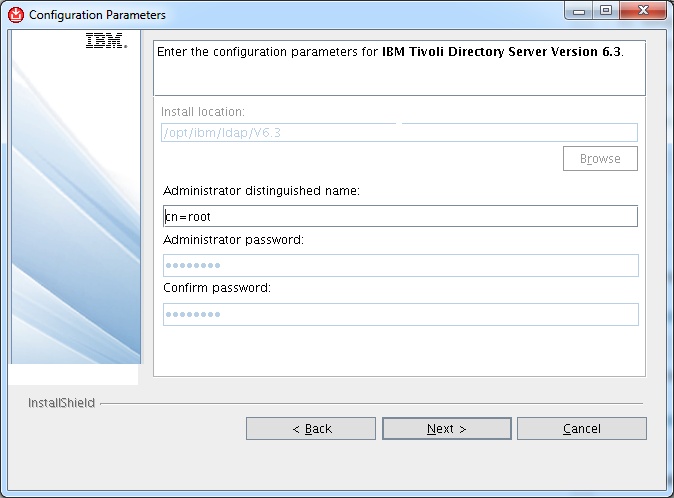
sccd-middleware-installer-db2-admin-groupLeave the default configuration values for the IBM Tivoli Directory Server installation, then click Next. It is important to point out here that the install location of the IBM Tivoli Directory Server can not be changed.

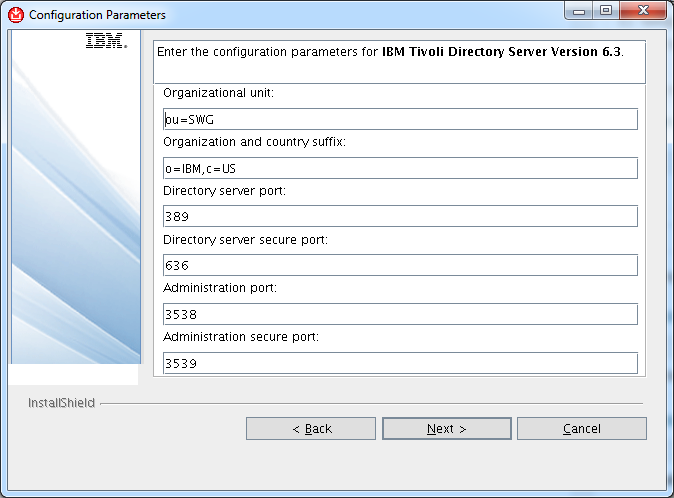
sccd-middleware-installer-tivoli-directory-serverLeave the default configuration values for the IBM Tivoli Directory Server configuration, then click Next.

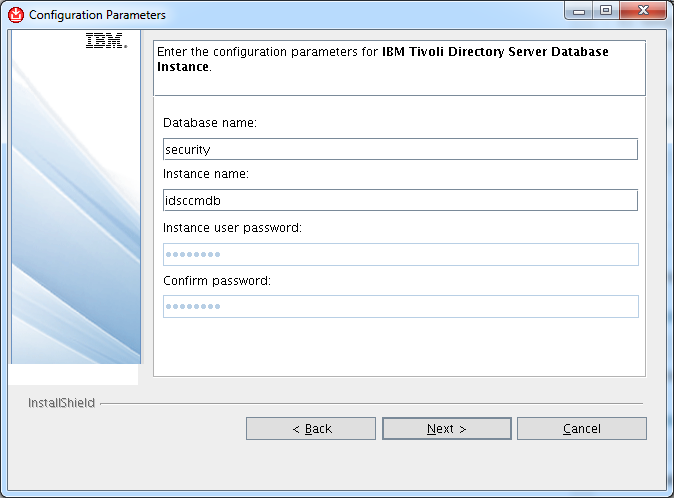
sccd-middleware-installer-tivoli-directory-server-configurationLeave the default configuration values for the IBM Tivoli Directory Server database configuration, then click Next.

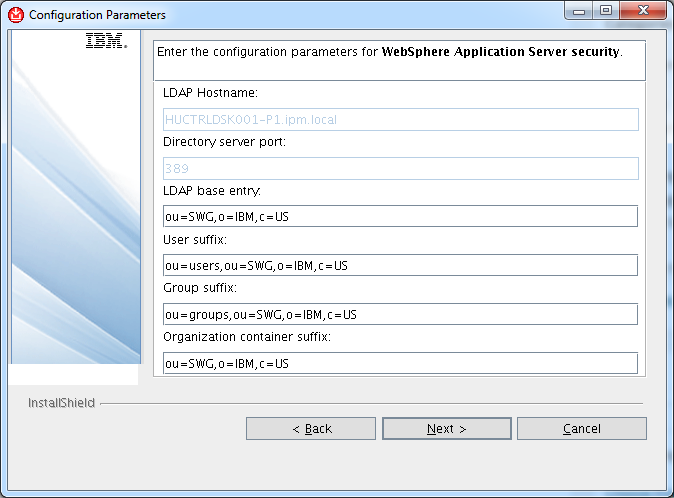
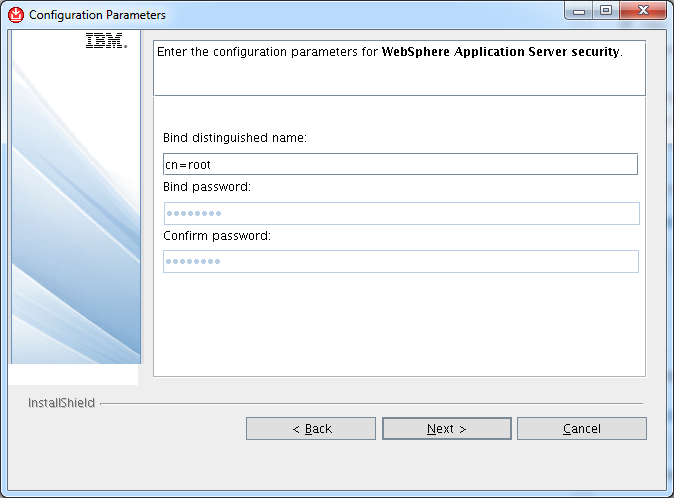
sccd-middleware-installer-tivoli-directory-server-databaserLeave the default configuration values for the WebSphere Application Server Security, then click Next.

sccd-middleware-installer-tivoli-directory-websphere-application-server-securityLeave the default configuration values for the WebSphere Application Server Security, then click Next.

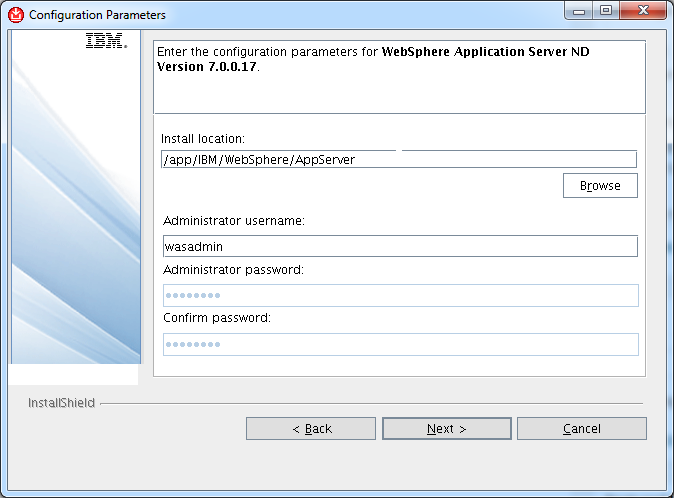
sccd-middleware-installer-tivoli-directory-websphere-application-server-security-2Leave the default configuration values for the WepSphere Application Server Network Deployment installation, then click Next.

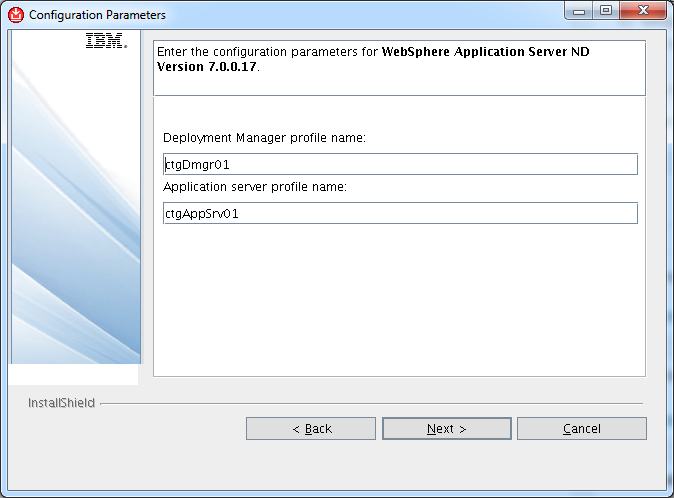
sccd-middleware-installer-websphere-configurationLeave the default configuration values for the Deployment Manager profile name and the Application Server Profile Name then click Next.

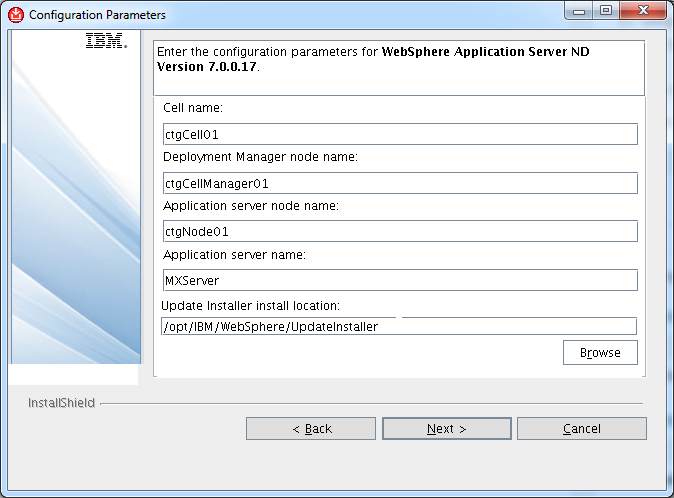
sccd-middleware-installer-websphere-configuration-serversLeave the default configuration values for the WepSphere Application Server Network Deployment configuration, then click Next.

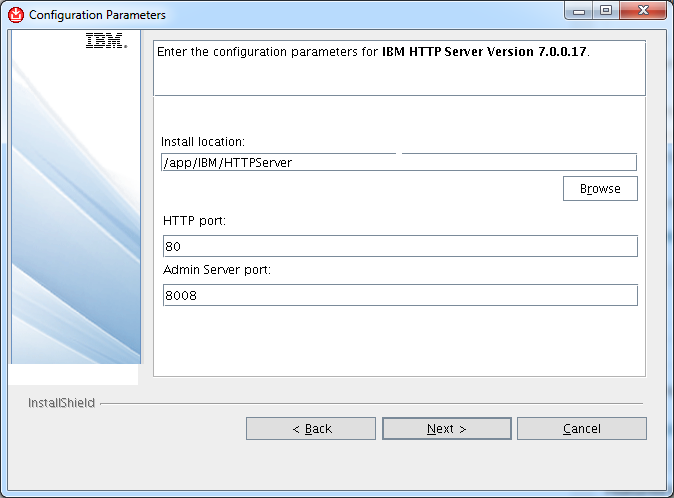
sccd-middleware-installer-websphere-configuration-servers-2Leave the default configuration values for the IBM HTTP Server Installation, then click Next.

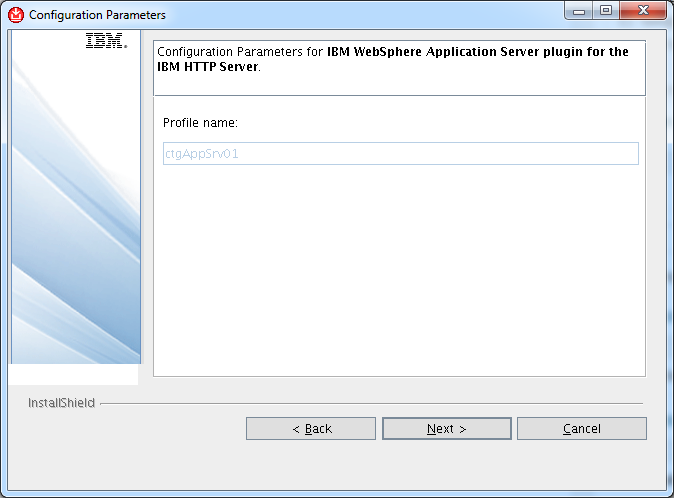
sccd-middleware-installer-http-serverLeave the default configuration values for the IBM WebSphere application server plugin for the IBM HTTP Server, then click Next.

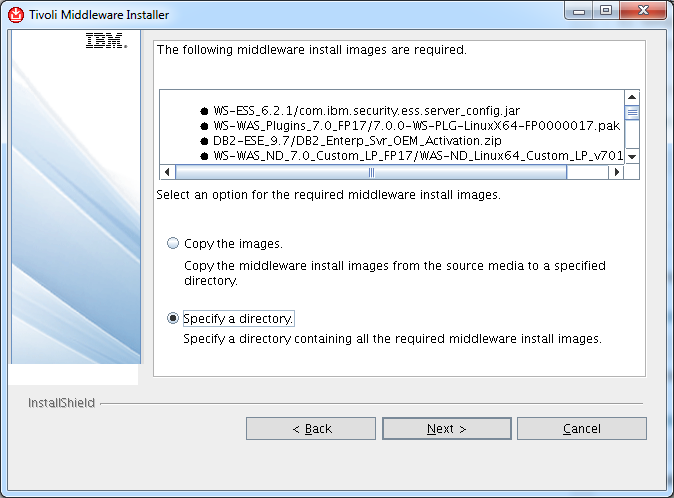
sccd-middleware-installer-http-server-pluginSelect Specify the directory to location where the Middleware installation images are, then click Next.

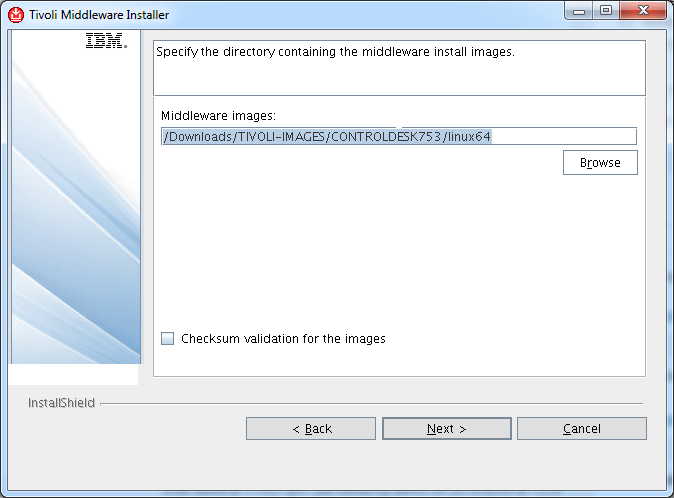
sccd-middleware-installer-image-locationWe copied everything into the root installation directory under the linux64 directory. Select your image location then click Next.

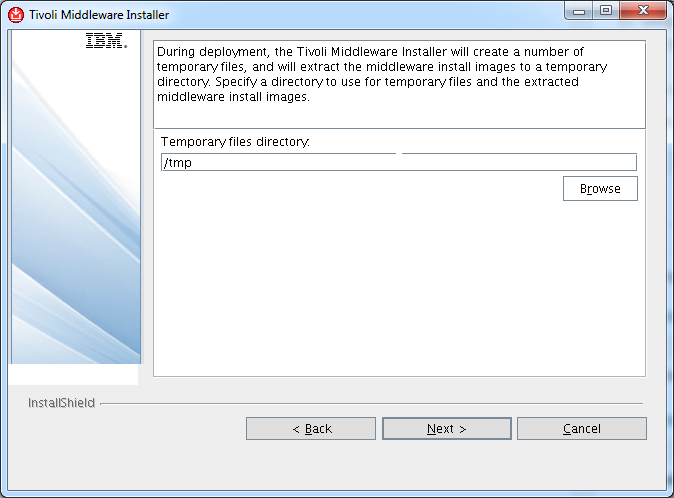
sccd-middleware-installer-image-location-linux64Specify the temporary directory for the installation, then click Next.

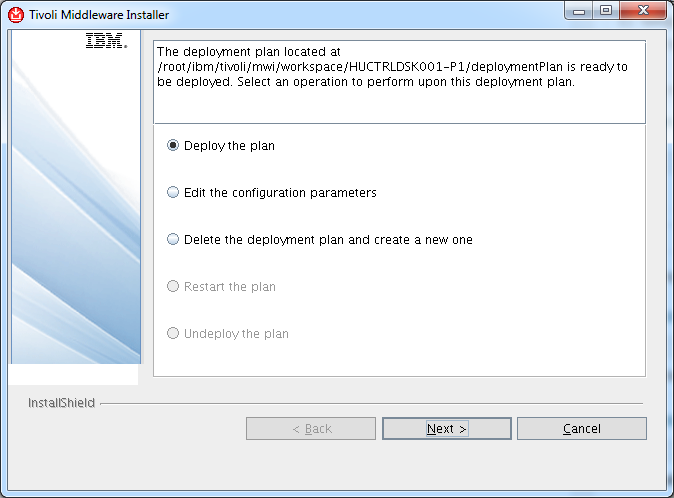
sccd-middleware-installer-tmpSelect the Deploy Plan option then click Next.

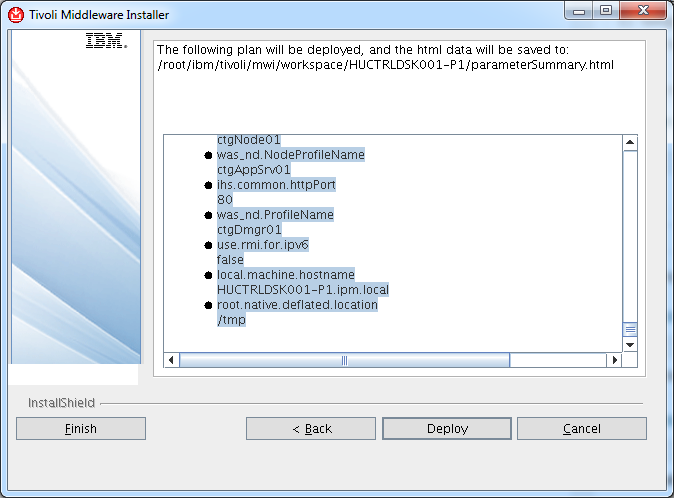
sccd-middleware-installer-deploy-planReview the installation plan then click Deploy to kick off the installation.

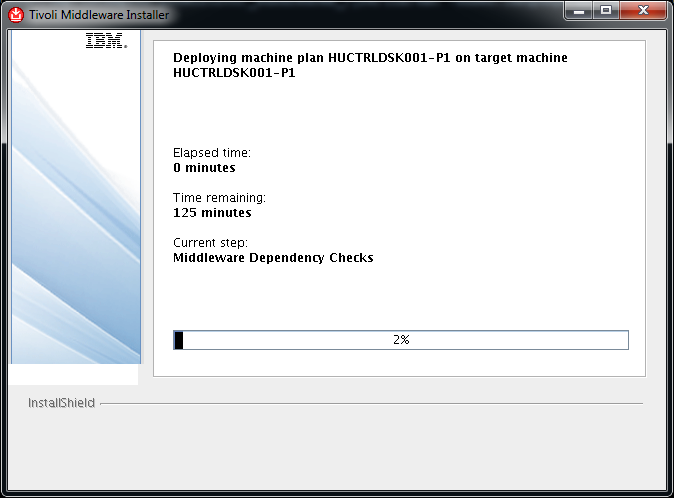
sccd-middleware-installer-deploy-plan-2The installation will take about 125 minutes in our environment. It is time to take a break now.

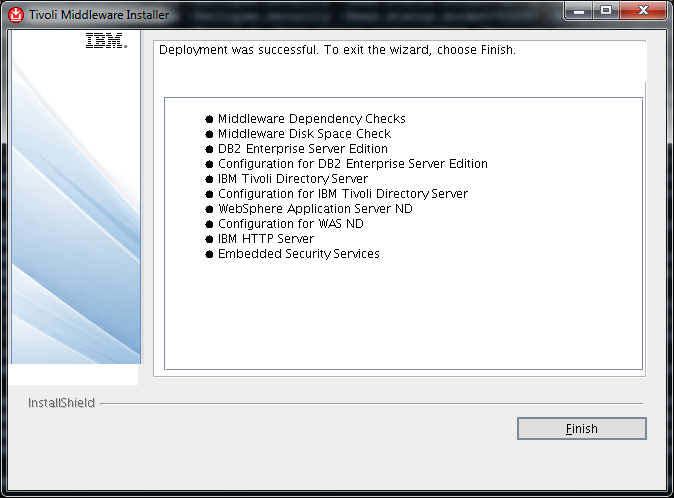
sccd-middleware-installer-installationIf everything goes as expected you should see this:

sccd-middleware-installer-successful

Installing Control Desk

Once the Middleware is installed we are ready to install the IBM Control Desk Service Provider Edition. Before you start the installation it is important to know that all configuration values will be validated once the Next button is clicked so there should be know unexpected surprises once the physical installation process starts. You will see the Validating inputs dialog a lot during configuration specification.

control-desk-service-provider-edition-installer-validating-inputs

The installation process does take a very long time. Let the installer finish its procedure. It is not uncommon the the installation is running for more than 8 hours. If you have to stop the installation procedure for some reason, you can resume the installation using taskrunner utility. The utility is located in your control desk installation directory under scripts. Run the following command to continue a halted installation:

./scripts/taskRunner.sh CONTINUE

We start the installation using the command line installer instead of the launchpad. The installer is located in ./Install/ISM directory.

HUCTRLDSK001-P1:/Downloads/TIVOLI-IMAGES/CONTROLDESK753/Install/ISM # ./install_linux64.sh
Entering ./install_linux64.sh at Thu Feb  5 21:36:06 CET 2015.
Preparing to install…
Extracting the JRE from the installer archive…
Unpacking the JRE…
Extracting the installation resources from the installer archive…
Configuring the installer for this system’s environment…

Launching installer…

Select the installation language then click OK.

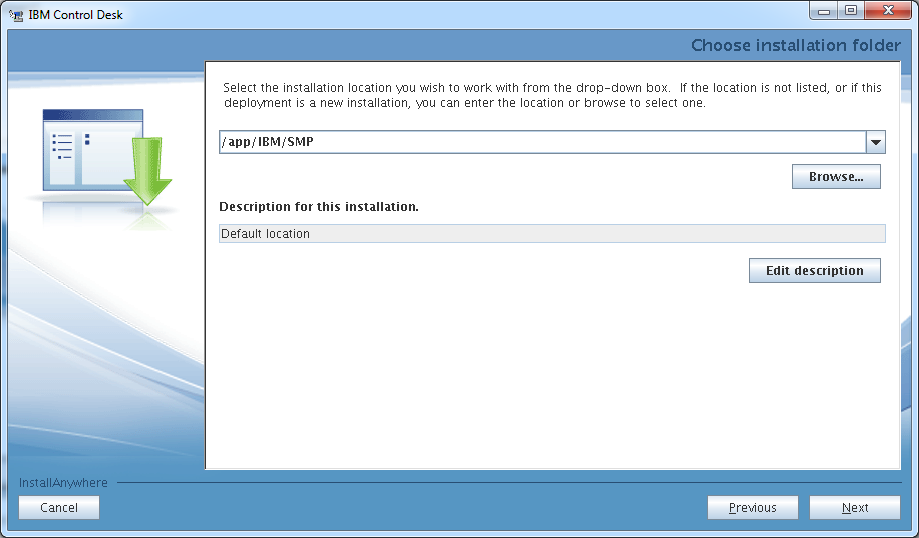
control-desk-service-provider-edition-installer-select-languageClick Next at the Introduction window, specify the installation location, then click Next.

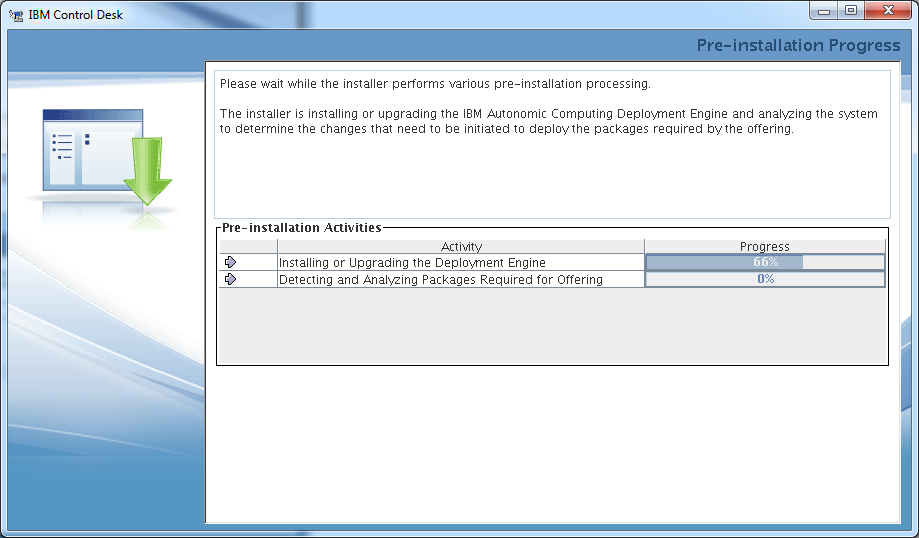
control-desk-service-provider-edition-installer-select-install-locationClick Next after the install location verification, and the pre-installation process starts.

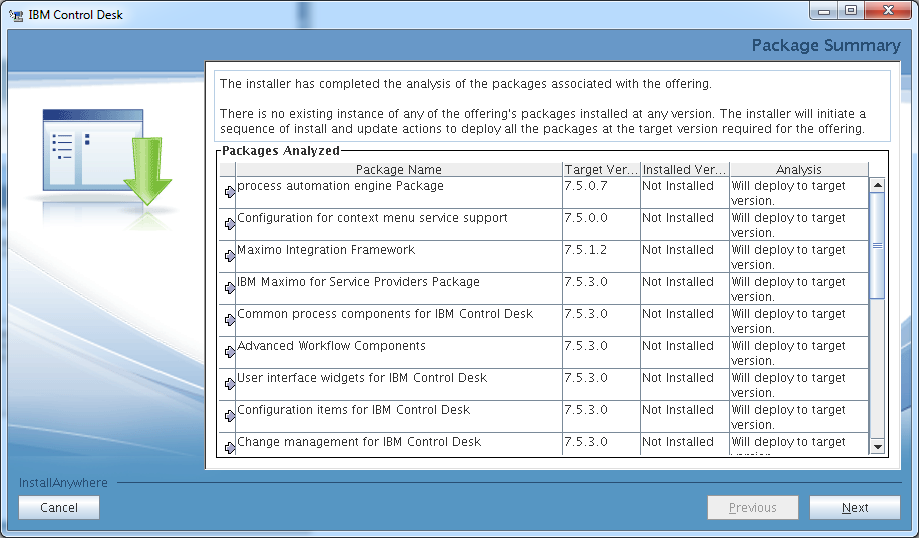
control-desk-service-provider-edition-installer-pre-installation-progressCheck the Package Summary then click Next to continue the installation process.

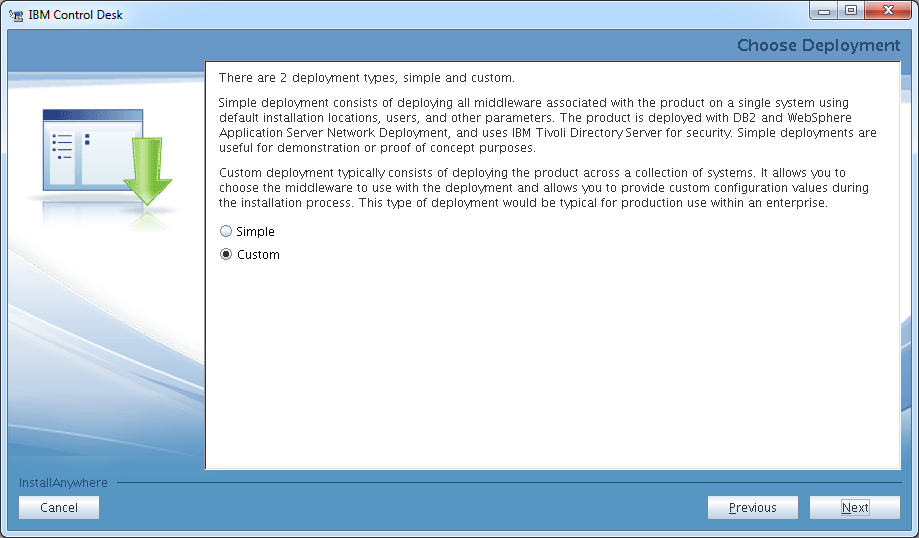
control-desk-service-provider-edition-installer-package-summaryAccept the License Agreement then select Custom Deployment in the following window then click Next.

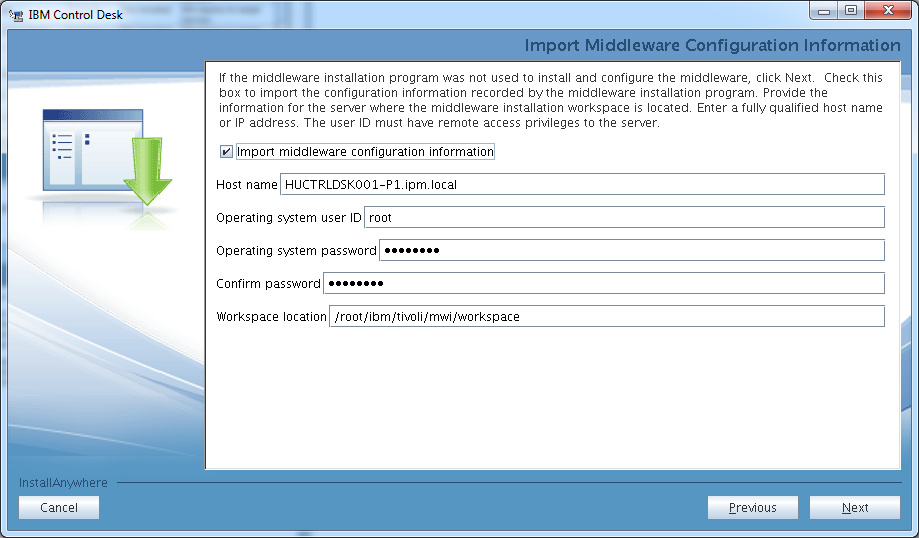
control-desk-service-provider-edition-installer-deploymentSelect the Import the Middleware configuration information and fill in the fields with your Host name, Workspace location and root account details. This is actually very handy as it will pick up all the Middleware configuration parameters apart from the passwords so most of the following installation parameters will be pre-filled. Click Next to continue the installation.

control-desk-service-provider-edition-installer-import-middleware-configurationSelect DB2 as the database type then click Next.

control-desk-service-provider-edition-installer-db2Type the DB2 user password, then click Next.

control-desk-service-provider-edition-installer-db2-instanceSelect Automate database creation and configuration as the database is not yet created and we would like the installer to do this for us. Click Next to continue the installation. control-desk-service-provider-edition-installer-db2-create-databaseSpecify an administrative account such as root so the installer can perform the required database operations. Click Next to continue the installation.

control-desk-service-provider-edition-installer-remote-access-authorizationSpecify the required database passwords, then click Next.

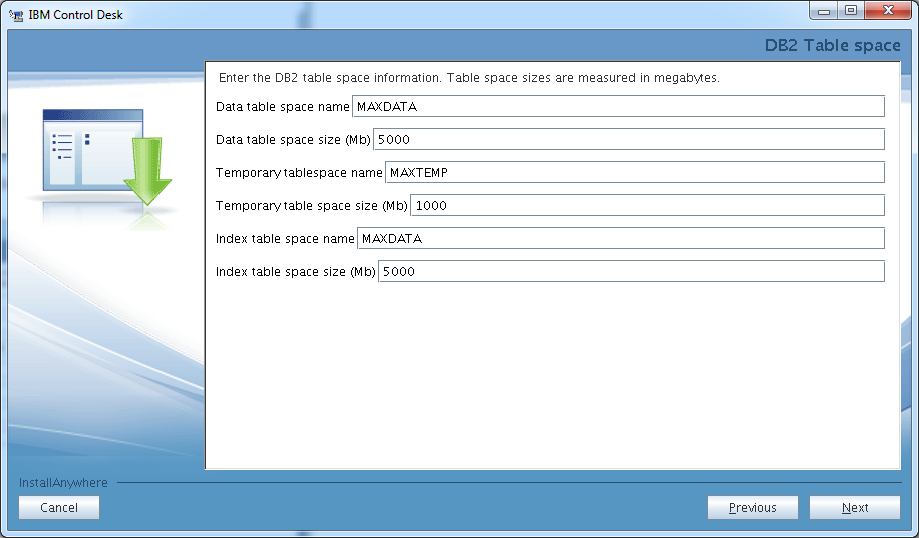
control-desk-service-provider-edition-installer-db2-instance-loginLeave the DB2 table space values on default, then click Next.

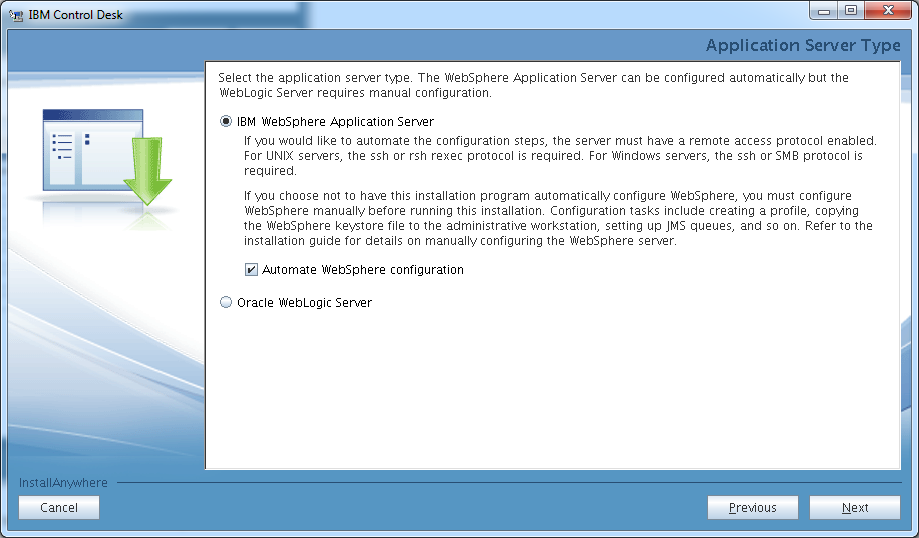
control-desk-service-provider-edition-installer-db2-table-spaceSelect IBM WebSphere Application Server and select the Automate WebSphere configuration option, then click Next.

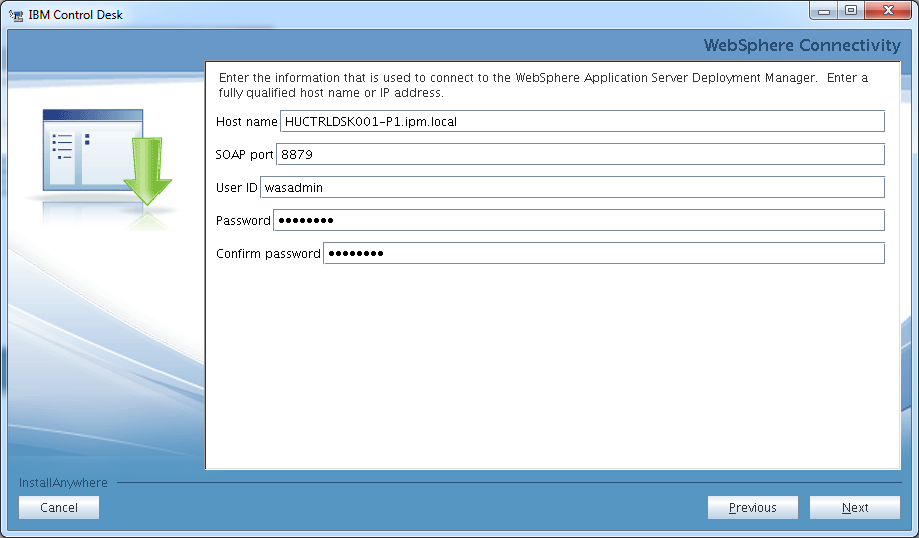
control-desk-service-provider-edition-installer-websphere-selectSpecify the wasadmin password then click Next.

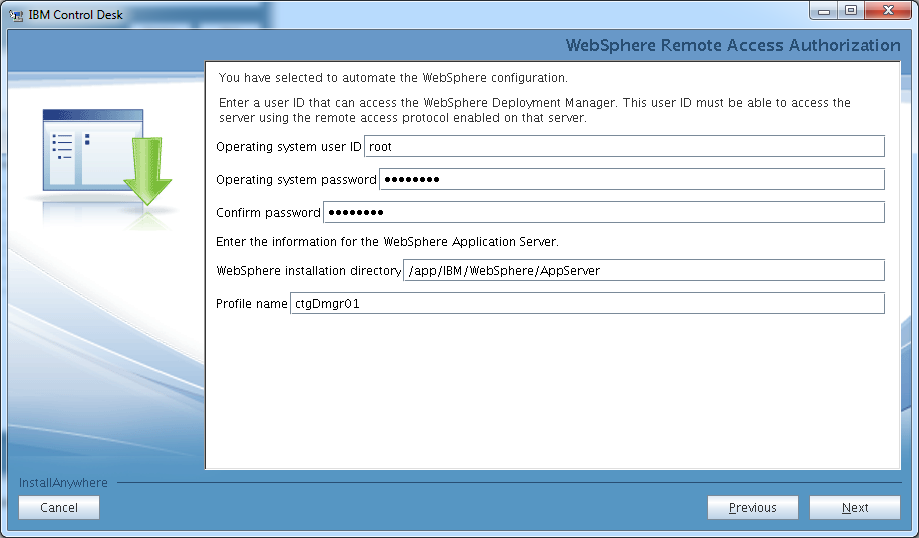
control-desk-service-provider-edition-installer-websphere-wasadmin Specify root and its password for the remote access user, then click Next.

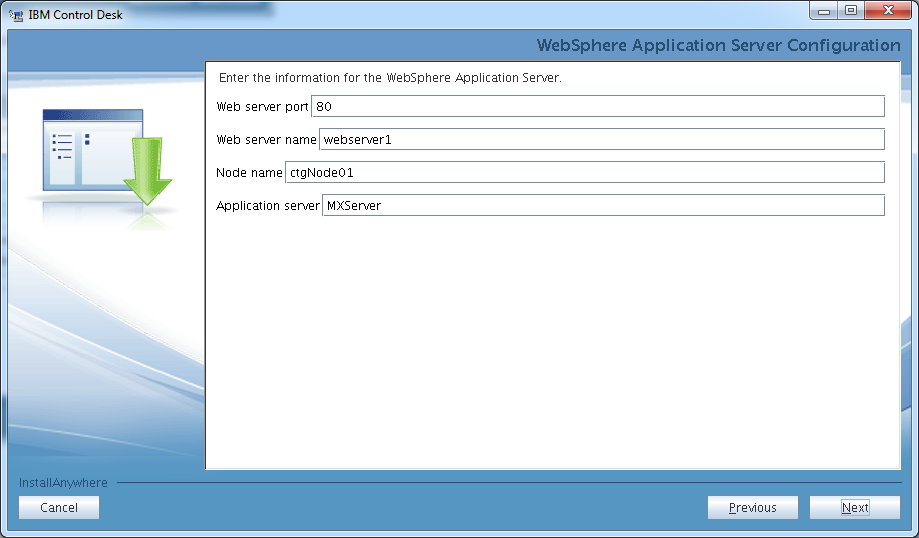
control-desk-service-provider-edition-installer-websphere-remote-accessLeave the WebSphere Application Server Configuration parameters on default and click Next.

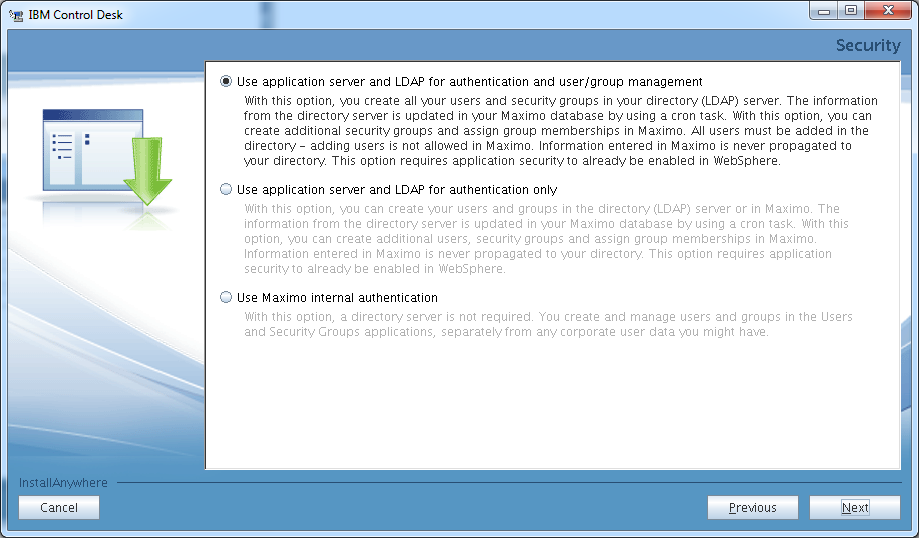
control-desk-service-provider-edition-installer-websphere-configuration-paramsSince we have the LDAP server pre-installed and configured select the first option at the Security panel then click Next.

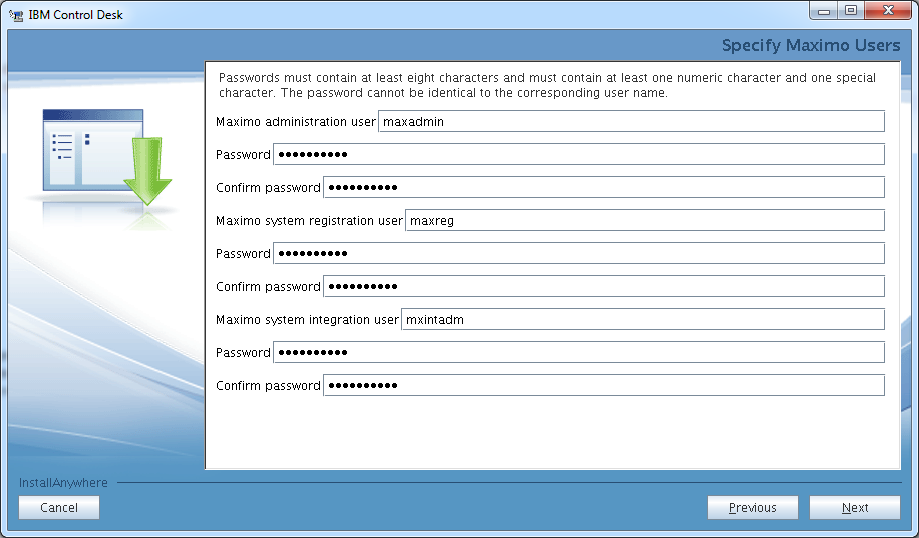
control-desk-service-provider-edition-installer-ldapSpecify passwords for the default maximo users. Please note that the password must contain at least one numeric and one special character. Click Next to continue the installation process.

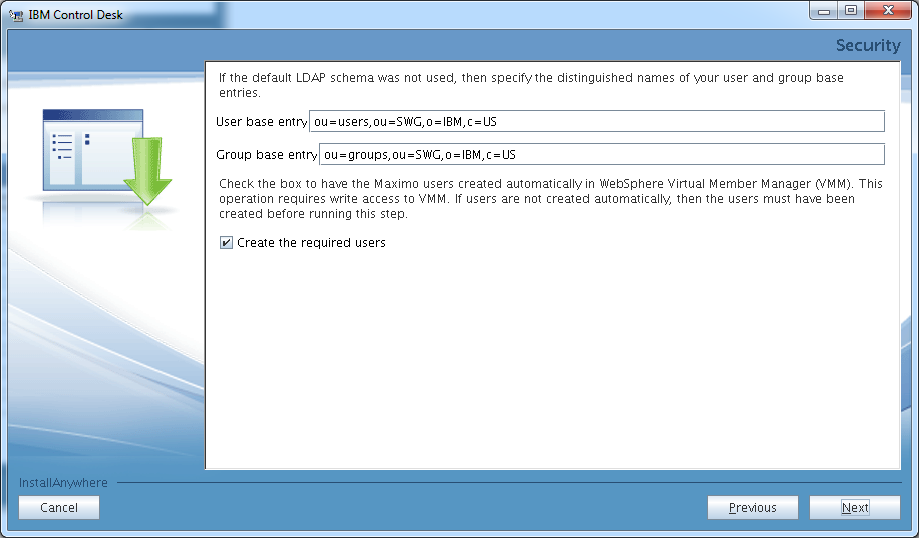
control-desk-service-provider-edition-installer-specify-maximo-usersLeave the LDAP schema settings on default, then click Next.

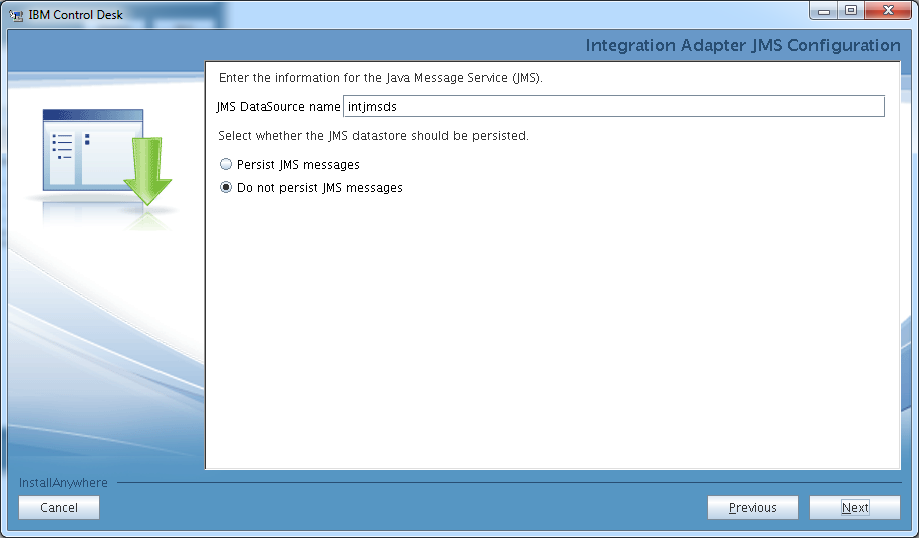
control-desk-service-provider-edition-installer-ldap-schemaLeave the JMS settings on default and click Next.

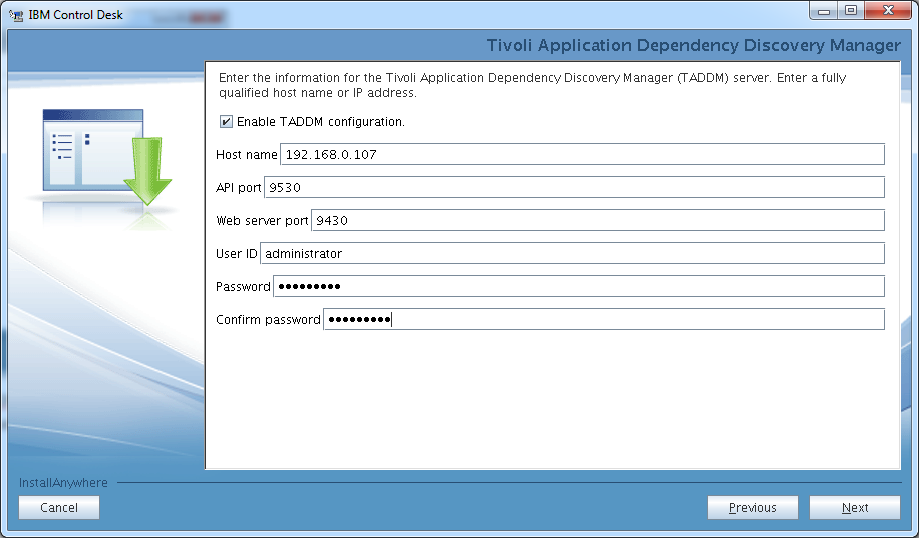
control-desk-service-provider-edition-installer-jms-settingsIf you have TADDM already installed you can specify the TADDM connection settings here. Since we have TADDM already rolled out we specify the required values.

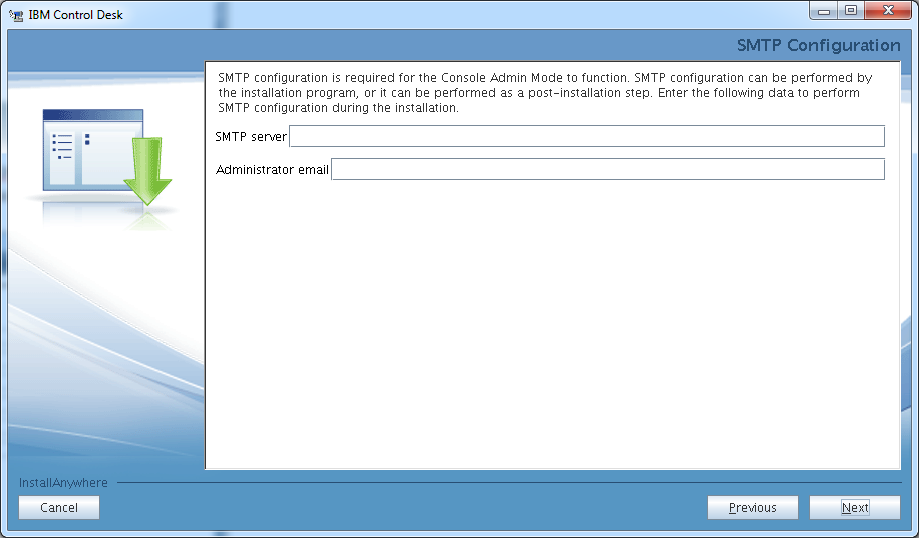
control-desk-service-provider-edition-installer-taddmWe do not specify an SMTP server for now. Click Next to continue the installation process.

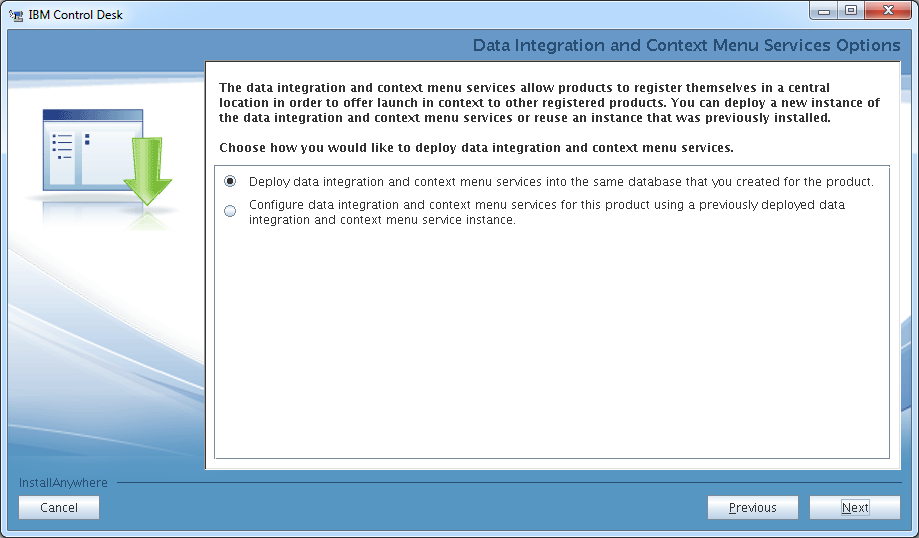
control-desk-service-provider-edition-installer-smtpWe use the maxdb75 database for everything so we picked the Deploy data integration and context menu services to the same database option. Click Next to continue the installation.

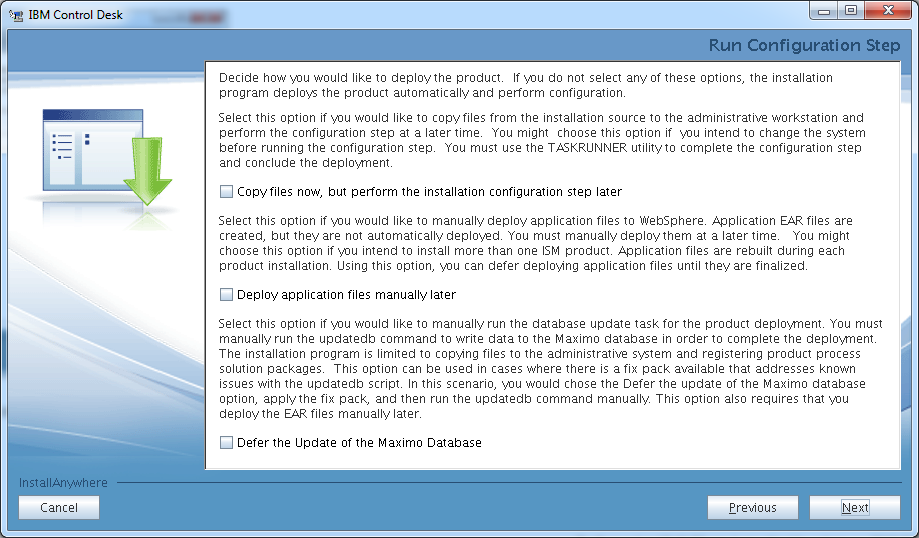
control-desk-service-provider-edition-installer-db-integrationAfter selecting the product languages, the installation gets to its final stage, you have various options here to do the installation later or perform actions manually. if you do not pick any of the options the setup program will perform the installation…

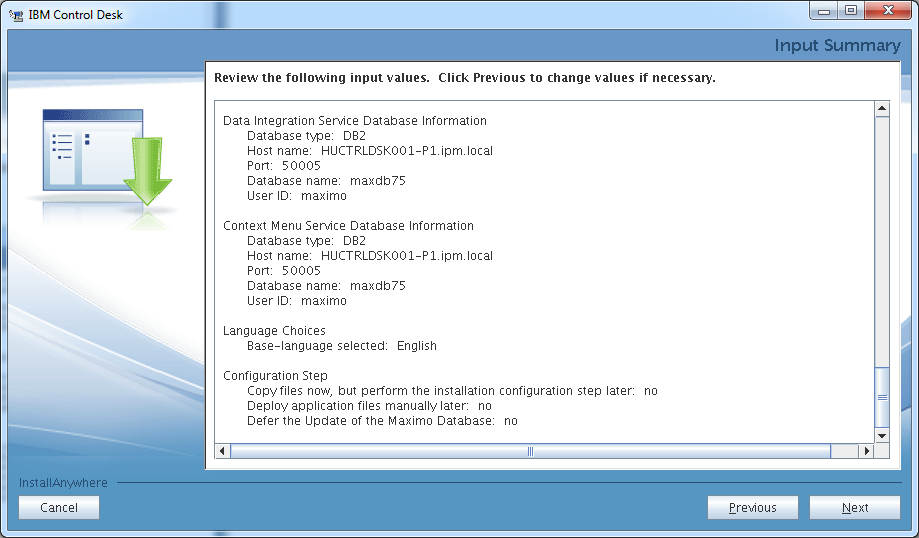
control-desk-service-provider-edition-installer-conig-setup… once you reviewed your input summary and …

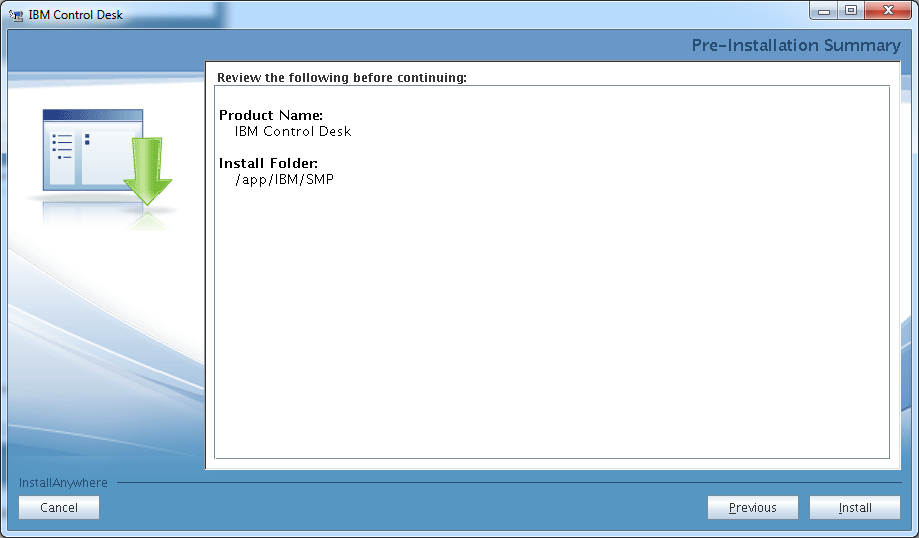
control-desk-service-provider-edition-installer-input-summary.. the pre-installation summary. Click Install to start the installation process.

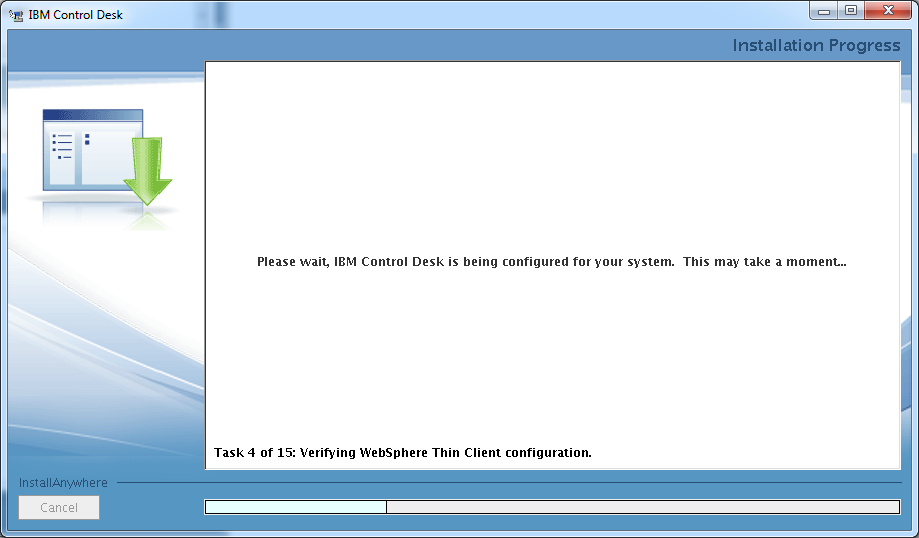
control-desk-service-provider-edition-installer-pre-install-summaryThe installation have 15 stages ( tasks ) and as I pointed out before it will take a very long time. Stage 6 ( Task 6 )  when the Database configuration is happening is a notoriously long process for example. Therefore it is good to use a utility that checks the real time load on your server for example top or htop if you like more visualized results. This way you can see if the installer is actually doing its job.

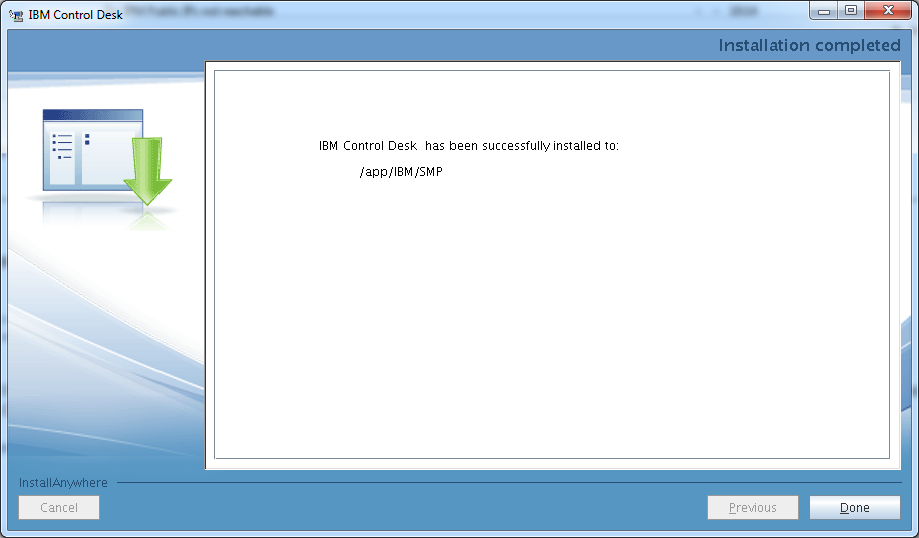
control-desk-service-provider-edition-installer-stagesUpon successful completion you should see the following screenshot.

control-desk-service-provider-edition-installation-completedOpen your browser and type the following URL to get to the maximo console:

http://yoursccdhost/maximo

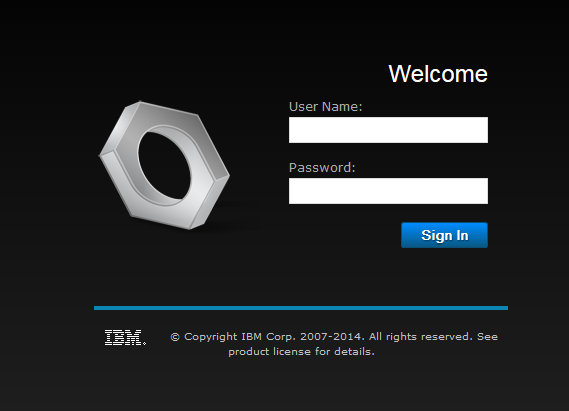
The admin user is maxadmin and use the password you have specified at installation time. If you are not able to log in right after the installation, you will need to restart the server and start up the components one by one. This usually solves the initial login issues for me.

control-desk-service-provider-edition-welcomeThis is how you start your IBM Control Desk server components:

HUCTRLDSK001-P1:~ # su – idsccmdb -c db2start
02/06/2015 13:48:13     0   0   SQL1063N  DB2START processing was successful.
SQL1063N  DB2START processing was successful.
HUCTRLDSK001-P1:~ # /opt/ibm/ldap/V6.3/sbin/ibmslapd -I idsccmdb
GLPSRV041I Server starting.
GLPCTL113I Largest core file size creation limit for the process (in bytes): ‘1024’(Soft limit) and ‘-1′(Hard limit).
GLPCTL119I Maximum Data Segment(Kbytes) soft ulimit for the process is -1 and the prescribed minimum is 262144.
GLPCTL119I Maximum File Size(512 bytes block) soft ulimit for the process is -1 and the prescribed minimum is 2097152.
GLPCTL122I Maximum Open Files soft ulimit for the process is 8192 and the prescribed minimum is 500.
GLPCTL121I Maximum Stack Size(Kbytes) soft ulimit for the process was 8192 and it is modified to the prescribed minimum 10240.
GLPCTL122I Maximum Virtual Memory(Kbytes) soft ulimit for the process is 6360560 and the prescribed minimum is 1048576.
GLPCOM024I The extended Operation plugin is successfully loaded from libevent.so.
GLPCOM024I The extended Operation plugin is successfully loaded from libtranext.so.
GLPCOM024I The extended Operation plugin is successfully loaded from libldaprepl.so.
GLPSRV155I The DIGEST-MD5 SASL Bind mechanism is enabled in the configuration file.
GLPCOM021I The preoperation plugin is successfully loaded from libDigest.so.
GLPCOM024I The extended Operation plugin is successfully loaded from libevent.so.
GLPCOM024I The extended Operation plugin is successfully loaded from libtranext.so.
GLPCOM023I The postoperation plugin is successfully loaded from libpsearch.so.
GLPCOM024I The extended Operation plugin is successfully loaded from libpsearch.so.
GLPCOM025I The audit plugin is successfully loaded from libldapaudit.so.
GLPCOM024I The extended Operation plugin is successfully loaded from libevent.so.
GLPCOM023I The postoperation plugin is successfully loaded from libpsearch.so.
GLPCOM024I The extended Operation plugin is successfully loaded from libpsearch.so.
GLPCOM022I The database plugin is successfully loaded from libback-config.so.
GLPCOM024I The extended Operation plugin is successfully loaded from libevent.so.
GLPCOM024I The extended Operation plugin is successfully loaded from libtranext.so.
GLPCOM023I The postoperation plugin is successfully loaded from libpsearch.so.
GLPCOM024I The extended Operation plugin is successfully loaded from libpsearch.so.
GLPCOM022I The database plugin is successfully loaded from libback-rdbm.so.
GLPCOM010I Replication plugin is successfully loaded from libldaprepl.so.
GLPSRV189I Virtual list view support is enabled.
GLPCOM021I The preoperation plugin is successfully loaded from libpta.so.
GLPSRV194I The Record Deleted Entries feature is disabled. Deleted entries are immediately removed from the database.
GLPSRV207I Group conflict resolution during replication is disabled.
GLPSRV200I Initializing primary database and its connections.
GLPRDB126I The directory server will not use DB2 selectivity.
GLPCOM024I The extended Operation plugin is successfully loaded from libloga.so.
GLPCOM024I The extended Operation plugin is successfully loaded from libidsfget.so.
GLPSRV180I Pass-through authentication is disabled.
GLPCOM003I Non-SSL port initialized to 389.
HUCTRLDSK001-P1:~ # su – ctginst1 -c db2start
02/06/2015 13:48:33     0   0   SQL1063N  DB2START processing was successful.
SQL1063N  DB2START processing was successful.
HUCTRLDSK001-P1:~ # /app/IBM/WebSphere/AppServer/profiles/ctgDmgr01/bin/startManager.sh
ADMU0116I: Tool information is being logged in file
/app/IBM/WebSphere/AppServer/profiles/ctgDmgr01/logs/dmgr/startServer.log
ADMU0128I: Starting tool with the ctgDmgr01 profile
ADMU3100I: Reading configuration for server: dmgr
ADMU3200I: Server launched. Waiting for initialization status.
ADMU3000I: Server dmgr open for e-business; process id is 5078
HUCTRLDSK001-P1:~ # /app/IBM/WebSphere/AppServer/profiles/ctgAppSrv01/bin/startNode.sh
ADMU0116I: Tool information is being logged in file
/app/IBM/WebSphere/AppServer/profiles/ctgAppSrv01/logs/nodeagent/startServer.log
ADMU0128I: Starting tool with the ctgAppSrv01 profile
ADMU3100I: Reading configuration for server: nodeagent
ADMU3200I: Server launched. Waiting for initialization status.
ADMU3000I: Server nodeagent open for e-business; process id is 5273
HUCTRLDSK001-P1:~ # /app/IBM/WebSphere/AppServer/profiles/ctgAppSrv01/bin/startServer.sh MXServer
ADMU0116I: Tool information is being logged in file
/app/IBM/WebSphere/AppServer/profiles/ctgAppSrv01/logs/MXServer/startServer.log
ADMU0128I: Starting tool with the ctgAppSrv01 profile
ADMU3100I: Reading configuration for server: MXServer
ADMU3200I: Server launched. Waiting for initialization status.
ADMU3000I: Server MXServer open for e-business; process id is 5436
HUCTRLDSK001-P1:~ # /app/IBM/HTTPServer/bin/apachectl start

We have a post with more detailed information about the components start up here.

IBM Control Desk Service Provider Edition Configuration & installation articles:

Installing the IBM Tivoli Integration Composer
Integrating TADDM and Control Desk using Integration Composer

Installing & Configuring the IBM Tivoli Monitoring Agent for Netcool/Omnibus 8.1

The IBM Tivoli Monitoring Agent for Netcool/Omnibus 8.1  is located in the IBM Tivoli Monitoring Agent for Netcool/Omnibus 8.1 eAssembly ( CRS7KML ) bundle. We used SLES 11 SP3 as our installation platform.

Installing the IBM Tivoli Monitoring Agent for Netcool/Omnibus 8.1 agent support on the ITM server(s).

First install the product support for TEPS, TEMS. We have a one box test system running ITM 6.3.0.4 so we will only have to perform the product support installation in this one server. We will install the following packages:

Tivoli Enterprise Portal Browser Client support
Tivoli Enterprise Portal Desktop Client support
Tivoli Enterprise Portal Server support
Tivoli Enterprise Monitoring Server support

Start the installation by executing install.sh from the installation media.

HUITM001-P1:/Downloads/TIVOLI-IMAGES/OMNIBUS8-PACK/agent # ./install.sh
INSTALL

Enter the name of the IBM Tivoli Monitoring directory
[ default = /opt/IBM/ITM ]: /app/IBM/ITM

ITM home directory “/app/IBM/ITM” already exists.
OK to use it [ 1-yes, 2-no; “1” is default ]?  1

The following processes are currently running:

Product = Tivoli Enterprise Monitoring Server  PID = 4206
Product = Tivoli Enterprise Monitoring Automation Server  PID = 4532
Product = IBM Eclipse Help Server  PID = 4836
Product = Tivoli Enterprise Portal Server  PID = 4928
Product = Warehouse Proxy  PID = 5371
Product = Monitoring Agent for Linux OS  PID = 5857
Product = Summarization and Pruning Agent  PID = 16319
install.sh warning: Existing products found to be running will be restarted during installation., continuing …

Continue with this installation [ 1-yes, 2-no; “1” is default ]?  1
Stopping TEMS…
It can take up to ten minutes.
TEMS stopped…
Processing. Please wait…
Stopping Tivoli Enterprise Monitoring Automation Server …
Product Tivoli Enterprise Monitoring Automation Server was stopped gracefully.
Agent stopped…
Processing. Please wait…
Stopping IBM Eclipse Help Server …
Product IBM Eclipse Help Server was stopped gracefully.
Agent stopped…
Processing. Please wait…
Stopping Tivoli Enterprise Portal Server …
Product Tivoli Enterprise Portal Server was stopped gracefully.
KCIIN0196E Agent is not running…
Processing. Please wait…
Stopping Warehouse Proxy …
Product Warehouse Proxy was stopped gracefully.
Agent stopped…
Processing. Please wait…
Stopping Watchdog process…
Watchdog process was stopped.
Stopping Monitoring Agent for Linux OS …
Product Monitoring Agent for Linux OS was stopped gracefully.
Agent stopped…
Processing. Please wait…
Stopping Summarization and Pruning Agent …
Product Summarization and Pruning Agent was stopped gracefully.
Agent stopped…
/app/IBM/ITM

Select one of the following:

1) Install products to the local host.
2) Install products to depot for remote deployment (requires TEMS).
3) Install TEMS support for remote seeding
4) Exit install.

Please enter a valid number:  1

Initializing …
International Program License Agreement

Part 1 – General Terms

BY DOWNLOADING, INSTALLING, COPYING, ACCESSING, OR USING
THE PROGRAM YOU AGREE TO THE TERMS OF THIS AGREEMENT. IF
YOU ARE ACCEPTING THESE TERMS ON BEHALF OF ANOTHER PERSON
OR A COMPANY OR OTHER LEGAL ENTITY, YOU REPRESENT AND
WARRANT THAT YOU HAVE FULL AUTHORITY TO BIND THAT PERSON,
COMPANY, OR LEGAL ENTITY TO THESE TERMS. IF YOU DO NOT
AGREE TO THESE TERMS,

– DO NOT DOWNLOAD, INSTALL, COPY, ACCESS, OR USE THE
PROGRAM; AND

Press Enter to continue viewing the license agreement, or
enter “1” to accept the agreement, “2” to decline it, “3”
to print it, “4” to read non-IBM terms, or “99” to go back
to the previous screen.
1

Product packages are available in /Downloads/TIVOLI-IMAGES/OMNIBUS8-PACK/agent/unix

The following products are currently installed in “/app/IBM/ITM”:

Agentless Monitoring for AIX Operating Systems V06.30.04.00 @ Tivoli Enterprise Portal Browser Client support
Agentless Monitoring for AIX Operating Systems V06.30.04.00 @ Tivoli Enterprise Portal Desktop Client support
Agentless Monitoring for AIX Operating Systems V06.30.04.00 @ Tivoli Enterprise Portal Server support
Agentless Monitoring for HP-UX Operating Systems V06.30.04.00 @ Tivoli Enterprise Portal Browser Client support
Agentless Monitoring for HP-UX Operating Systems V06.30.04.00 @ Tivoli Enterprise Portal Desktop Client support
Agentless Monitoring for HP-UX Operating Systems V06.30.04.00 @ Tivoli Enterprise Portal Server support
Agentless Monitoring for Linux Operating Systems V06.30.04.00 @ Tivoli Enterprise Portal Browser Client support
Agentless Monitoring for Linux Operating Systems V06.30.04.00 @ Tivoli Enterprise Portal Desktop Client support
Agentless Monitoring for Linux Operating Systems V06.30.04.00 @ Tivoli Enterprise Portal Server support
Agentless Monitoring for Solaris Operating Systems V06.30.04.00 @ Tivoli Enterprise Portal Browser Client support
Agentless Monitoring for Solaris Operating Systems V06.30.04.00 @ Tivoli Enterprise Portal Desktop Client support
Agentless Monitoring for Solaris Operating Systems V06.30.04.00 @ Tivoli Enterprise Portal Server support
Agentless Monitoring for Windows Operating Systems V06.30.04.00 @ Tivoli Enterprise Portal Browser Client support
Agentless Monitoring for Windows Operating Systems V06.30.04.00 @ Tivoli Enterprise Portal Desktop Client support
Agentless Monitoring for Windows Operating Systems V06.30.04.00 @ Tivoli Enterprise Portal Server support
IBM Eclipse Help Server V06.30.04.00 @ Linux Intel R2.6, R3.0 (32 bit)/Intel R2.6 GCC 2.9.5 (64 bit)/Intel R2.6, R3.0 (64 bit)/x86_64 R2.6, R3.0 (32 bit)/x86_64 R2.6, R3.0 (64 bit)
IBM GSKit Security Interface V08.00.50.20 @ Linux x86_64 R2.6, R3.0 (64 bit)
IBM HTTP Server V08.00.06.00 @ Linux x86_64 R2.6, R3.0 (64 bit)
IBM Installation Manager V01.06.03.01 @ Linux x86_64 R2.6, R3.0 (64 bit)
IBM Tivoli Enterprise Portal Server Extensions V08.00.06.00 @ Linux x86_64 R2.6, R3.0 (64 bit)
Monitoring Agent for IBM Tivoli Monitoring 5.x Endpoint V06.23.05.00 @ Tivoli Enterprise Portal Server support
Monitoring Agent for Linux OS V06.30.04.00 @ Linux x86_64 R2.6, R3.0 (64 bit)
Monitoring Agent for Linux OS V06.30.04.00 @ Tivoli Enterprise Portal Browser Client support
Monitoring Agent for Linux OS V06.30.04.00 @ Tivoli Enterprise Portal Desktop Client support
Monitoring Agent for Linux OS V06.30.04.00 @ Tivoli Enterprise Portal Server support
Monitoring Agent for TADDM Serviceability and Manageability V07.22.00.00 @ Tivoli Enterprise Portal Browser Client support
Monitoring Agent for TADDM Serviceability and Manageability V07.22.00.00 @ Tivoli Enterprise Portal Desktop Client support
Monitoring Agent for TADDM Serviceability and Manageability V07.22.00.00 @ Tivoli Enterprise Portal Server support
Monitoring Agent for UNIX Logs V06.23.05.00 @ Tivoli Enterprise Portal Browser Client support
Monitoring Agent for UNIX Logs V06.23.05.00 @ Tivoli Enterprise Portal Desktop Client support
Monitoring Agent for UNIX Logs V06.23.05.00 @ Tivoli Enterprise Portal Server support
Monitoring Agent for UNIX OS V06.30.04.00 @ Tivoli Enterprise Portal Browser Client support
Monitoring Agent for UNIX OS V06.30.04.00 @ Tivoli Enterprise Portal Desktop Client support
Monitoring Agent for UNIX OS V06.30.04.00 @ Tivoli Enterprise Portal Server support
Monitoring Agent for Windows OS V06.30.04.00 @ Tivoli Enterprise Portal Browser Client support
Monitoring Agent for Windows OS V06.30.04.00 @ Tivoli Enterprise Portal Desktop Client support
Monitoring Agent for Windows OS V06.30.04.00 @ Tivoli Enterprise Portal Server support
Monitoring Agent for i5/OS V06.30.04.00 @ Tivoli Enterprise Portal Browser Client support
Monitoring Agent for i5/OS V06.30.04.00 @ Tivoli Enterprise Portal Desktop Client support
Monitoring Agent for i5/OS V06.30.04.00 @ Tivoli Enterprise Portal Server support
Summarization and Pruning Agent V06.30.04.00 @ Linux x86_64 R2.6, R3.0 (64 bit)
Summarization and Pruning Agent V06.30.04.00 @ Tivoli Enterprise Portal Browser Client support
Summarization and Pruning Agent V06.30.04.00 @ Tivoli Enterprise Portal Desktop Client support
Summarization and Pruning Agent V06.30.04.00 @ Tivoli Enterprise Portal Server support
TEC GUI Integration V06.30.04.00 @ Tivoli Enterprise Portal Browser Client support
TEC GUI Integration V06.30.04.00 @ Tivoli Enterprise Portal Desktop Client support
TEC GUI Integration V06.30.04.00 @ Tivoli Enterprise Portal Server support
Tivoli Enterprise Monitoring Automation Server V06.30.04.00 @ Linux x86_64 R2.6, R3.0 (64 bit)
Tivoli Enterprise Monitoring SOAP Server V06.30.04.00 @ Linux x86_64 R2.6, R3.0 (64 bit)
Tivoli Enterprise Monitoring Server V06.30.04.00 @ Linux x86_64 R2.6, R3.0 (64 bit)
Tivoli Enterprise Portal Browser Client V06.30.04.00 @ Linux x86_64 R2.6, R3.0 (64 bit)
Tivoli Enterprise Portal Desktop Client V06.30.04.00 @ Linux x86_64 R2.6, R3.0 (64 bit)
Tivoli Enterprise Portal Server V06.30.04.00 @ Linux x86_64 R2.6, R3.0 (64 bit)
Tivoli Enterprise Services User Interface Extensions V06.30.04.00 @ Linux x86_64 R2.6, R3.0 (64 bit)
Tivoli Enterprise Services User Interface V06.30.04.00 @ Linux x86_64 R2.6, R3.0 (64 bit)
Tivoli Performance Analyzer V06.30.04.00 @ Tivoli Enterprise Portal Browser Client support
Tivoli Performance Analyzer V06.30.04.00 @ Tivoli Enterprise Portal Desktop Client support
Tivoli Performance Analyzer V06.30.04.00 @ Tivoli Enterprise Portal Server support
Universal Agent V06.23.05.00 @ Tivoli Enterprise Portal Browser Client support
Universal Agent V06.23.05.00 @ Tivoli Enterprise Portal Desktop Client support
Universal Agent V06.23.05.00 @ Tivoli Enterprise Portal Server support
Warehouse Proxy V06.30.04.00 @ Linux x86_64 R2.6, R3.0 (64 bit)
Warehouse Proxy V06.30.04.00 @ Tivoli Enterprise Portal Browser Client support
Warehouse Proxy V06.30.04.00 @ Tivoli Enterprise Portal Desktop Client support
Warehouse Proxy V06.30.04.00 @ Tivoli Enterprise Portal Server support

All agents require that application support files that contain agent-specific information be installed on the Tivoli Enterprise Monitoring Server that the agents will connect to, Tivoli Enterprise Portal Server and Tivoli Enterprise Portal desktop and browser client. Install application support before starting to install any Tivoli Enterprise Monitoring Agents.

Product packages are available for this operating system and component support categories:

1) IBM Tivoli Monitoring components for this operating system
 2) Tivoli Enterprise Portal Browser Client support
 3) Tivoli Enterprise Portal Desktop Client support
 4) Tivoli Enterprise Portal Server support
 5) Tivoli Enterprise Monitoring Server support
 6) Other operating systems

Type the number or type “q” to quit selection
[ number “1” or “IBM Tivoli Monitoring components for this operating system” is default ]:  2

You selected number “2” or “Tivoli Enterprise Portal Browser Client support

Is the selection correct [ 1=Yes, 2=No ; default is “1” ] ? 1

The following application supports are available for installation:

1) Monitoring Agent for Tivoli Netcool/OMNIbus  V07.40.00.00
2) all of the above

Type the numbers that correspond to the products that you want to install. Type “b” to change operating system, or type “q” to quit selection.
If you enter more than one number, separate the numbers by a comma or a space.

Type your selections here:  1

The following products will be installed:

Monitoring Agent for Tivoli Netcool/OMNIbus  V07.40.00.00

Are your selections correct [ 1=Yes, 2=No ; default is “1” ] ? 1

… installing “Monitoring Agent for Tivoli Netcool/OMNIbus  V07.40.00.00 for Tivoli Enterprise Portal Browser Client support”; please wait.

=> installed “Monitoring Agent for Tivoli Netcool/OMNIbus  V07.40.00.00 for Tivoli Enterprise Portal Browser Client support”.
… Initializing component Monitoring Agent for Tivoli Netcool/OMNIbus  V07.40.00.00 for Tivoli Enterprise Portal Browser Client support.
… Monitoring Agent for Tivoli Netcool/OMNIbus  V07.40.00.00 for Tivoli Enterprise Portal Browser Client support initialized.

Do you want to install additional products or product support packages [ 1=Yes, 2=No ; default is “2” ] ? 1

Product packages are available for this operating system and component support categories:

 1) IBM Tivoli Monitoring components for this operating system
 2) Tivoli Enterprise Portal Browser Client support
 3) Tivoli Enterprise Portal Desktop Client support
 4) Tivoli Enterprise Portal Server support
 5) Tivoli Enterprise Monitoring Server support
 6) Other operating systems

Type the number or type “q” to quit selection
[ number “1” or “IBM Tivoli Monitoring components for this operating system” is default ]:  3

You selected number “3” or “Tivoli Enterprise Portal Desktop Client support

Is the selection correct [ 1=Yes, 2=No ; default is “1” ] ? 1

The following application supports are available for installation:

1) Monitoring Agent for Tivoli Netcool/OMNIbus  V07.40.00.00
2) all of the above

Type the numbers that correspond to the products that you want to install. Type “b” to change operating system, or type “q” to quit selection.
If you enter more than one number, separate the numbers by a comma or a space.

Type your selections here:  1

The following products will be installed:

Monitoring Agent for Tivoli Netcool/OMNIbus  V07.40.00.00

Are your selections correct [ 1=Yes, 2=No ; default is “1” ] ? 1

… installing “Monitoring Agent for Tivoli Netcool/OMNIbus  V07.40.00.00 for Tivoli Enterprise Portal Desktop Client support”; please wait.

=> installed “Monitoring Agent for Tivoli Netcool/OMNIbus  V07.40.00.00 for Tivoli Enterprise Portal Desktop Client support”.
… Initializing component Monitoring Agent for Tivoli Netcool/OMNIbus  V07.40.00.00 for Tivoli Enterprise Portal Desktop Client support.
… Monitoring Agent for Tivoli Netcool/OMNIbus  V07.40.00.00 for Tivoli Enterprise Portal Desktop Client support initialized.

Do you want to install additional products or product support packages [ 1=Yes, 2=No ; default is “2” ] ? 1

Product packages are available for this operating system and component support categories:

 1) IBM Tivoli Monitoring components for this operating system
 2) Tivoli Enterprise Portal Browser Client support
 3) Tivoli Enterprise Portal Desktop Client support
 4) Tivoli Enterprise Portal Server support
 5) Tivoli Enterprise Monitoring Server support
 6) Other operating systems

Type the number or type “q” to quit selection
[ number “1” or “IBM Tivoli Monitoring components for this operating system” is default ]:  4

You selected number “4” or “Tivoli Enterprise Portal Server support

Is the selection correct [ 1=Yes, 2=No ; default is “1” ] ? 1

The following application supports are available for installation:

1) Monitoring Agent for Tivoli Netcool/OMNIbus  V07.40.00.00
2) all of the above

Type the numbers that correspond to the products that you want to install. Type “b” to change operating system, or type “q” to quit selection.
If you enter more than one number, separate the numbers by a comma or a space.

Type your selections here:  1

The following products will be installed:

Monitoring Agent for Tivoli Netcool/OMNIbus  V07.40.00.00

Are your selections correct [ 1=Yes, 2=No ; default is “1” ] ? 1

… installing “Monitoring Agent for Tivoli Netcool/OMNIbus  V07.40.00.00 for Tivoli Enterprise Portal Server support”; please wait.

=> installed “Monitoring Agent for Tivoli Netcool/OMNIbus  V07.40.00.00 for Tivoli Enterprise Portal Server support”.
… Initializing component Monitoring Agent for Tivoli Netcool/OMNIbus  V07.40.00.00 for Tivoli Enterprise Portal Server support.
… Monitoring Agent for Tivoli Netcool/OMNIbus  V07.40.00.00 for Tivoli Enterprise Portal Server support initialized.

Do you want to install additional products or product support packages [ 1=Yes, 2=No ; default is “2” ] ? 1

Product packages are available for this operating system and component support categories:

1) IBM Tivoli Monitoring components for this operating system
 2) Tivoli Enterprise Portal Browser Client support
 3) Tivoli Enterprise Portal Desktop Client support
 4) Tivoli Enterprise Portal Server support
 5) Tivoli Enterprise Monitoring Server support
 6) Other operating systems

Type the number or type “q” to quit selection
[ number “1” or “IBM Tivoli Monitoring components for this operating system” is default ]:  5

You selected number “5” or “Tivoli Enterprise Monitoring Server support

Is the selection correct [ 1=Yes, 2=No ; default is “1” ] ? 1

The following application supports are available for installation:

1) Monitoring Agent for Tivoli Netcool/OMNIbus  V07.40.00.00
2) all of the above

Type the numbers that correspond to the products that you want to install. Type “b” to change operating system, or type “q” to quit selection.
If you enter more than one number, separate the numbers by a comma or a space.

Type your selections here:  1

The following products will be installed:

Monitoring Agent for Tivoli Netcool/OMNIbus  V07.40.00.00

Are your selections correct [ 1=Yes, 2=No ; default is “1” ] ? 1

… installing “Monitoring Agent for Tivoli Netcool/OMNIbus  V07.40.00.00 for Tivoli Enterprise Monitoring Server support”; please wait.

=> installed “Monitoring Agent for Tivoli Netcool/OMNIbus  V07.40.00.00 for Tivoli Enterprise Monitoring Server support”.
… Initializing component Monitoring Agent for Tivoli Netcool/OMNIbus  V07.40.00.00 for Tivoli Enterprise Monitoring Server support.
… Monitoring Agent for Tivoli Netcool/OMNIbus  V07.40.00.00 for Tivoli Enterprise Monitoring Server support initialized.

Do you want to install additional products or product support packages [ 1=Yes, 2=No ; default is “2” ] ?
… postprocessing; please wait.
… running /app/IBM/ITM/lx8266/cq/bin/helpmerg.sh
… finished postprocessing.
Installation step complete.

Following Tivoli Enterprise Monitoring Server product support were installed:
*) Monitoring Agent for Tivoli Netcool/OMNIbus

Note: This operation causes the monitoring server to restart.
Do you want to seed product support on the Tivoli Enterprise Monitoring Server? [ 1=Yes, 2=No ; default is “1” ] ?
Starting TEMS…
TEMS started…

The following new Tivoli Enterprise Monitoring Server product support packages will be seeded:
*) Monitoring Agent for Tivoli Netcool/OMNIbus

Choose one of the following options to add or update the situation distribution definition to include the default managed system groups:

1) ALL – This option adds the default managed system groups to all the applicable situations. Note that not all situations have the default managed group setting. For some, you might need to manually define the distribution in the Tivoli Enterprise Portal due to the specific content of the agent support package.
2) NONE – The default managed system group is not added to any situation.

Type your selections here [ number “1” or “ALL” is default ]:
1

Seeding support for Monitoring Agent for Tivoli Netcool/OMNIbus [1 of 1]
Product support seeding completed…
Stopping TEMS…
TEMS stopped…
All supports successfully seeded.

As a reminder, you should install product support on each of your TEM servers for any agents you have just installed.
This is done via the “/app/IBM/ITM/bin/itmcmd support” command on your TEM servers.

You may now configure any locally installed IBM Tivoli Monitoring product via the “/app/IBM/ITM/bin/itmcmd config” command.

insserv: warning: current start runlevel(s) (3 5) of script `vboxadd-x11′ overwrites defaults (empty).
insserv: Service network is missed in the runlevels 4 to use service ctrmc
insserv: Service syslog is missed in the runlevels 4 to use service ctrmc

Starting TEMS…
It can take up to ten minutes.
TEMS started…
Processing. Please wait…
Starting Tivoli Enterprise Monitoring Automation Server …
Tivoli Enterprise Monitoring Automation Server started
Processing. Please wait…
Starting IBM Eclipse Help Server …
IBM Eclipse Help Server started
Processing. Please wait…
Starting Tivoli Enterprise Portal Server …
Eclipse Help Server is required by Tivoli Enterprise Portal Server (TEPS) and will be started…
Eclipse Help Server is already started.
Tivoli Enterprise Portal Server started
Processing. Please wait…
Starting Warehouse Proxy …
Warehouse Proxy started
Processing. Please wait…
Starting Summarization and Pruning Agent …
Summarization and Pruning Agent started
Processing. Please wait…
Starting Monitoring Agent for Linux OS …
Monitoring Agent for Linux OS started

Reconfigure teps to complete the product support installation. Start the Manage Tivoli Enterprise Monitoring services console on the ITM server using the $CANDLEDIR/bin/itmcmd manage & command then right click Tivoli Enterprise Portal Server and select Configure from the drop down menu.

reconfigure-tepsTEPS will have to be stopped during configuration.reconfigure-teps-stopClick OK at the next popup window.

reconfigure-teps-common-event-console-configurationClick Save at the next window. Basically you do not want to change any parameters here, only want to reconfiguration to run and detect and include the new product support jar files. This procedure could take quite a while, so be patient.

reconfigure-teps-saveOnce the configuration is done, click Yes to start the TEPS server.

reconfigure-teps-start

Installing the IBM Tivoli Monitoring Agent for Netcool/Omnibus 8.1.

Start the monitoring agent installation on your omnibus server using install.sh

HUOMNIBUS001-P1:/Downloads/TIVOLI-IMAGES/OMNIBUS8-PACK/agent # ./install.sh
INSTALL

Enter the name of the IBM Tivoli Monitoring directory
[ default = /opt/IBM/ITM ]: /app/IBM/ITM

ITM home directory “/app/IBM/ITM” already exists.
OK to use it [ 1-yes, 2-no; “1” is default ]?

The following processes are currently running:

Product = Monitoring Agent for Linux OS  PID = 3773
install.sh warning: Existing products found to be running will be restarted during installation., continuing …

Continue with this installation [ 1-yes, 2-no; “1” is default ]?  1
Processing. Please wait…
Stopping Watchdog process…
Watchdog process was stopped.
Stopping Monitoring Agent for Linux OS …
Product Monitoring Agent for Linux OS was stopped gracefully.
Agent stopped…
/app/IBM/ITM

Select one of the following:

1) Install products to the local host.
2) Install products to depot for remote deployment (requires TEMS).
3) Install TEMS support for remote seeding
4) Exit install.

Please enter a valid number:  1

Initializing …
International Program License Agreement

Part 1 – General Terms

BY DOWNLOADING, INSTALLING, COPYING, ACCESSING, OR USING
THE PROGRAM YOU AGREE TO THE TERMS OF THIS AGREEMENT. IF
YOU ARE ACCEPTING THESE TERMS ON BEHALF OF ANOTHER PERSON
OR A COMPANY OR OTHER LEGAL ENTITY, YOU REPRESENT AND
WARRANT THAT YOU HAVE FULL AUTHORITY TO BIND THAT PERSON,
COMPANY, OR LEGAL ENTITY TO THESE TERMS. IF YOU DO NOT
AGREE TO THESE TERMS,

– DO NOT DOWNLOAD, INSTALL, COPY, ACCESS, OR USE THE
PROGRAM; AND

Press Enter to continue viewing the license agreement, or
enter “1” to accept the agreement, “2” to decline it, “3”
to print it, “4” to read non-IBM terms, or “99” to go back
to the previous screen.
1

Product packages are available in /Downloads/TIVOLI-IMAGES/OMNIBUS8-PACK/agent/unix

The following products are currently installed in “/app/IBM/ITM”:

IBM GSKit Security Interface V08.00.50.20 @ Linux x86_64 R2.6, R3.0 (64 bit)
Monitoring Agent for Linux OS V06.30.04.00 @ Linux x86_64 R2.6, R3.0 (64 bit)
Tivoli Enterprise Services User Interface V06.30.04.00 @ Linux x86_64 R2.6, R3.0 (64 bit)

All agents require that application support files that contain agent-specific information be installed on the Tivoli Enterprise Monitoring Server that the agents will connect to, Tivoli Enterprise Portal Server and Tivoli Enterprise Portal desktop and browser client. Install application support before starting to install any Tivoli Enterprise Monitoring Agents.

Product packages are available for this operating system and component support categories:

 1) IBM Tivoli Monitoring components for this operating system
 2) Tivoli Enterprise Portal Browser Client support
 3) Tivoli Enterprise Portal Desktop Client support
 4) Tivoli Enterprise Portal Server support
 5) Tivoli Enterprise Monitoring Server support
 6) Other operating systems

Type the number or type “q” to quit selection
[ number “1” or “IBM Tivoli Monitoring components for this operating system” is default ]:  1

You selected number “1” or “IBM Tivoli Monitoring components for this operating system”

Is the selection correct [ 1=Yes, 2=No ; default is “1” ] ? 1

The following products are available for installation:

1) Monitoring Agent for Tivoli Netcool/OMNIbus  V07.40.00.00
2) all of the above

Type the numbers that correspond to the products that you want to install. Type “b” to change operating system, or type “q” to quit selection.
If you enter more than one number, separate the numbers by a comma or a space.

Type your selections here:  1

The following products will be installed:

  Monitoring Agent for Tivoli Netcool/OMNIbus  V07.40.00.00

Are your selections correct [ 1=Yes, 2=No ; default is “1” ] ? 1

Do you want to check prerequisites for the above components? [ 1=Yes, 2=No ; default is “1” ] ? 1
Running Prerequisite Scanner.
This may take a few minutes depending on the number of components being checked and the machine’s performance.
Prerequisite Scanner results for the selected components:
NOT AVAILABLE    Monitoring Agent for Tivoli Netcool/OMNIbus        /app/IBM/ITM/logs/prereqscan/20150126-113643/COMMON/result.txt
NOT AVAILABLE    Tivoli Enterprise-supplied JRE        /app/IBM/ITM/logs/prereqscan/20150126-113643/COMMON/result.txt
NOT AVAILABLE    IBM Tivoli Monitoring Shared Libraries        /app/IBM/ITM/logs/prereqscan/20150126-113643/COMMON/result.txt
NOT AVAILABLE    IBM GSKit Security Interface        /app/IBM/ITM/logs/prereqscan/20150126-113643/COMMON/result.txt

PASS    Prerequisite Scanner Overall Result        /app/IBM/ITM/logs/prereqscan/20150126-113643/COMMON/result.txt

Do you want to continue with the installation [ 1=Yes, 2=No ; default is “1” ] ? 1

… installing “Monitoring Agent for Tivoli Netcool/OMNIbus  V07.40.00.00 for Linux x86_64 R2.6, R3.0 (64 bit)”; please wait.

=> installed “Monitoring Agent for Tivoli Netcool/OMNIbus  V07.40.00.00 for Linux x86_64 R2.6, R3.0 (64 bit)”.
… Initializing component Monitoring Agent for Tivoli Netcool/OMNIbus  V07.40.00.00 for Linux x86_64 R2.6, R3.0 (64 bit).
… Monitoring Agent for Tivoli Netcool/OMNIbus  V07.40.00.00 for Linux x86_64 R2.6, R3.0 (64 bit) initialized.

Do you want to install additional products or product support packages [ 1=Yes, 2=No ; default is “2” ] ?
… postprocessing; please wait.
… finished postprocessing.
Installation step complete.

As a reminder, you should install product support on each of your TEM servers for any agents you have just installed.
This is done via the “/app/IBM/ITM/bin/itmcmd support” command on your TEM servers.

You may now configure any locally installed IBM Tivoli Monitoring product via the “/app/IBM/ITM/bin/itmcmd config” command.

insserv: warning: current start runlevel(s) (3 5) of script `vboxadd-x11′ overwrites defaults (empty).
insserv: Service network is missed in the runlevels 4 to use service ctrmc
insserv: Service syslog is missed in the runlevels 4 to use service ctrmc

Processing. Please wait…
Starting Monitoring Agent for Linux OS ..

To complete the agent installation the itm_os.sql file will have to be run by omnibus to apply the necessary modifications on the Omnibus database. In our case this file was located in:

/app/IBM/ITM/lx8266/no/bin

So we executed the following command:

HUOMNIBUS001-P1:/app/IBM/ITM/lx8266/no/bin # /app/IBM/tivoli/netcool/omnibus/bin/nco_sql -user root -S NCOMS -P ****** < /app/IBM/ITM/lx8266/no/bin/itm_os.sql
(0 rows affected)
(0 rows affected)
(0 rows affected)
(0 rows affected)
(0 rows affected)
(0 rows affected)
(0 rows affected)
(0 rows affected)
(0 rows affected)
(0 rows affected)
(0 rows affected)
(0 rows affected)
(0 rows affected)
(0 rows affected)
(0 rows affected)
(0 rows affected)
(0 rows affected)
(0 rows affected)
(0 rows affected)
(0 rows affected)
(0 rows affected)
(0 rows affected)
(0 rows affected)
(0 rows affected)
(0 rows affected)
(0 rows affected)
(0 rows affected)
(0 rows affected)
(0 rows affected)
(0 rows affected)

Configuring the IBM Tivoli Monitoring Agent for Netcool/Omnibus 8.1.

Start the Manage Tivoli Enterprise Monitoring services console on the Omnibus server using the $CANDLEDIR/bin/itmcmd manage & command then right click on Tivoli Monitoring Agent for Netcool/Omnibus and select Configure from the drop down menu.

omnibus-itm-agent-configureSpecify the log directory of the installed Netcool Omnibus 8.1 Server.

omnibus-itm-agent-configure-log-directoryThen specify the name of the running objectserver. We used the default objectserver name which is NCOMS. Click OK to continute to the second configuration step.

omnibus-itm-agent-configure-objectserverSpecify the name of the TEMS or RTEMS where you want to get your agent connected to, then click save.

omnibus-itm-agent-CONNECTION

Right click on the monitoring agent, then select Start Service to start the monitoring agent.

omnibus-itm-agent-startAfter a few seconds the agent should be popping up on your TEPS console like this:

teps-omnibus-agent


Installing & Configuring the TADDM 7.3 ITM Agent

The Monitoring Agent for TADDM Serviceability and Manageability 7.2.2  is located on the 3rd package of the TADDM installation bundle. Which is TADDM_7.3.0_3_OF_4_LNX_X86_ML.zip at the time of writing.

Before we Install the Monitoring Agent for TADDM Serviceability and Manageability  we need to make sure that the product support is installed on TEPS and TEMS. As we have both running on the same server in our test environment, we only have to complete the procedure once. As usual we use SLES 11 SP3 as the installation platform. The installation is started by executing install.sh from the taddm agent image directory.

Install the Monitoring Agent for TADDM Serviceability and Manageability

HUITM001-P1:/Downloads/TIVOLI-IMAGES/TADDM73PACK/itm-selfmon-support/UNIX # ./install.sh
INSTALL

Enter the name of the IBM Tivoli Monitoring directory
[ default = /opt/IBM/ITM ]: /app/IBM/ITM

ITM home directory “/app/IBM/ITM” already exists.
OK to use it [ 1-yes, 2-no; “1” is default ]?

The following processes are currently running:

Product = Monitoring Agent for Linux OS  PID = 1348
Product = IBM Eclipse Help Server  PID = 23946
Product = Tivoli Enterprise Monitoring Automation Server  PID = 10236
Product = Tivoli Enterprise Portal Server  PID = 26087
Product = Tivoli Enterprise Monitoring Server  PID = 16462
install.sh warning: Existing products found to be running will be restarted during installation., continuing …

Continue with this installation [ 1-yes, 2-no; “1” is default ]?  1
Processing. Please wait…
Stopping Tivoli Enterprise Portal Server …
Product Tivoli Enterprise Portal Server was stopped gracefully.
Product IBM Eclipse Help Server was stopped gracefully.
Agent stopped…
Processing. Please wait…
Stopping IBM Eclipse Help Server …
KCIIN0196E Agent is not running…
Processing. Please wait…
Stopping Watchdog process…
Watchdog process was stopped.
Stopping Monitoring Agent for Linux OS …
Product Monitoring Agent for Linux OS was stopped gracefully.
Agent stopped…
Processing. Please wait…
Stopping Tivoli Enterprise Monitoring Automation Server …
Product Tivoli Enterprise Monitoring Automation Server was stopped gracefully.
Agent stopped…
Stopping TEMS…
It can take up to ten minutes.
TEMS stopped…
/app/IBM/ITM

Select one of the following:

1) Install products to the local host.
2) Install products to depot for remote deployment (requires TEMS).
3) Install TEMS support for remote seeding
4) Exit install.

Please enter a valid number:  1

Initializing …
International Program License Agreement

Part 1 – General Terms

BY DOWNLOADING, INSTALLING, COPYING, ACCESSING, CLICKING ON
AN “ACCEPT” BUTTON, OR OTHERWISE USING THE PROGRAM,
LICENSEE AGREES TO THE TERMS OF THIS AGREEMENT. IF YOU ARE
ACCEPTING THESE TERMS ON BEHALF OF LICENSEE, YOU REPRESENT
AND WARRANT THAT YOU HAVE FULL AUTHORITY TO BIND LICENSEE
TO THESE TERMS. IF YOU DO NOT AGREE TO THESE TERMS,

– DO NOT DOWNLOAD, INSTALL, COPY, ACCESS, CLICK ON AN
“ACCEPT” BUTTON, OR USE THE PROGRAM; AND

– PROMPTLY RETURN THE UNUSED MEDIA, DOCUMENTATION, AND

Press Enter to continue viewing the license agreement, or
enter “1” to accept the agreement, “2” to decline it, “3”
to print it, “4” to read non-IBM terms, or “99” to go back
to the previous screen.
1

Product packages are available in /Downloads/TIVOLI-IMAGES/TADDM73PACK/itm-selfmon-support/UNIX/unix

The following products are currently installed in “/app/IBM/ITM”:

Agentless Monitoring for AIX Operating Systems V06.30.04.00 @ Tivoli Enterprise Portal Browser Client support
Agentless Monitoring for AIX Operating Systems V06.30.04.00 @ Tivoli Enterprise Portal Desktop Client support
Agentless Monitoring for AIX Operating Systems V06.30.04.00 @ Tivoli Enterprise Portal Server support
Agentless Monitoring for HP-UX Operating Systems V06.30.04.00 @ Tivoli Enterprise Portal Browser Client support
Agentless Monitoring for HP-UX Operating Systems V06.30.04.00 @ Tivoli Enterprise Portal Desktop Client support
Agentless Monitoring for HP-UX Operating Systems V06.30.04.00 @ Tivoli Enterprise Portal Server support
Agentless Monitoring for Linux Operating Systems V06.30.04.00 @ Tivoli Enterprise Portal Browser Client support
Agentless Monitoring for Linux Operating Systems V06.30.04.00 @ Tivoli Enterprise Portal Desktop Client support
Agentless Monitoring for Linux Operating Systems V06.30.04.00 @ Tivoli Enterprise Portal Server support
Agentless Monitoring for Solaris Operating Systems V06.30.04.00 @ Tivoli Enterprise Portal Browser Client support
Agentless Monitoring for Solaris Operating Systems V06.30.04.00 @ Tivoli Enterprise Portal Desktop Client support
Agentless Monitoring for Solaris Operating Systems V06.30.04.00 @ Tivoli Enterprise Portal Server support
Agentless Monitoring for Windows Operating Systems V06.30.04.00 @ Tivoli Enterprise Portal Browser Client support
Agentless Monitoring for Windows Operating Systems V06.30.04.00 @ Tivoli Enterprise Portal Desktop Client support
Agentless Monitoring for Windows Operating Systems V06.30.04.00 @ Tivoli Enterprise Portal Server support
IBM Eclipse Help Server V06.30.04.00 @ Linux Intel R2.6, R3.0 (32 bit)/Intel R2.6 GCC 2.9.5 (64 bit)/Intel R2.6, R3.0 (64 bit)/x86_64 R2.6, R3.0 (32 bit)/x86_64 R2.6, R3.0 (64 bit)
IBM GSKit Security Interface V08.00.50.20 @ Linux x86_64 R2.6, R3.0 (64 bit)
IBM HTTP Server V08.00.06.00 @ Linux x86_64 R2.6, R3.0 (64 bit)
IBM Installation Manager V01.06.03.01 @ Linux x86_64 R2.6, R3.0 (64 bit)
IBM Tivoli Enterprise Portal Server Extensions V08.00.06.00 @ Linux x86_64 R2.6, R3.0 (64 bit)
Monitoring Agent for IBM Tivoli Monitoring 5.x Endpoint V06.23.05.00 @ Tivoli Enterprise Portal Server support
Monitoring Agent for Linux OS V06.30.04.00 @ Linux x86_64 R2.6, R3.0 (64 bit)
Monitoring Agent for Linux OS V06.30.04.00 @ Tivoli Enterprise Portal Browser Client support
Monitoring Agent for Linux OS V06.30.04.00 @ Tivoli Enterprise Portal Desktop Client support
Monitoring Agent for Linux OS V06.30.04.00 @ Tivoli Enterprise Portal Server support
Monitoring Agent for UNIX Logs V06.23.05.00 @ Tivoli Enterprise Portal Browser Client support
Monitoring Agent for UNIX Logs V06.23.05.00 @ Tivoli Enterprise Portal Desktop Client support
Monitoring Agent for UNIX Logs V06.23.05.00 @ Tivoli Enterprise Portal Server support
Monitoring Agent for UNIX OS V06.30.04.00 @ Tivoli Enterprise Portal Browser Client support
Monitoring Agent for UNIX OS V06.30.04.00 @ Tivoli Enterprise Portal Desktop Client support
Monitoring Agent for UNIX OS V06.30.04.00 @ Tivoli Enterprise Portal Server support
Monitoring Agent for Windows OS V06.30.04.00 @ Tivoli Enterprise Portal Browser Client support
Monitoring Agent for Windows OS V06.30.04.00 @ Tivoli Enterprise Portal Desktop Client support
Monitoring Agent for Windows OS V06.30.04.00 @ Tivoli Enterprise Portal Server support
Monitoring Agent for i5/OS V06.30.04.00 @ Tivoli Enterprise Portal Browser Client support
Monitoring Agent for i5/OS V06.30.04.00 @ Tivoli Enterprise Portal Desktop Client support
Monitoring Agent for i5/OS V06.30.04.00 @ Tivoli Enterprise Portal Server support
Summarization and Pruning Agent V06.30.04.00 @ Linux x86_64 R2.6, R3.0 (64 bit)
Summarization and Pruning Agent V06.30.04.00 @ Tivoli Enterprise Portal Browser Client support
Summarization and Pruning Agent V06.30.04.00 @ Tivoli Enterprise Portal Desktop Client support
Summarization and Pruning Agent V06.30.04.00 @ Tivoli Enterprise Portal Server support
TEC GUI Integration V06.30.04.00 @ Tivoli Enterprise Portal Browser Client support
TEC GUI Integration V06.30.04.00 @ Tivoli Enterprise Portal Desktop Client support
TEC GUI Integration V06.30.04.00 @ Tivoli Enterprise Portal Server support
Tivoli Enterprise Monitoring Automation Server V06.30.04.00 @ Linux x86_64 R2.6, R3.0 (64 bit)
Tivoli Enterprise Monitoring SOAP Server V06.30.04.00 @ Linux x86_64 R2.6, R3.0 (64 bit)
Tivoli Enterprise Monitoring Server V06.30.04.00 @ Linux x86_64 R2.6, R3.0 (64 bit)
Tivoli Enterprise Portal Browser Client V06.30.04.00 @ Linux x86_64 R2.6, R3.0 (64 bit)
Tivoli Enterprise Portal Desktop Client V06.30.04.00 @ Linux x86_64 R2.6, R3.0 (64 bit)
Tivoli Enterprise Portal Server V06.30.04.00 @ Linux x86_64 R2.6, R3.0 (64 bit)
Tivoli Enterprise Services User Interface Extensions V06.30.04.00 @ Linux x86_64 R2.6, R3.0 (64 bit)
Tivoli Enterprise Services User Interface V06.30.04.00 @ Linux x86_64 R2.6, R3.0 (64 bit)
Tivoli Performance Analyzer V06.30.04.00 @ Tivoli Enterprise Portal Browser Client support
Tivoli Performance Analyzer V06.30.04.00 @ Tivoli Enterprise Portal Desktop Client support
Tivoli Performance Analyzer V06.30.04.00 @ Tivoli Enterprise Portal Server support
Universal Agent V06.23.05.00 @ Tivoli Enterprise Portal Browser Client support
Universal Agent V06.23.05.00 @ Tivoli Enterprise Portal Desktop Client support
Universal Agent V06.23.05.00 @ Tivoli Enterprise Portal Server support
Warehouse Proxy V06.30.04.00 @ Linux x86_64 R2.6, R3.0 (64 bit)
Warehouse Proxy V06.30.04.00 @ Tivoli Enterprise Portal Browser Client support
Warehouse Proxy V06.30.04.00 @ Tivoli Enterprise Portal Desktop Client support
Warehouse Proxy V06.30.04.00 @ Tivoli Enterprise Portal Server support

All agents require that application support files that contain agent-specific information be installed on the Tivoli Enterprise Monitoring Server that the agents will connect to, Tivoli Enterprise Portal Server and Tivoli Enterprise Portal desktop and browser client. Install application support before starting to install any Tivoli Enterprise Monitoring Agents.

KCIIN2463W Warning: This installation media does not contain any components which can be run on the current system platform architecture. To install components which can run on this system, please locate the installation media containing files similiar to *lx82*.jar.
NOTE: IF YOU ARE INSTALLING APPLICATION SUPPORT, CONTINUE WITH THE INSTALLATION TO SEE A LIST OF SUPPORT FILES.

Press Enter to continue, or type ‘q’ to quit:

Product packages are available for the following operating systems and component support categories:

1) Tivoli Enterprise Portal Browser Client support
2) Tivoli Enterprise Portal Desktop Client support
3) Tivoli Enterprise Portal Server support
4) Tivoli Enterprise Monitoring Server support

Type the number for the OS you want, or type “q” to quit selection:  1

You selected number “1” or “Tivoli Enterprise Portal Browser Client support”

Is the selection correct [ 1=Yes, 2=No ; default is “1” ] ? 1

The following application supports are available for installation:

1) Monitoring Agent for TADDM Serviceability and Manageability  V07.22.00.00
2) all of the above

Type the numbers that correspond to the products that you want to install. Type “b” to change operating system, or type “q” to quit selection.
If you enter more than one number, separate the numbers by a comma or a space.

Type your selections here:  1

The following products will be installed:

Monitoring Agent for TADDM Serviceability and Manageability  V07.22.00.00

Are your selections correct [ 1=Yes, 2=No ; default is “1” ] ? 1

… installing “Monitoring Agent for TADDM Serviceability and Manageability  V07.22.00.00 for Tivoli Enterprise Portal Browser Client support”; please wait.

=> installed “Monitoring Agent for TADDM Serviceability and Manageability  V07.22.00.00 for Tivoli Enterprise Portal Browser Client support”.
… Initializing component Monitoring Agent for TADDM Serviceability and Manageability  V07.22.00.00 for Tivoli Enterprise Portal Browser Client support.
… Monitoring Agent for TADDM Serviceability and Manageability  V07.22.00.00 for Tivoli Enterprise Portal Browser Client support initialized.

Do you want to install additional products or product support packages [ 1=Yes, 2=No ; default is “2” ] ? 1

KCIIN2463W Warning: This installation media does not contain any components which can be run on the current system platform architecture. To install components which can run on this system, please locate the installation media containing files similiar to *lx82*.jar.
NOTE: IF YOU ARE INSTALLING APPLICATION SUPPORT, CONTINUE WITH THE INSTALLATION TO SEE A LIST OF SUPPORT FILES.

Press Enter to continue, or type ‘q’ to quit:

Product packages are available for the following operating systems and component support categories:

1) Tivoli Enterprise Portal Browser Client support
2) Tivoli Enterprise Portal Desktop Client support
3) Tivoli Enterprise Portal Server support
4) Tivoli Enterprise Monitoring Server support

Type the number for the OS you want, or type “q” to quit selection:  2

You selected number “2” or “Tivoli Enterprise Portal Desktop Client support”

Is the selection correct [ 1=Yes, 2=No ; default is “1” ] ? 1

The following application supports are available for installation:

1) Monitoring Agent for TADDM Serviceability and Manageability  V07.22.00.00
2) all of the above

Type the numbers that correspond to the products that you want to install. Type “b” to change operating system, or type “q” to quit selection.
If you enter more than one number, separate the numbers by a comma or a space.

Type your selections here:  1

The following products will be installed:

Monitoring Agent for TADDM Serviceability and Manageability  V07.22.00.00

Are your selections correct [ 1=Yes, 2=No ; default is “1” ] ? 1

… installing “Monitoring Agent for TADDM Serviceability and Manageability  V07.22.00.00 for Tivoli Enterprise Portal Desktop Client support”; please wait.

=> installed “Monitoring Agent for TADDM Serviceability and Manageability  V07.22.00.00 for Tivoli Enterprise Portal Desktop Client support”.
… Initializing component Monitoring Agent for TADDM Serviceability and Manageability  V07.22.00.00 for Tivoli Enterprise Portal Desktop Client support.
… Monitoring Agent for TADDM Serviceability and Manageability  V07.22.00.00 for Tivoli Enterprise Portal Desktop Client support initialized.

Do you want to install additional products or product support packages [ 1=Yes, 2=No ; default is “2” ] ? 1

KCIIN2463W Warning: This installation media does not contain any components which can be run on the current system platform architecture. To install components which can run on this system, please locate the installation media containing files similiar to *lx82*.jar.
NOTE: IF YOU ARE INSTALLING APPLICATION SUPPORT, CONTINUE WITH THE INSTALLATION TO SEE A LIST OF SUPPORT FILES.

Press Enter to continue, or type ‘q’ to quit:

Product packages are available for the following operating systems and component support categories:

 1) Tivoli Enterprise Portal Browser Client support
 2) Tivoli Enterprise Portal Desktop Client support
 3) Tivoli Enterprise Portal Server support
 4) Tivoli Enterprise Monitoring Server support

Type the number for the OS you want, or type “q” to quit selection:  3

You selected number “3” or “Tivoli Enterprise Portal Server support”

Is the selection correct [ 1=Yes, 2=No ; default is “1” ] ? 1

The following application supports are available for installation:

1) Monitoring Agent for TADDM Serviceability and Manageability  V07.22.00.00
2) all of the above

Type the numbers that correspond to the products that you want to install. Type “b” to change operating system, or type “q” to quit selection.
If you enter more than one number, separate the numbers by a comma or a space.

Type your selections here:  1

The following products will be installed:

Monitoring Agent for TADDM Serviceability and Manageability  V07.22.00.00

Are your selections correct [ 1=Yes, 2=No ; default is “1” ] ?

… installing “Monitoring Agent for TADDM Serviceability and Manageability  V07.22.00.00 for Tivoli Enterprise Portal Server support”; please wait.

=> installed “Monitoring Agent for TADDM Serviceability and Manageability  V07.22.00.00 for Tivoli Enterprise Portal Server support”.
… Initializing component Monitoring Agent for TADDM Serviceability and Manageability  V07.22.00.00 for Tivoli Enterprise Portal Server support.
… Monitoring Agent for TADDM Serviceability and Manageability  V07.22.00.00 for Tivoli Enterprise Portal Server support initialized.

KCIIN2463W Warning: This installation media does not contain any components which can be run on the current system platform architecture. To install components which can run on this system, please locate the installation media containing files similiar to *lx82*.jar.
NOTE: IF YOU ARE INSTALLING APPLICATION SUPPORT, CONTINUE WITH THE INSTALLATION TO SEE A LIST OF SUPPORT FILES.

Press Enter to continue, or type ‘q’ to quit:

Product packages are available for the following operating systems and component support categories:

1) Tivoli Enterprise Portal Browser Client support
2) Tivoli Enterprise Portal Desktop Client support
3) Tivoli Enterprise Portal Server support
4) Tivoli Enterprise Monitoring Server support

Type the number for the OS you want, or type “q” to quit selection:  4

You selected number “4” or “Tivoli Enterprise Monitoring Server support”

Is the selection correct [ 1=Yes, 2=No ; default is “1” ] ? 1

The following application supports are available for installation:

1) Monitoring Agent for TADDM Serviceability and Manageability  V07.22.00.00
2) all of the above

Type the numbers that correspond to the products that you want to install. Type “b” to change operating system, or type “q” to quit selection.
If you enter more than one number, separate the numbers by a comma or a space.

Type your selections here:  1

The following products will be installed:

Monitoring Agent for TADDM Serviceability and Manageability  V07.22.00.00

Are your selections correct [ 1=Yes, 2=No ; default is “1” ] ? 1

… installing “Monitoring Agent for TADDM Serviceability and Manageability  V07.22.00.00 for Tivoli Enterprise Monitoring Server support”; please wait.

=> installed “Monitoring Agent for TADDM Serviceability and Manageability  V07.22.00.00 for Tivoli Enterprise Monitoring Server support”.
… Initializing component Monitoring Agent for TADDM Serviceability and Manageability  V07.22.00.00 for Tivoli Enterprise Monitoring Server support.
… Monitoring Agent for TADDM Serviceability and Manageability  V07.22.00.00 for Tivoli Enterprise Monitoring Server support initialized.

Do you want to install additional products or product support packages [ 1=Yes, 2=No ; default is “2” ] ?
… postprocessing; please wait.
… running /app/IBM/ITM/lx8266/cq/bin/helpmerg.sh
… finished postprocessing.
Installation step complete.

Following Tivoli Enterprise Monitoring Server product support were installed:
*) Monitoring Agent for TADDM Serviceability and Manageability

Note: This operation causes the monitoring server to restart.
Do you want to seed product support on the Tivoli Enterprise Monitoring Server? [ 1=Yes, 2=No ; default is “1” ] ? 1
Starting TEMS…
TEMS started…

The following new Tivoli Enterprise Monitoring Server product support packages will be seeded:
*) Monitoring Agent for TADDM Serviceability and Manageability

Choose one of the following options to add or update the situation distribution definition to include the default managed system groups:

1) ALL – This option adds the default managed system groups to all the applicable situations. Note that not all situations have the default managed group setting. For some, you might need to manually define the distribution in the Tivoli Enterprise Portal due to the specific content of the agent support package.
2) NONE – The default managed system group is not added to any situation.

Type your selections here [ number “1” or “ALL” is default ]:
1

Seeding support for Monitoring Agent for TADDM Serviceability and Manageability [1 of 1]
Product support seeding completed…
Stopping TEMS…
TEMS stopped…
All supports successfully seeded.

You may now configure any locally installed IBM Tivoli Monitoring product via the “/app/IBM/ITM/bin/itmcmd config” command.

insserv: warning: current start runlevel(s) (3 5) of script `vboxadd-x11′ overwrites defaults (empty).
insserv: Service network is missed in the runlevels 4 to use service ctrmc
insserv: Service syslog is missed in the runlevels 4 to use service ctrmc

Starting TEMS…
It can take up to ten minutes.
TEMS started…
Processing. Please wait…
Starting Tivoli Enterprise Monitoring Automation Server …
Tivoli Enterprise Monitoring Automation Server started
Processing. Please wait…
Starting IBM Eclipse Help Server …
IBM Eclipse Help Server started
Processing. Please wait…
Starting Tivoli Enterprise Portal Server …
Eclipse Help Server is required by Tivoli Enterprise Portal Server (TEPS) and will be started…
Eclipse Help Server is already started.
Tivoli Enterprise Portal Server started
Processing. Please wait…
Starting Monitoring Agent for Linux OS …
Monitoring Agent for Linux OS started

Once the product support installation is done you will need to reconfigure TEPS then we move on to install the actual agent on our TADDM 7.3 server. We start the installation by executing install.sh

 HUTADDM001-P1:/Downloads/TIVOLI-IMAGES/TADDM73PACK/itm-selfmon-support # ./install.sh
INSTALL

Enter the name of the IBM Tivoli Monitoring directory
[ default = /opt/IBM/ITM ]: /app/IBM/ITM

ITM home directory “/app/IBM/ITM” already exists.
OK to use it [ 1-yes, 2-no; “1” is default ]?  1

The following processes are currently running:

Product = Monitoring Agent for Linux OS  PID = 23040
install.sh warning: Existing products found to be running will be restarted during installation., continuing …

Continue with this installation [ 1-yes, 2-no; “1” is default ]?  1
Processing. Please wait…
Stopping Watchdog process…
Watchdog process was stopped.
Stopping Monitoring Agent for Linux OS …
Product Monitoring Agent for Linux OS was stopped gracefully.
Agent stopped…
/app/IBM/ITM

Select one of the following:

1) Install products to the local host.
2) Install products to depot for remote deployment (requires TEMS).
3) Install TEMS support for remote seeding
4) Exit install.

Please enter a valid number:  1

Initializing …
International Program License Agreement

Part 1 – General Terms

BY DOWNLOADING, INSTALLING, COPYING, ACCESSING, CLICKING ON
AN “ACCEPT” BUTTON, OR OTHERWISE USING THE PROGRAM,
LICENSEE AGREES TO THE TERMS OF THIS AGREEMENT. IF YOU ARE
ACCEPTING THESE TERMS ON BEHALF OF LICENSEE, YOU REPRESENT
AND WARRANT THAT YOU HAVE FULL AUTHORITY TO BIND LICENSEE
TO THESE TERMS. IF YOU DO NOT AGREE TO THESE TERMS,

– DO NOT DOWNLOAD, INSTALL, COPY, ACCESS, CLICK ON AN
“ACCEPT” BUTTON, OR USE THE PROGRAM; AND

– PROMPTLY RETURN THE UNUSED MEDIA, DOCUMENTATION, AND

Press Enter to continue viewing the license agreement, or
enter “1” to accept the agreement, “2” to decline it, “3”
to print it, “4” to read non-IBM terms, or “99” to go back
to the previous screen.
1

Product packages are available in /Downloads/TIVOLI-IMAGES/TADDM73PACK/itm-selfmon-support/unix

The following products are currently installed in “/app/IBM/ITM”:

IBM GSKit Security Interface V08.00.50.20 @ Linux x86_64 R2.6, R3.0 (64 bit)
Monitoring Agent for Linux OS V06.30.04.00 @ Linux x86_64 R2.6, R3.0 (64 bit)
Tivoli Enterprise Services User Interface V06.30.04.00 @ Linux x86_64 R2.6, R3.0 (64 bit)

All agents require that application support files that contain agent-specific information be installed on the Tivoli Enterprise Monitoring Server that the agents will connect to, Tivoli Enterprise Portal Server and Tivoli Enterprise Portal desktop and browser client. Install application support before starting to install any Tivoli Enterprise Monitoring Agents.

Product packages are available for this operating system and component support categories:

 1) IBM Tivoli Monitoring components for this operating system
 2) Tivoli Enterprise Portal Browser Client support
 3) Tivoli Enterprise Portal Desktop Client support
 4) Tivoli Enterprise Portal Server support
 5) Tivoli Enterprise Monitoring Server support
 6) Other operating systems

Type the number or type “q” to quit selection
[ number “1” or “IBM Tivoli Monitoring components for this operating system” is default ]:  1

You selected number “1” or “IBM Tivoli Monitoring components for this operating system”

Is the selection correct [ 1=Yes, 2=No ; default is “1” ] ? 1

The following products are available for installation:

 1) Monitoring Agent for TADDM Serviceability and Manageability  V07.22.00.00
 2) Tivoli Enterprise Services User Interface Extensions  V06.22.04.00
 3) all of the above

Type the numbers that correspond to the products that you want to install. Type “b” to change operating system, or type “q” to quit selection.
If you enter more than one number, separate the numbers by a comma or a space.

Type your selections here:  1

The following products will be installed:

  Monitoring Agent for TADDM Serviceability and Manageability  V07.22.00.00

Are your selections correct [ 1=Yes, 2=No ; default is “1” ] ? 1

Do you want to check prerequisites for the above components? [ 1=Yes, 2=No ; default is “1” ] ? 1
Running Prerequisite Scanner.
This may take a few minutes depending on the number of components being checked and the machine’s performance.
Prerequisite Scanner results for the selected components:
NOT AVAILABLE   Monitoring Agent for TADDM Serviceability and Manageability             /app/IBM/ITM/logs/prereqscan/20150123-100816/COMMON/result.txt
NOT AVAILABLE   Tivoli Enterprise-supplied JRE          /app/IBM/ITM/logs/prereqscan/20150123-100816/COMMON/result.txt
NOT AVAILABLE   IBM Tivoli Monitoring Shared Libraries          /app/IBM/ITM/logs/prereqscan/20150123-100816/COMMON/result.txt
NOT AVAILABLE   IBM GSKit Security Interface            /app/IBM/ITM/logs/prereqscan/20150123-100816/COMMON/result.txt

PASS    Prerequisite Scanner Overall Result             /app/IBM/ITM/logs/prereqscan/20150123-100816/COMMON/result.txt

Do you want to continue with the installation [ 1=Yes, 2=No ; default is “1” ] ? 1

… installing “Monitoring Agent for TADDM Serviceability and Manageability  V07.22.00.00 for Linux x86_64 R2.6, R3.0 (64 bit)”; please wait.

=> installed “Monitoring Agent for TADDM Serviceability and Manageability  V07.22.00.00 for Linux x86_64 R2.6, R3.0 (64 bit)”.
… Initializing component Monitoring Agent for TADDM Serviceability and Manageability  V07.22.00.00 for Linux x86_64 R2.6, R3.0 (64 bit).
… Monitoring Agent for TADDM Serviceability and Manageability  V07.22.00.00 for Linux x86_64 R2.6, R3.0 (64 bit) initialized.

Do you want to install additional products or product support packages [ 1=Yes, 2=No ; default is “2” ] ?
… postprocessing; please wait.
… finished postprocessing.
Installation step complete.

You may now configure any locally installed IBM Tivoli Monitoring product via the “/app/IBM/ITM/bin/itmcmd config” command.

insserv: warning: current start runlevel(s) (3 5) of script `vboxadd-x11′ overwrites defaults (empty).

Processing. Please wait…
Starting Monitoring Agent for Linux OS …
Monitoring Agent for Linux OS started

Configure the Monitoring Agent for TADDM Serviceability and Manageability

Start the Manage Tivoli Enterprise Monitoring services console on the newly installed agent box using the $CANDLEDIR/bin/itmcmd manage & command.
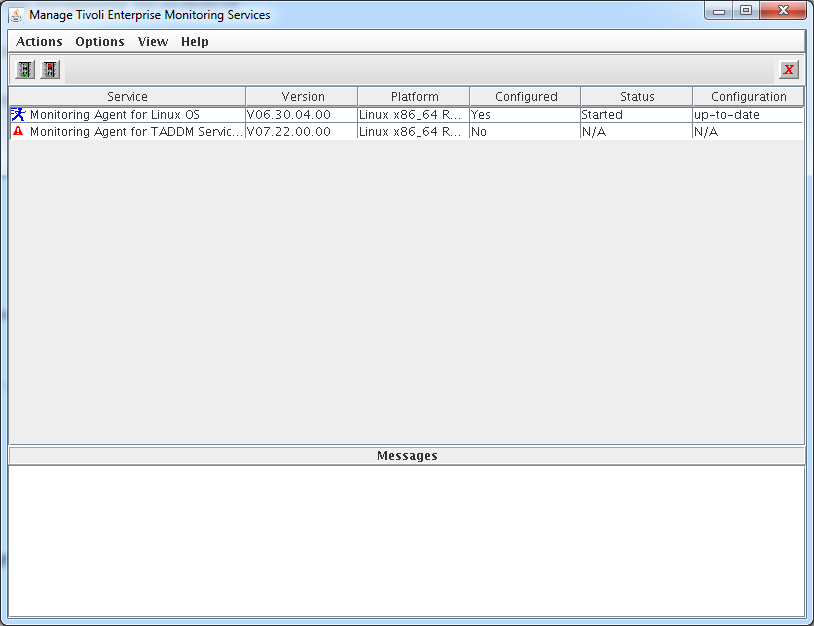
tivoli-enterprise-monitoring-services-console-startedRight click on the Monitoring Agent for TADDM Serviceability and Manageability entry and select configure.
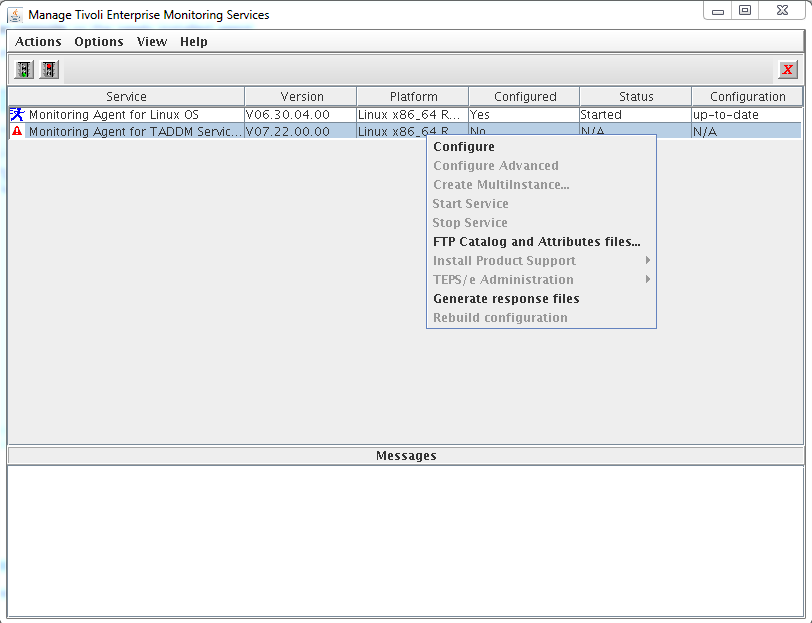
tivoli-enterprise-monitoring-services-console-configureFill in the login credentials for your TADDM server then click Next.
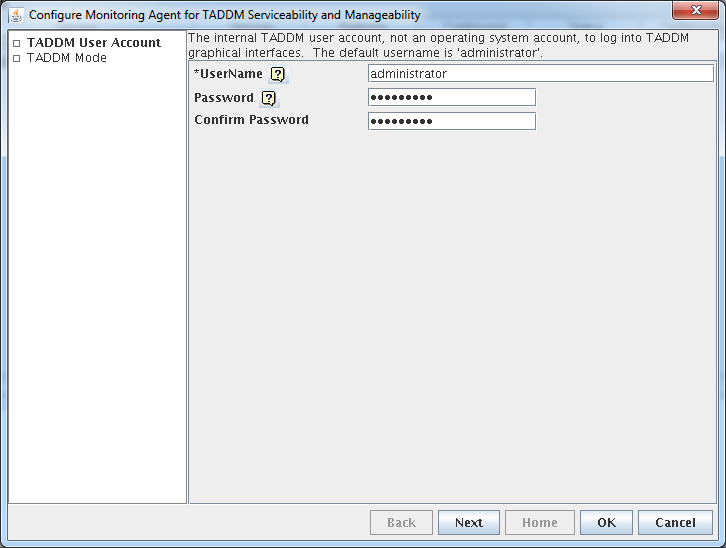
tivoli-enterprise-monitoring-services-console-configure-taddm-loginSelect the TADDM mode appropriate for your TADDM server. We picked Primary Storage Server as we have installed our agent on this type of TADDM server. Click OK to finish the first part of agent configuration.
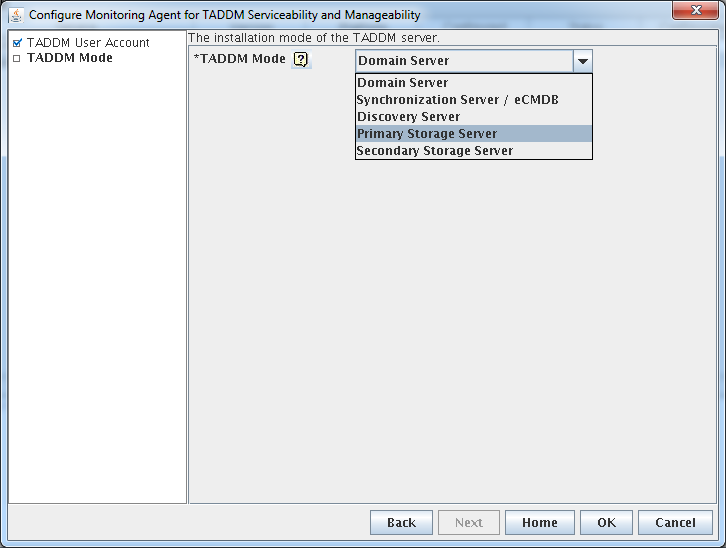
tivoli-enterprise-monitoring-services-console-configure-select-taddm-serviceFill in the agent connection details in the next window. The value here normally is either an rtems in your environment or the hub tems if you are running a one box ITM test environment just like myself. Click Save to finialize the agent configuration.
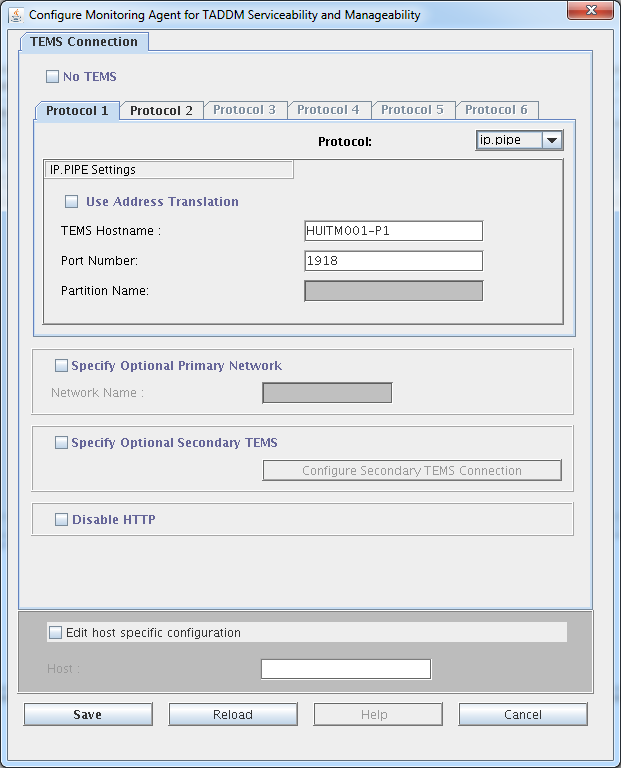
tivoli-enterprise-monitoring-services-console-configure-agent-connection-parametersThe Monitoring Agent for TADDM Serviceability and Manageability will have to be started from the command line as it only works correctly if the taddmusr user is running it.

HUTADDM001-P1:/app/IBM/ITM/bin # su – taddmusr
taddmusr@HUTADDM001-P1:~> /app/IBM/ITM/bin/itmcmd agent start za
Processing. Please wait…
Starting Monitoring Agent for TADDM Serviceability and Manageability …
Monitoring Agent for TADDM Serviceability and Manageability started
taddmusr@HUTADDM001-P1:~>

Finally this is how the agent looks on the TEP console:
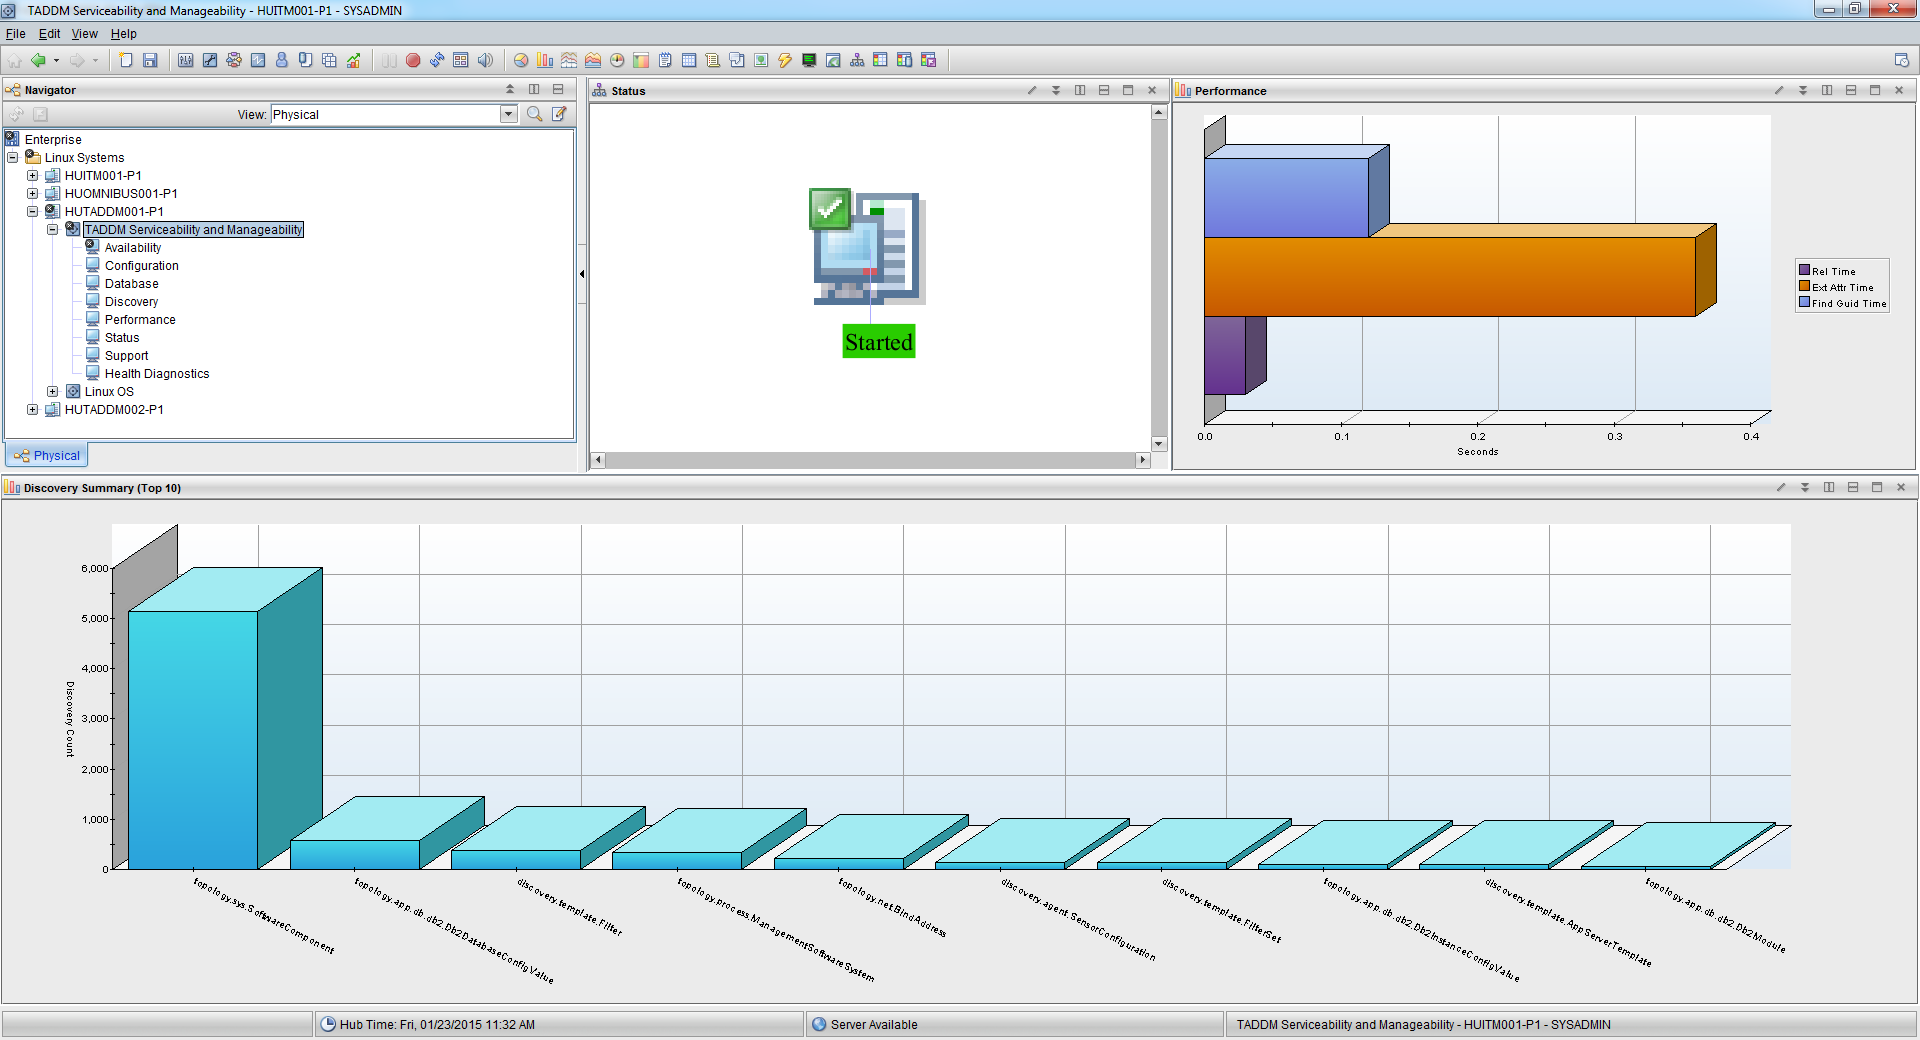
taddm-agent-teps-consoleIf you need more information on the topic please see the official agent documentation here.