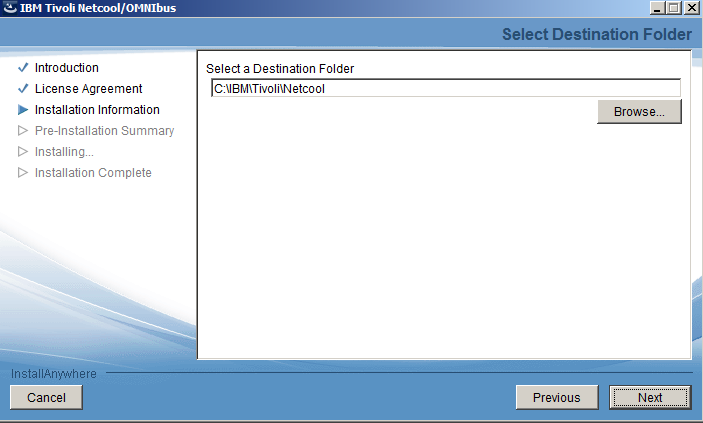
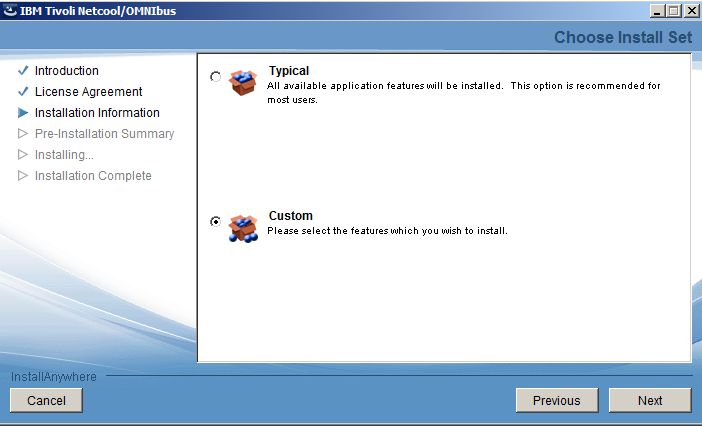
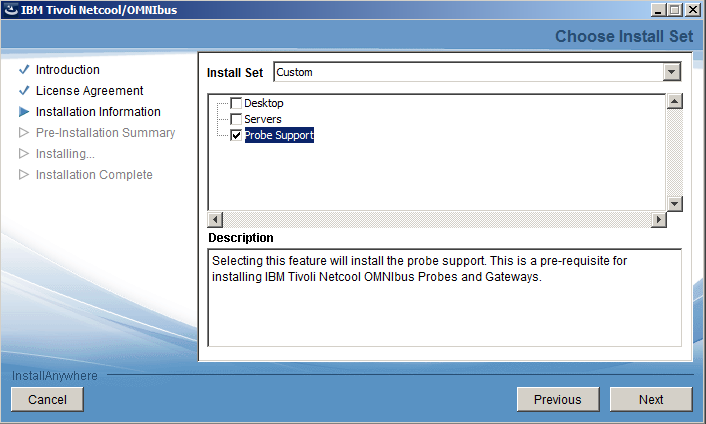
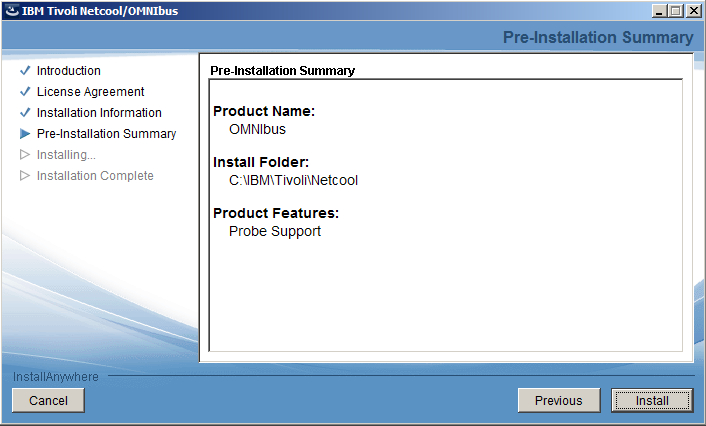
As proof of concept today we are going to try to install IBM Tivoli Monitoring 6.3.0.3 on CentOS 7 which should be identical as the Red Hat Linux Server 7 ( RHEL ). We installed the 64bit version of CentOS using the KDE option on a virtual box VM. The Software Compatibility Matrix provided by IBM states a good couple of prerequisites. We installed these prereq. software and added a few on our own to make sure that the installation goes through without any problem.
Set the ip and the hostname in the /etc/hosts file. Either set up static ip or make sure that the DHCP rolls you the same ip all the time.
The following software was installed before the installation as a prerequsite:
The GNU C Library 32bit version this is required by GSkit to install correctly.
yum install glibc.i686
Korn Shell latest version, this is needed by the installer to run correctly.
yum install ksh
This package contains the pamlib.so which is required by the installer.
yum install pam.x86_64
In case you do not have the X installed on your CentOS box:
yum install libX11.x86_64
yum install libXfixes.x86_64
yum install libXi.x86_64
We needed all libstdc ( both 64 and 32 bit ones ) and all compat-libstdc++ ( 32 bit and 64 bit ones as well )
We performed a search to find the latest libraries…
-sh-4.2# yum search libstdc
Loaded plugins: fastestmirror, langpacks
Loading mirror speeds from cached hostfile
* base: centos.mirroraustria.at
* extras: centos.mirroraustria.at
* updates: ftp.freepark.org
=========================================================================================================== N/S matched: libstdc ============================================================================================================
compat-libstdc++-33.i686 : Compatibility standard C++ libraries
compat-libstdc++-33.x86_64 : Compatibility standard C++ libraries
libstdc++.i686 : GNU Standard C++ Library
libstdc++.x86_64 : GNU Standard C++ Library
libstdc++-devel.i686 : Header files and libraries for C++ development
libstdc++-devel.x86_64 : Header files and libraries for C++ development
libstdc++-docs.x86_64 : Documentation for the GNU standard C++ library
libstdc++-static.i686 : Static libraries for the GNU standard C++ library
libstdc++-static.x86_64 : Static libraries for the GNU standard C++ library
Name and summary matches only, use “search all” for everything.
… and performed the installation
yum install compat-libstdc++-33.i686
yum install compat-libstdc++-33.x86_64
yum install libstdc++.i686
yum install libstdc++.x86_64
We also needed to disable SeLinux as a prereq. by the installer. Edit vim /etc/sysconfig/selinux file and set the SELINUX parameter to disabled as shown below:
# This file controls the state of SELinux on the system.
# SELINUX= can take one of these three values:
# enforcing – SELinux security policy is enforced.
# permissive – SELinux prints warnings instead of enforcing.
# disabled – No SELinux policy is loaded.
SELINUX=disabled
# SELINUXTYPE= can take one of three two values:
# targeted – Targeted processes are protected,
# minimum – Modification of targeted policy. Only selected processes are protected.
# mls – Multi Level Security protection.
SELINUXTYPE=targeted
Now all the required packages and libraries are installed we can go ahead and start the installation:
setarch $(uname -m) –uname-2.6
This command will put in a special shell where uname -r will show 2.6.xxx as a kernel version. Be prepared that all the prereq. checks will fail as CentOS is not a supported platform luckily you can still install the product regardless the failed prereqs.
As a base installation we will use the IBM Tivoli Monitoring 6.3.0.2 installation bundle then upgrade to 6.3.0.3 as there is no 6.3.0.3 stand alone installation package exists yet.
Now start the installation using the install.sh command:
-sh-4.2# ./install.sh
INSTALL
Enter the name of the IBM Tivoli Monitoring directory
[ default = /opt/IBM/ITM ]: /app/IBM/ITM
ITM home directory “/app/IBM/ITM” already exists.
OK to use it [ 1-yes, 2-no; “1” is default ]?
KCI1362W IBM Tivoli Monitoring version 6.3 introduces a number of platform improvements which may require operating system updates. It is important that you ensure this system meets these requirements prior to installing or updating your installation. Please refer to the following technote for more information: http://www.ibm.com/support/docview.wss?uid=swg21623341
Select one of the following:
1) Install products to the local host.
2) Install products to depot for remote deployment (requires TEMS).
3) Install TEMS support for remote seeding
4) Exit install.
Please enter a valid number: 1
Initializing …
Prerequisite scanning for JRE failed:
FAIL Tivoli Enterprise-supplied JRE /app/IBM/ITM/logs/prereqscan/20151014-141724/KJR/result.txt
Property Result Found Expected
============================================================================================================
OS Version FAIL CentOS Linux release 7.1.1503 (Core… AIX V6.*
Continue with this installation [1-yes, 2-no; “2” is default ]? 1
International Program License Agreement
Part 1 – General Terms
BY DOWNLOADING, INSTALLING, COPYING, ACCESSING, CLICKING ON
AN “ACCEPT” BUTTON, OR OTHERWISE USING THE PROGRAM,
LICENSEE AGREES TO THE TERMS OF THIS AGREEMENT. IF YOU ARE
ACCEPTING THESE TERMS ON BEHALF OF LICENSEE, YOU REPRESENT
AND WARRANT THAT YOU HAVE FULL AUTHORITY TO BIND LICENSEE
TO THESE TERMS. IF YOU DO NOT AGREE TO THESE TERMS,
* DO NOT DOWNLOAD, INSTALL, COPY, ACCESS, CLICK ON AN
“ACCEPT” BUTTON, OR USE THE PROGRAM; AND
* PROMPTLY RETURN THE UNUSED MEDIA, DOCUMENTATION, AND
Press Enter to continue viewing the license agreement, or
enter “1” to accept the agreement, “2” to decline it, “3”
to print it, “4” to read non-IBM terms, or “99” to go back
to the previous screen.
1
Product packages are available in /mnt/downloads/TIVOLI-IMAGES/itm6.3.0.2-LNX64/unix
The following products are currently installed in “/app/IBM/ITM”:
IBM GSKit Security Interface V08.00.50.05 @ Linux x86_64 R2.6, R3.0 (64 bit)
All agents require that application support files that contain agent-specific information be installed on the Tivoli Enterprise Monitoring Server that the agents will connect to, Tivoli Enterprise Portal Server and Tivoli Enterprise Portal desktop and browser client. Install application support before starting to install any Tivoli Enterprise Monitoring Agents.
Product packages are available for this operating system and component support categories:
1) IBM Tivoli Monitoring components for this operating system
2) Tivoli Enterprise Portal Browser Client support
3) Tivoli Enterprise Portal Desktop Client support
4) Tivoli Enterprise Portal Server support
5) Tivoli Enterprise Monitoring Server support
6) Other operating systems
Type the number or type “q” to quit selection
[ number “1” or “IBM Tivoli Monitoring components for this operating system” is default ]: 1
You selected number “1” or “IBM Tivoli Monitoring components for this operating system”
Is the selection correct [ 1=Yes, 2=No ; default is “1” ] ? 1
The following products are available for installation:
1) Summarization and Pruning Agent V06.30.02.00
2) Tivoli Enterprise Monitoring Automation Server V06.30.02.00
3) Tivoli Enterprise Monitoring Server V06.30.02.00
4) Tivoli Enterprise Portal Desktop Client V06.30.02.00
5) Tivoli Enterprise Portal Server V06.30.02.00
6) Tivoli Enterprise Services User Interface Extensions V06.30.02.00
7) Tivoli Performance Analyzer V06.30.02.00
8) Warehouse Proxy V06.30.02.00
9) all of the above
Type the numbers that correspond to the products that you want to install. Type “b” to change operating system, or type “q” to quit selection.
If you enter more than one number, separate the numbers by a comma or a space.
Type your selections here: 9
The following products will be installed:
Summarization and Pruning Agent V06.30.02.00
Tivoli Enterprise Monitoring Automation Server V06.30.02.00
Tivoli Enterprise Monitoring Server V06.30.02.00
Tivoli Enterprise Portal Desktop Client V06.30.02.00
Tivoli Enterprise Portal Server V06.30.02.00
Tivoli Enterprise Services User Interface Extensions V06.30.02.00
Tivoli Performance Analyzer V06.30.02.00
Warehouse Proxy V06.30.02.00
Are your selections correct [ 1=Yes, 2=No ; default is “1” ] ? 1
Do you want to check prerequisites for the above components? [ 1=Yes, 2=No ; default is “1” ] ? 1
Running Prerequisite Scanner.
This may take a few minutes depending on the number of components being checked and the machine’s performance.
Prerequisite Scanner results for the selected components:
FAIL Tivoli Enterprise Monitoring Automation Server /app/IBM/ITM/logs/prereqscan/20151014-141755/COMMON/result.txt
FAIL IBM Tivoli Monitoring Shared Libraries /app/IBM/ITM/logs/prereqscan/20151014-141755/COMMON/result.txt
FAIL Tivoli Enterprise Portal Desktop Client /app/IBM/ITM/logs/prereqscan/20151014-141755/COMMON/result.txt
FAIL Tivoli Enterprise Portal Server /app/IBM/ITM/logs/prereqscan/20151014-141755/COMMON/result.txt
FAIL IBM GSKit Security Interface /app/IBM/ITM/logs/prereqscan/20151014-141755/COMMON/result.txt
FAIL Warehouse Proxy /app/IBM/ITM/logs/prereqscan/20151014-141755/COMMON/result.txt
FAIL Tivoli Enterprise-supplied JRE /app/IBM/ITM/logs/prereqscan/20151014-141755/COMMON/result.txt
FAIL Tivoli Enterprise Monitoring Server /app/IBM/ITM/logs/prereqscan/20151014-141755/COMMON/result.txt
FAIL Tivoli Performance Analyzer /app/IBM/ITM/logs/prereqscan/20151014-141755/COMMON/result.txt
FAIL Summarization and Pruning Agent /app/IBM/ITM/logs/prereqscan/20151014-141755/COMMON/result.txt
FAIL Tivoli Enterprise Services User Interface Extensions /app/IBM/ITM/logs/prereqscan/20151014-141755/COMMON/result.txt
FAIL Prerequisite Scanner Overall Result /app/IBM/ITM/logs/prereqscan/20151014-141755/COMMON/result.txt
Do you want to continue with the installation [ 1=Yes, 2=No ; default is “2” ] ? 1
Installing IBM Global Security Toolkit
… installing “Summarization and Pruning Agent V06.30.02.00 for Linux x86_64 R2.6, R3.0 (64 bit)”; please wait.
=> installed “Summarization and Pruning Agent V06.30.02.00 for Linux x86_64 R2.6, R3.0 (64 bit)”.
… Initializing component Summarization and Pruning Agent V06.30.02.00 for Linux x86_64 R2.6, R3.0 (64 bit).
… Summarization and Pruning Agent V06.30.02.00 for Linux x86_64 R2.6, R3.0 (64 bit) initialized.
… installing “Tivoli Enterprise Monitoring Automation Server V06.30.02.00 for Linux x86_64 R2.6, R3.0 (64 bit)”; please wait.
=> installed “Tivoli Enterprise Monitoring Automation Server V06.30.02.00 for Linux x86_64 R2.6, R3.0 (64 bit)”.
… Initializing component Tivoli Enterprise Monitoring Automation Server V06.30.02.00 for Linux x86_64 R2.6, R3.0 (64 bit).
… Tivoli Enterprise Monitoring Automation Server V06.30.02.00 for Linux x86_64 R2.6, R3.0 (64 bit) initialized.
… installing “Tivoli Enterprise Monitoring Server V06.30.02.00 for Linux x86_64 R2.6, R3.0 (64 bit)”; please wait.
=> installed “Tivoli Enterprise Monitoring Server V06.30.02.00 for Linux x86_64 R2.6, R3.0 (64 bit)”.
… Initializing component Tivoli Enterprise Monitoring Server V06.30.02.00 for Linux x86_64 R2.6, R3.0 (64 bit).
Please enter TEMS name [ TEMS is default ]: hurefcos001
… creating config file “/app/IBM/ITM/config/ms.config”
… creating file “/app/IBM/ITM/tables/hurefcos001/glb_site.txt.”
… updating “/app/IBM/ITM/config/kbbenv”
… verifying Hot Standby.
… Tivoli Enterprise Monitoring Server V06.30.02.00 for Linux x86_64 R2.6, R3.0 (64 bit) initialized.
… installing “Tivoli Enterprise Portal Desktop Client V06.30.02.00 for Linux x86_64 R2.6, R3.0 (64 bit)”; please wait.
=> installed “Tivoli Enterprise Portal Desktop Client V06.30.02.00 for Linux x86_64 R2.6, R3.0 (64 bit)”.
… Initializing component Tivoli Enterprise Portal Desktop Client V06.30.02.00 for Linux x86_64 R2.6, R3.0 (64 bit).
… Tivoli Enterprise Portal Desktop Client V06.30.02.00 for Linux x86_64 R2.6, R3.0 (64 bit) initialized.
… installing “Tivoli Enterprise Portal Server V06.30.02.00 for Linux x86_64 R2.6, R3.0 (64 bit)”; please wait.
IBM Eclipse Help Server will be installed as a prerequisite to Tivoli Enterprise Portal Server.
=> installed “Tivoli Enterprise Portal Server V06.30.02.00 for Linux x86_64 R2.6, R3.0 (64 bit)”.
… Initializing component Tivoli Enterprise Portal Server V06.30.02.00 for Linux x86_64 R2.6, R3.0 (64 bit).
Tivoli Enterprise Portal server configuration was updated to reflect Eclipse Help Server configuration changes.
… Tivoli Enterprise Portal Server V06.30.02.00 for Linux x86_64 R2.6, R3.0 (64 bit) initialized.
… installing “Tivoli Enterprise Services User Interface Extensions V06.30.02.00 for Linux x86_64 R2.6, R3.0 (64 bit)”; please wait.
=> installed “Tivoli Enterprise Services User Interface Extensions V06.30.02.00 for Linux x86_64 R2.6, R3.0 (64 bit)”.
… Initializing component Tivoli Enterprise Services User Interface Extensions V06.30.02.00 for Linux x86_64 R2.6, R3.0 (64 bit).
… Tivoli Enterprise Services User Interface Extensions V06.30.02.00 for Linux x86_64 R2.6, R3.0 (64 bit) initialized.
… installing “Tivoli Performance Analyzer V06.30.02.00 for Linux x86_64 R2.6, R3.0 (64 bit)”; please wait.
=> installed “Tivoli Performance Analyzer V06.30.02.00 for Linux x86_64 R2.6, R3.0 (64 bit)”.
… Initializing component Tivoli Performance Analyzer V06.30.02.00 for Linux x86_64 R2.6, R3.0 (64 bit).
… Tivoli Performance Analyzer V06.30.02.00 for Linux x86_64 R2.6, R3.0 (64 bit) initialized.
… installing “Warehouse Proxy V06.30.02.00 for Linux x86_64 R2.6, R3.0 (64 bit)”; please wait.
=> installed “Warehouse Proxy V06.30.02.00 for Linux x86_64 R2.6, R3.0 (64 bit)”.
… Initializing component Warehouse Proxy V06.30.02.00 for Linux x86_64 R2.6, R3.0 (64 bit).
… Warehouse Proxy V06.30.02.00 for Linux x86_64 R2.6, R3.0 (64 bit) initialized.
If you are installing Tivoli Enterprise Portal Server (TEPS) or Tivoli Enterprise Portal Desktop Client (TEP) for the first time you will probably want to install product support to the TEPS and TEP for the agent products which you plan to use. This gives you product specific function within the TEP. To install support packages choose yes below or run the install again at a later time and when prompted to choose an operating system or component support category choose the appropriate support category.
Do you want to install additional products or product support packages [ 1=Yes, 2=No ; default is “2” ] ? 2
… postprocessing; please wait.
… finished postprocessing.
Installation step complete.
Following Tivoli Enterprise Monitoring Server product support were installed:
*) Monitoring Agent for IBM Tivoli Monitoring 5.x Endpoint
*) Warehouse Proxy
*) Monitoring Agent for i5/OS
*) Monitoring Agent for UNIX OS
*) Monitoring Agent for Windows OS
*) Tivoli Performance Analyzer
*) Tivoli Enterprise Monitoring Server
*) Summarization and Pruning Agent
*) Monitoring Agent for UNIX Logs
*) Universal Agent
*) Agentless Monitoring for Windows Operating Systems
*) Monitoring Agent for Linux OS
*) Agentless Monitoring for AIX Operating Systems
*) Agentless Monitoring for Linux Operating Systems
*) Agentless Monitoring for HP-UX Operating Systems
*) Agentless Monitoring for Solaris Operating Systems
Note: This operation causes the monitoring server to restart.
Do you want to seed product support on the Tivoli Enterprise Monitoring Server? [ 1=Yes, 2=No ; default is “1” ] ? 1
Starting TEMS…
TEMS started…
The following new Tivoli Enterprise Monitoring Server product support packages will be seeded:
*) Monitoring Agent for IBM Tivoli Monitoring 5.x Endpoint
*) Warehouse Proxy
*) Monitoring Agent for i5/OS
*) Monitoring Agent for UNIX OS
*) Monitoring Agent for Windows OS
*) Tivoli Performance Analyzer
*) Summarization and Pruning Agent
*) Monitoring Agent for UNIX Logs
*) Universal Agent
*) Agentless Monitoring for Windows Operating Systems
*) Monitoring Agent for Linux OS
*) Agentless Monitoring for AIX Operating Systems
*) Agentless Monitoring for Linux Operating Systems
*) Agentless Monitoring for HP-UX Operating Systems
*) Agentless Monitoring for Solaris Operating Systems
The following previously seeded Tivoli Enterprise Monitoring Server product support packages will be re-seeded:
*) Tivoli Enterprise Monitoring Server
Choose one of the following options to add or update the situation distribution definition to include the default managed system groups:
1) ALL – This option adds the default managed system groups to all the applicable situations. Note that not all situations have the default managed group setting. For some, you might need to manually define the distribution in the Tivoli Enterprise Portal due to the specific content of the agent support package.
2) NONE – The default managed system group is not added to any situation.
3) NEW – This option adds the default managed system groups to all applicable situations from the product support packages that are being seeded for the first time. Note that not all situations have the default managed group setting. For some, you might need to manually define the distribution in the Tivoli Enterprise Portal due to the specific content of the agent support package. Modifications are not made to managed system groups in upgraded product support packages.
Type your selections here [ number “3” or “NEW” is default ]:
1
Seeding support for Monitoring Agent for IBM Tivoli Monitoring 5.x Endpoint [1 of 16]
Product support seeding completed…
Seeding support for Warehouse Proxy [2 of 16]
Product support seeding completed…
Seeding support for Monitoring Agent for i5/OS [3 of 16]
Product support seeding completed…
Seeding support for Monitoring Agent for UNIX OS [4 of 16]
Product support seeding completed…
Seeding support for Monitoring Agent for Windows OS [5 of 16]
Product support seeding completed…
Seeding support for Tivoli Performance Analyzer [6 of 16]
Product support seeding completed…
Seeding support for Tivoli Enterprise Monitoring Server [7 of 16]
Product support seeding completed…
Seeding support for Summarization and Pruning Agent [8 of 16]
Product support seeding completed…
Seeding support for Monitoring Agent for UNIX Logs [9 of 16]
Product support seeding completed…
Seeding support for Universal Agent [10 of 16]
Product support seeding completed…
Seeding support for Agentless Monitoring for Windows Operating Systems [11 of 16]
Product support seeding completed…
Seeding support for Monitoring Agent for Linux OS [12 of 16]
Product support seeding completed…
Seeding support for Agentless Monitoring for AIX Operating Systems [13 of 16]
Product support seeding completed…
Seeding support for Agentless Monitoring for Linux Operating Systems [14 of 16]
Product support seeding completed…
Seeding support for Agentless Monitoring for HP-UX Operating Systems [15 of 16]
Product support seeding completed…
Seeding support for Agentless Monitoring for Solaris Operating Systems [16 of 16]
Product support seeding completed…
Stopping TEMS…
TEMS stopped…
All supports successfully seeded.
You may now configure any locally installed IBM Tivoli Monitoring product via the “/app/IBM/ITM/bin/itmcmd config” command.
Automatic start at system initialization has been configured.
Automatic stop at system shutdown has been configured.
The install.sh command creates most of directories and files with world write permissions. IBM Tivoli Monitoring provides the secureMain utility to helps you keep the monitoring environment secured. You can secure this installation now or manually execute the secureMain utility later. For more information see Appendix G. Securing your IBM Tivoli Monitoring installation on Linux or UNIX in the IBM Tivoli Monitoring Installation and Setup Guide.
Do you want to secure this IBM Tivoli Monitoring installation [ 1-yes, 2-no; “2” is default ]?
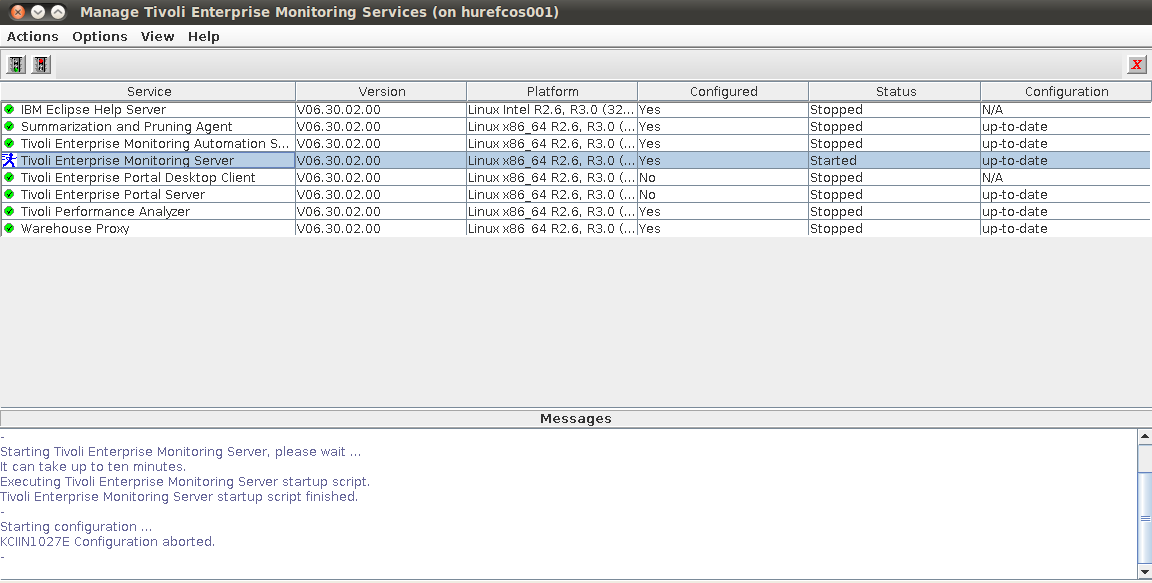
After the installation we have started the Manage Tivoli Enterprise Montoring Services, configured the Server as HUB TEMS and started it.
Applying IBM Tivoli Monitoring 6.3.0.3 ( Fix Pack 3 ) on Cent OS7
The next step is to apply Fixpack 3 on the current ITM ( 6.3.0.2 ) level. Locate the 6.3.0.3 installation directory and kick off the installation with the install.sh installer script.
-sh-4.2# ./install.sh
UPGRADE
Enter the name of the IBM Tivoli Monitoring directory
[ default = /opt/IBM/ITM ]: /app/IBM/ITM
ITM home directory “/app/IBM/ITM” already exists.
OK to use it [ 1-yes, 2-no; “1” is default ]? 1
The Manage Tivoli Enterprise Monitoring Services is running in the background, please close it before continuing.
Continue with this installation [ 1-yes, 2-no; “1” is default ]? 1
The following processes are currently running:
Product = Tivoli Enterprise Monitoring Server PID = 19904
install.sh warning: Existing products found to be running will be restarted during installation., continuing …
Continue with this installation [ 1-yes, 2-no; “1” is default ]? 1
Stopping TEMS…
It can take up to ten minutes.
TEMS stopped…
/app/IBM/ITM
KCI1362W IBM Tivoli Monitoring version 6.3 introduces a number of platform improvements which may require operating system updates. It is important that you ensure this system meets these requirements prior to installing or updating your installation. Please refer to the following technote for more information: http://www.ibm.com/support/docview.wss?uid=swg21623341
Select one of the following:
1) Install products to the local host.
2) Install products to depot for remote deployment (requires TEMS).
3) Install TEMS support for remote seeding
4) Exit install.
Please enter a valid number: 1
Initializing …
Prerequisite scanning for JRE failed:
FAIL Tivoli Enterprise-supplied JRE /app/IBM/ITM/logs/prereqscan/20151014-145153/KJR/result.txt
Property Result Found Expected
============================================================================================================
OS Version FAIL CentOS Linux release 7.1.1503 (Core… regex{AIX V[67].*}
Continue with this installation [1-yes, 2-no; “2” is default ]? 1
International Program License Agreement
Part 1 – General Terms
BY DOWNLOADING, INSTALLING, COPYING, ACCESSING, CLICKING ON
AN “ACCEPT” BUTTON, OR OTHERWISE USING THE PROGRAM,
LICENSEE AGREES TO THE TERMS OF THIS AGREEMENT. IF YOU ARE
ACCEPTING THESE TERMS ON BEHALF OF LICENSEE, YOU REPRESENT
AND WARRANT THAT YOU HAVE FULL AUTHORITY TO BIND LICENSEE
TO THESE TERMS. IF YOU DO NOT AGREE TO THESE TERMS,
* DO NOT DOWNLOAD, INSTALL, COPY, ACCESS, CLICK ON AN
“ACCEPT” BUTTON, OR USE THE PROGRAM; AND
* PROMPTLY RETURN THE UNUSED MEDIA, DOCUMENTATION, AND
Press Enter to continue viewing the license agreement, or
enter “1” to accept the agreement, “2” to decline it, “3”
to print it, “4” to read non-IBM terms, or “99” to go back
to the previous screen.
1
Product packages are available in /mnt/downloads/TIVOLI-IMAGES/itm6.3.0.3-LNX64/unix
The following products are currently installed in “/app/IBM/ITM”:
IBM Eclipse Help Server V06.30.02.00 @ Linux Intel R2.6, R3.0 (32 bit)/Intel R2.6 GCC 2.9.5 (64 bit)/Intel R2.6, R3.0 (64 bit)/x86_64 R2.6, R3.0 (32 bit)/x86_64 R2.6, R3.0 (64 bit)
IBM GSKit Security Interface V08.00.50.05 @ Linux Intel R2.4 (32 bit)/Intel R2.6, R3.0 (32 bit)/x86_64 R2.6, R3.0 (32 bit)
IBM GSKit Security Interface V08.00.50.05 @ Linux x86_64 R2.6, R3.0 (64 bit)
IBM HTTP Server V08.00.06.00 @ Linux x86_64 R2.6, R3.0 (64 bit)
IBM Installation Manager V01.06.03.01 @ Linux x86_64 R2.6, R3.0 (64 bit)
IBM Tivoli Enterprise Portal Server Extensions V08.00.06.00 @ Linux x86_64 R2.6, R3.0 (64 bit)
Summarization and Pruning Agent V06.30.02.00 @ Linux x86_64 R2.6, R3.0 (64 bit)
Tivoli Enterprise Monitoring Automation Server V06.30.02.00 @ Linux x86_64 R2.6, R3.0 (64 bit)
Tivoli Enterprise Monitoring SOAP Server V06.30.02.00 @ Linux x86_64 R2.6, R3.0 (64 bit)
Tivoli Enterprise Monitoring Server V06.30.02.00 @ Linux x86_64 R2.6, R3.0 (64 bit)
Tivoli Enterprise Portal Browser Client V06.30.02.00 @ Linux x86_64 R2.6, R3.0 (64 bit)
Tivoli Enterprise Portal Desktop Client V06.30.02.00 @ Linux x86_64 R2.6, R3.0 (64 bit)
Tivoli Enterprise Portal Server V06.30.02.00 @ Linux x86_64 R2.6, R3.0 (64 bit)
Tivoli Enterprise Services User Interface Extensions V06.30.02.00 @ Linux x86_64 R2.6, R3.0 (64 bit)
Tivoli Enterprise Services User Interface V06.30.02.00 @ Linux x86_64 R2.6, R3.0 (64 bit)
Tivoli Performance Analyzer V06.30.02.00 @ Linux x86_64 R2.6, R3.0 (64 bit)
Warehouse Proxy V06.30.02.00 @ Linux x86_64 R2.6, R3.0 (64 bit)
All agents require that application support files that contain agent-specific information be installed on the Tivoli Enterprise Monitoring Server that the agents will connect to, Tivoli Enterprise Portal Server and Tivoli Enterprise Portal desktop and browser client. Install application support before starting to install any Tivoli Enterprise Monitoring Agents.
Product packages are available for this operating system and component support categories:
1) IBM Tivoli Monitoring components for this operating system
2) Tivoli Enterprise Portal Browser Client support
3) Tivoli Enterprise Portal Desktop Client support
4) Tivoli Enterprise Portal Server support
5) Tivoli Enterprise Monitoring Server support
6) Other operating systems
Type the number or type “q” to quit selection
[ number “1” or “IBM Tivoli Monitoring components for this operating system” is default ]: 1
You selected number “1” or “IBM Tivoli Monitoring components for this operating system”
Is the selection correct [ 1=Yes, 2=No ; default is “1” ] ? 1
The following products are available for installation:
1) Summarization and Pruning Agent V06.30.03.00
2) Tivoli Enterprise Monitoring Automation Server V06.30.03.00
3) Tivoli Enterprise Monitoring Server V06.30.03.00
4) Tivoli Enterprise Portal Desktop Client V06.30.03.00
5) Tivoli Enterprise Portal Server V06.30.03.00
6) Tivoli Enterprise Services User Interface Extensions V06.30.03.00
7) Tivoli Performance Analyzer V06.30.03.00
8) Warehouse Proxy V06.30.03.00
9) all of the above
Type the numbers that correspond to the products that you want to install. Type “b” to change operating system, or type “q” to quit selection.
If you enter more than one number, separate the numbers by a comma or a space.
Type your selections here: 9
The following products will be installed:
Summarization and Pruning Agent V06.30.03.00
Tivoli Enterprise Monitoring Automation Server V06.30.03.00
Tivoli Enterprise Monitoring Server V06.30.03.00
Tivoli Enterprise Portal Desktop Client V06.30.03.00
Tivoli Enterprise Portal Server V06.30.03.00
Tivoli Enterprise Services User Interface Extensions V06.30.03.00
Tivoli Performance Analyzer V06.30.03.00
Warehouse Proxy V06.30.03.00
Are your selections correct [ 1=Yes, 2=No ; default is “1” ] ? 1
Do you want to check prerequisites for the above components? [ 1=Yes, 2=No ; default is “1” ] ? 2
Installing IBM Global Security Toolkit
Installing prerequisite components
… installing package “axlx8266”; please wait.
=> installed package “axlx8266”.
… installing package “uilx8266”; please wait.
=> installed package “uilx8266”.
… installing package “uelx8266”; please wait.
=> installed package “uelx8266”.
… installing package “shlx8266”; please wait.
=> installed package “shlx8266”.
… installing package “axli6263”; please wait.
=> installed package “axli6263”.
… installing package “jrli6263”; please wait.
=> installed package “jrli6263”.
… installing package “cwlx8266”; please wait.
=> installed package “cwlx8266”.
… installing package “kfli6263”; please wait.
=> installed package “kfli6263”.
… installing “Summarization and Pruning Agent V06.30.03.00 for Linux x86_64 R2.6, R3.0 (64 bit)”; please wait.
=> installed “Summarization and Pruning Agent V06.30.03.00 for Linux x86_64 R2.6, R3.0 (64 bit)”.
… Initializing component Summarization and Pruning Agent V06.30.03.00 for Linux x86_64 R2.6, R3.0 (64 bit).
… Summarization and Pruning Agent V06.30.03.00 for Linux x86_64 R2.6, R3.0 (64 bit) initialized.
… installing “Tivoli Enterprise Monitoring Automation Server V06.30.03.00 for Linux x86_64 R2.6, R3.0 (64 bit)”; please wait.
=> installed “Tivoli Enterprise Monitoring Automation Server V06.30.03.00 for Linux x86_64 R2.6, R3.0 (64 bit)”.
… Initializing component Tivoli Enterprise Monitoring Automation Server V06.30.03.00 for Linux x86_64 R2.6, R3.0 (64 bit).
… Tivoli Enterprise Monitoring Automation Server V06.30.03.00 for Linux x86_64 R2.6, R3.0 (64 bit) initialized.
… installing “Tivoli Enterprise Monitoring Server V06.30.03.00 for Linux x86_64 R2.6, R3.0 (64 bit)”; please wait.
=> installed “Tivoli Enterprise Monitoring Server V06.30.03.00 for Linux x86_64 R2.6, R3.0 (64 bit)”.
… Initializing component Tivoli Enterprise Monitoring Server V06.30.03.00 for Linux x86_64 R2.6, R3.0 (64 bit).
The following TEMS are installed in /app/IBM/ITM:
hurefcos001
… creating config file “/app/IBM/ITM/config/ms.config”
… creating file “/app/IBM/ITM/tables/hurefcos001/glb_site.txt.”
… updating “/app/IBM/ITM/config/kbbenv”
… verifying Hot Standby.
… Tivoli Enterprise Monitoring Server V06.30.03.00 for Linux x86_64 R2.6, R3.0 (64 bit) initialized.
… installing “Tivoli Enterprise Portal Desktop Client V06.30.03.00 for Linux x86_64 R2.6, R3.0 (64 bit)”; please wait.
=> installed “Tivoli Enterprise Portal Desktop Client V06.30.03.00 for Linux x86_64 R2.6, R3.0 (64 bit)”.
… Initializing component Tivoli Enterprise Portal Desktop Client V06.30.03.00 for Linux x86_64 R2.6, R3.0 (64 bit).
… Tivoli Enterprise Portal Desktop Client V06.30.03.00 for Linux x86_64 R2.6, R3.0 (64 bit) initialized.
… installing “Tivoli Enterprise Portal Server V06.30.03.00 for Linux x86_64 R2.6, R3.0 (64 bit)”; please wait.
=> installed “Tivoli Enterprise Portal Server V06.30.03.00 for Linux x86_64 R2.6, R3.0 (64 bit)”.
… Initializing component Tivoli Enterprise Portal Server V06.30.03.00 for Linux x86_64 R2.6, R3.0 (64 bit).
Tivoli Enterprise Portal server configuration was updated to reflect Eclipse Help Server configuration changes.
… Tivoli Enterprise Portal Server V06.30.03.00 for Linux x86_64 R2.6, R3.0 (64 bit) initialized.
… installing “Tivoli Enterprise Services User Interface Extensions V06.30.03.00 for Linux x86_64 R2.6, R3.0 (64 bit)”; please wait.
=> installed “Tivoli Enterprise Services User Interface Extensions V06.30.03.00 for Linux x86_64 R2.6, R3.0 (64 bit)”.
… Initializing component Tivoli Enterprise Services User Interface Extensions V06.30.03.00 for Linux x86_64 R2.6, R3.0 (64 bit).
… Tivoli Enterprise Services User Interface Extensions V06.30.03.00 for Linux x86_64 R2.6, R3.0 (64 bit) initialized.
… installing “Tivoli Performance Analyzer V06.30.03.00 for Linux x86_64 R2.6, R3.0 (64 bit)”; please wait.
=> installed “Tivoli Performance Analyzer V06.30.03.00 for Linux x86_64 R2.6, R3.0 (64 bit)”.
… Initializing component Tivoli Performance Analyzer V06.30.03.00 for Linux x86_64 R2.6, R3.0 (64 bit).
… Tivoli Performance Analyzer V06.30.03.00 for Linux x86_64 R2.6, R3.0 (64 bit) initialized.
… installing “Warehouse Proxy V06.30.03.00 for Linux x86_64 R2.6, R3.0 (64 bit)”; please wait.
=> installed “Warehouse Proxy V06.30.03.00 for Linux x86_64 R2.6, R3.0 (64 bit)”.
… Initializing component Warehouse Proxy V06.30.03.00 for Linux x86_64 R2.6, R3.0 (64 bit).
… Warehouse Proxy V06.30.03.00 for Linux x86_64 R2.6, R3.0 (64 bit) initialized.
If you are installing Tivoli Enterprise Portal Server (TEPS) or Tivoli Enterprise Portal Desktop Client (TEP) for the first time you will probably want to install product support to the TEPS and TEP for the agent products which you plan to use. This gives you product specific function within the TEP. To install support packages choose yes below or run the install again at a later time and when prompted to choose an operating system or component support category choose the appropriate support category.
Do you want to install additional products or product support packages [ 1=Yes, 2=No ; default is “2” ] ? 2
… postprocessing; please wait.
… finished postprocessing.
Installation step complete.
Following Tivoli Enterprise Monitoring Server product support were installed:
*) Monitoring Agent for IBM Tivoli Monitoring 5.x Endpoint
*) Warehouse Proxy
*) Monitoring Agent for i5/OS
*) Monitoring Agent for UNIX OS
*) Monitoring Agent for Windows OS
*) Tivoli Performance Analyzer
*) Tivoli Enterprise Monitoring Server
*) Summarization and Pruning Agent
*) Monitoring Agent for UNIX Logs
*) Universal Agent
*) Agentless Monitoring for Windows Operating Systems
*) Monitoring Agent for Linux OS
*) Agentless Monitoring for AIX Operating Systems
*) Agentless Monitoring for Linux Operating Systems
*) Agentless Monitoring for HP-UX Operating Systems
*) Agentless Monitoring for Solaris Operating Systems
Note: This operation causes the monitoring server to restart.
Do you want to seed product support on the Tivoli Enterprise Monitoring Server? [ 1=Yes, 2=No ; default is “1” ] ? 1
Starting TEMS…
TEMS started…
The following new Tivoli Enterprise Monitoring Server product support packages will be seeded:
*) Tivoli Performance Analyzer
The following previously seeded Tivoli Enterprise Monitoring Server product support packages will be re-seeded:
*) Monitoring Agent for IBM Tivoli Monitoring 5.x Endpoint
*) Warehouse Proxy
*) Monitoring Agent for i5/OS
*) Monitoring Agent for UNIX OS
*) Monitoring Agent for Windows OS
*) Tivoli Enterprise Monitoring Server
*) Summarization and Pruning Agent
*) Monitoring Agent for UNIX Logs
*) Universal Agent
*) Agentless Monitoring for Windows Operating Systems
*) Monitoring Agent for Linux OS
*) Agentless Monitoring for AIX Operating Systems
*) Agentless Monitoring for Linux Operating Systems
*) Agentless Monitoring for HP-UX Operating Systems
*) Agentless Monitoring for Solaris Operating Systems
Choose one of the following options to add or update the situation distribution definition to include the default managed system groups:
1) ALL – This option adds the default managed system groups to all the applicable situations. Note that not all situations have the default managed group setting. For some, you might need to manually define the distribution in the Tivoli Enterprise Portal due to the specific content of the agent support package.
2) NONE – The default managed system group is not added to any situation.
3) NEW – This option adds the default managed system groups to all applicable situations from the product support packages that are being seeded for the first time. Note that not all situations have the default managed group setting. For some, you might need to manually define the distribution in the Tivoli Enterprise Portal due to the specific content of the agent support package. Modifications are not made to managed system groups in upgraded product support packages.
Type your selections here [ number “3” or “NEW” is default ]:
1
Seeding support for Monitoring Agent for IBM Tivoli Monitoring 5.x Endpoint [1 of 16]
Product support seeding completed…
Seeding support for Warehouse Proxy [2 of 16]
Product support seeding completed…
Seeding support for Monitoring Agent for i5/OS [3 of 16]
Product support seeding completed…
Seeding support for Monitoring Agent for UNIX OS [4 of 16]
Product support seeding completed…
Seeding support for Monitoring Agent for Windows OS [5 of 16]
Product support seeding completed…
Seeding support for Tivoli Performance Analyzer [6 of 16]
Product support seeding completed…
Seeding support for Tivoli Enterprise Monitoring Server [7 of 16]
Product support seeding completed…
Seeding support for Summarization and Pruning Agent [8 of 16]
Product support seeding completed…
Seeding support for Monitoring Agent for UNIX Logs [9 of 16]
Product support seeding completed…
Seeding support for Universal Agent [10 of 16]
Product support seeding completed…
Seeding support for Agentless Monitoring for Windows Operating Systems [11 of 16]
Product support seeding completed…
Seeding support for Monitoring Agent for Linux OS [12 of 16]
Product support seeding completed…
Seeding support for Agentless Monitoring for AIX Operating Systems [13 of 16]
Product support seeding completed…
Seeding support for Agentless Monitoring for Linux Operating Systems [14 of 16]
Product support seeding completed…
Seeding support for Agentless Monitoring for HP-UX Operating Systems [15 of 16]
Product support seeding completed…
Seeding support for Agentless Monitoring for Solaris Operating Systems [16 of 16]
Product support seeding completed…
Stopping TEMS…
TEMS stopped…
All supports successfully seeded.
You may now configure any locally installed IBM Tivoli Monitoring product via the “/app/IBM/ITM/bin/itmcmd config” command.
Automatic start at system initialization has been configured.
Automatic stop at system shutdown has been configured.
The install.sh command creates most of directories and files with world write permissions. IBM Tivoli Monitoring provides the secureMain utility to helps you keep the monitoring environment secured. You can secure this installation now or manually execute the secureMain utility later. For more information see Appendix G. Securing your IBM Tivoli Monitoring installation on Linux or UNIX in the IBM Tivoli Monitoring Installation and Setup Guide.
Do you want to secure this IBM Tivoli Monitoring installation [ 1-yes, 2-no; “2” is default ]?
Starting TEMS…
It can take up to ten minutes.
TEMS started…
The Warehouse Proxy and/or the Summarization and Pruning agents are not started automatically after the upgrade is completed. Dependent upon the installed agents and the associated attribute groups enabled for historical collection and whether limited database permissions are granted to the warehouse user, a database administrator might need to use the Warehouse Publication Tool to generate a script with the necessary changes for the database. Information regarding these required steps can be found in the IBM Tivoli Monitoring Installation and Setup Guide.
[1]+ Done /app/IBM/ITM/bin/itmcmd manage (wd: /mnt/downloads/TIVOLI-IMAGES/itm6.3.0.2-LNX64)
(wd now: /mnt/downloads/TIVOLI-IMAGES/itm6.3.0.3-LNX64)
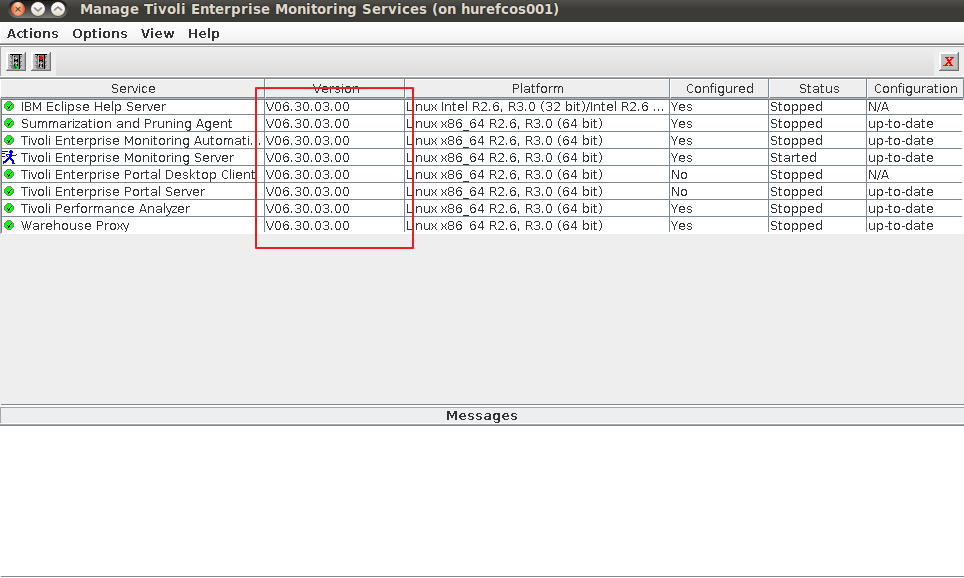
As you can see from the following screenshot the installation went well and FP3 was successfully applied.
Applying IBM Tivoli Monitoring 6.3.0.3 Support Packages on CentOS 7
The next step is to apply the the following support packages:
– Tivoli Enterprise Portal Browser Client support
– Tivoli Enterprise Portal Desktop Client support
– Tivoli Enterprise Portal Server support
We restart the 6.3.0.3 installation bundle using ./install.sh
The following products are currently installed in “/app/IBM/ITM”:
IBM Eclipse Help Server V06.30.03.00 @ Linux Intel R2.6, R3.0 (32 bit)/Intel R2.6 GCC 2.9.5 (64 bit)/Intel R2.6, R3.0 (64 bit)/x86_64 R2.6, R3.0 (32 bit)/x86_64 R2.6, R3.0 (64 bit)
IBM GSKit Security Interface V08.00.50.20 @ Linux Intel R2.4 (32 bit)/Intel R2.6, R3.0 (32 bit)/x86_64 R2.6, R3.0 (32 bit)
IBM GSKit Security Interface V08.00.50.20 @ Linux x86_64 R2.6, R3.0 (64 bit)
IBM HTTP Server V08.00.06.00 @ Linux x86_64 R2.6, R3.0 (64 bit)
IBM Installation Manager V01.06.03.01 @ Linux x86_64 R2.6, R3.0 (64 bit)
IBM Tivoli Enterprise Portal Server Extensions V08.00.06.00 @ Linux x86_64 R2.6, R3.0 (64 bit)
Summarization and Pruning Agent V06.30.03.00 @ Linux x86_64 R2.6, R3.0 (64 bit)
Tivoli Enterprise Monitoring Automation Server V06.30.03.00 @ Linux x86_64 R2.6, R3.0 (64 bit)
Tivoli Enterprise Monitoring SOAP Server V06.30.03.00 @ Linux x86_64 R2.6, R3.0 (64 bit)
Tivoli Enterprise Monitoring Server V06.30.03.00 @ Linux x86_64 R2.6, R3.0 (64 bit)
Tivoli Enterprise Portal Browser Client V06.30.03.00 @ Linux x86_64 R2.6, R3.0 (64 bit)
Tivoli Enterprise Portal Desktop Client V06.30.03.00 @ Linux x86_64 R2.6, R3.0 (64 bit)
Tivoli Enterprise Portal Server V06.30.03.00 @ Linux x86_64 R2.6, R3.0 (64 bit)
Tivoli Enterprise Services User Interface Extensions V06.30.03.00 @ Linux x86_64 R2.6, R3.0 (64 bit)
Tivoli Enterprise Services User Interface V06.30.03.00 @ Linux x86_64 R2.6, R3.0 (64 bit)
Tivoli Performance Analyzer V06.30.03.00 @ Linux x86_64 R2.6, R3.0 (64 bit)
Warehouse Proxy V06.30.03.00 @ Linux x86_64 R2.6, R3.0 (64 bit)
All agents require that application support files that contain agent-specific information be installed on the Tivoli Enterprise Monitoring Server that the agents will connect to, Tivoli Enterprise Portal Server and Tivoli Enterprise Portal desktop and browser client. Install application support before starting to install any Tivoli Enterprise Monitoring Agents.
Product packages are available for this operating system and component support categories:
1) IBM Tivoli Monitoring components for this operating system
2) Tivoli Enterprise Portal Browser Client support
3) Tivoli Enterprise Portal Desktop Client support
4) Tivoli Enterprise Portal Server support
5) Tivoli Enterprise Monitoring Server support
6) Other operating systems
Type the number or type “q” to quit selection
[ number “1” or “IBM Tivoli Monitoring components for this operating system” is default ]: 2
You selected number “2” or “Tivoli Enterprise Portal Browser Client support”
Is the selection correct [ 1=Yes, 2=No ; default is “1” ] ? 1
The following application supports are available for installation:
1) Agentless Monitoring for AIX Operating Systems V06.30.03.00
2) Agentless Monitoring for HP-UX Operating Systems V06.30.03.00
3) Agentless Monitoring for Linux Operating Systems V06.30.03.00
4) Agentless Monitoring for Solaris Operating Systems V06.30.03.00
5) Agentless Monitoring for Windows Operating Systems V06.30.03.00
6) Monitoring Agent for Linux OS V06.30.03.00
7) Monitoring Agent for UNIX Logs V06.23.05.00
8) Monitoring Agent for UNIX OS V06.30.03.00
9) Monitoring Agent for Windows OS V06.30.03.00
10) Monitoring Agent for i5/OS V06.30.03.00
11) Summarization and Pruning Agent V06.30.03.00
12) TEC GUI Integration V06.30.03.00
13) Tivoli Performance Analyzer V06.30.03.00
14) Universal Agent V06.23.05.00
15) Warehouse Proxy V06.30.03.00
16) all of the above
Type the numbers that correspond to the products that you want to install. Type “b” to change operating system, or type “q” to quit selection.
If you enter more than one number, separate the numbers by a comma or a space.
Type your selections here: 16
The following products will be installed:
Agentless Monitoring for AIX Operating Systems V06.30.03.00
Agentless Monitoring for HP-UX Operating Systems V06.30.03.00
Agentless Monitoring for Linux Operating Systems V06.30.03.00
Agentless Monitoring for Solaris Operating Systems V06.30.03.00
Agentless Monitoring for Windows Operating Systems V06.30.03.00
Monitoring Agent for Linux OS V06.30.03.00
Monitoring Agent for UNIX Logs V06.23.05.00
Monitoring Agent for UNIX OS V06.30.03.00
Monitoring Agent for Windows OS V06.30.03.00
Monitoring Agent for i5/OS V06.30.03.00
Summarization and Pruning Agent V06.30.03.00
TEC GUI Integration V06.30.03.00
Tivoli Performance Analyzer V06.30.03.00
Universal Agent V06.23.05.00
Warehouse Proxy V06.30.03.00
Are your selections correct [ 1=Yes, 2=No ; default is “1” ] ? 1
… installing “Agentless Monitoring for AIX Operating Systems V06.30.03.00 for Tivoli Enterprise Portal Browser Client support”; please wait.
=> installed “Agentless Monitoring for AIX Operating Systems V06.30.03.00 for Tivoli Enterprise Portal Browser Client support”.
… Initializing component Agentless Monitoring for AIX Operating Systems V06.30.03.00 for Tivoli Enterprise Portal Browser Client support.
… Agentless Monitoring for AIX Operating Systems V06.30.03.00 for Tivoli Enterprise Portal Browser Client support initialized.
… installing “Agentless Monitoring for HP-UX Operating Systems V06.30.03.00 for Tivoli Enterprise Portal Browser Client support”; please wait.
=> installed “Agentless Monitoring for HP-UX Operating Systems V06.30.03.00 for Tivoli Enterprise Portal Browser Client support”.
… Initializing component Agentless Monitoring for HP-UX Operating Systems V06.30.03.00 for Tivoli Enterprise Portal Browser Client support.
… Agentless Monitoring for HP-UX Operating Systems V06.30.03.00 for Tivoli Enterprise Portal Browser Client support initialized.
… installing “Agentless Monitoring for Linux Operating Systems V06.30.03.00 for Tivoli Enterprise Portal Browser Client support”; please wait.
=> installed “Agentless Monitoring for Linux Operating Systems V06.30.03.00 for Tivoli Enterprise Portal Browser Client support”.
… Initializing component Agentless Monitoring for Linux Operating Systems V06.30.03.00 for Tivoli Enterprise Portal Browser Client support.
… Agentless Monitoring for Linux Operating Systems V06.30.03.00 for Tivoli Enterprise Portal Browser Client support initialized.
… installing “Agentless Monitoring for Solaris Operating Systems V06.30.03.00 for Tivoli Enterprise Portal Browser Client support”; please wait.
=> installed “Agentless Monitoring for Solaris Operating Systems V06.30.03.00 for Tivoli Enterprise Portal Browser Client support”.
… Initializing component Agentless Monitoring for Solaris Operating Systems V06.30.03.00 for Tivoli Enterprise Portal Browser Client support.
… Agentless Monitoring for Solaris Operating Systems V06.30.03.00 for Tivoli Enterprise Portal Browser Client support initialized.
… installing “Agentless Monitoring for Windows Operating Systems V06.30.03.00 for Tivoli Enterprise Portal Browser Client support”; please wait.
=> installed “Agentless Monitoring for Windows Operating Systems V06.30.03.00 for Tivoli Enterprise Portal Browser Client support”.
… Initializing component Agentless Monitoring for Windows Operating Systems V06.30.03.00 for Tivoli Enterprise Portal Browser Client support.
… Agentless Monitoring for Windows Operating Systems V06.30.03.00 for Tivoli Enterprise Portal Browser Client support initialized.
… installing “Monitoring Agent for Linux OS V06.30.03.00 for Tivoli Enterprise Portal Browser Client support”; please wait.
=> installed “Monitoring Agent for Linux OS V06.30.03.00 for Tivoli Enterprise Portal Browser Client support”.
… Initializing component Monitoring Agent for Linux OS V06.30.03.00 for Tivoli Enterprise Portal Browser Client support.
… Monitoring Agent for Linux OS V06.30.03.00 for Tivoli Enterprise Portal Browser Client support initialized.
… installing “Monitoring Agent for UNIX Logs V06.23.05.00 for Tivoli Enterprise Portal Browser Client support”; please wait.
=> installed “Monitoring Agent for UNIX Logs V06.23.05.00 for Tivoli Enterprise Portal Browser Client support”.
… Initializing component Monitoring Agent for UNIX Logs V06.23.05.00 for Tivoli Enterprise Portal Browser Client support.
… Monitoring Agent for UNIX Logs V06.23.05.00 for Tivoli Enterprise Portal Browser Client support initialized.
… installing “Monitoring Agent for UNIX OS V06.30.03.00 for Tivoli Enterprise Portal Browser Client support”; please wait.
=> installed “Monitoring Agent for UNIX OS V06.30.03.00 for Tivoli Enterprise Portal Browser Client support”.
… Initializing component Monitoring Agent for UNIX OS V06.30.03.00 for Tivoli Enterprise Portal Browser Client support.
… Monitoring Agent for UNIX OS V06.30.03.00 for Tivoli Enterprise Portal Browser Client support initialized.
… installing “Monitoring Agent for Windows OS V06.30.03.00 for Tivoli Enterprise Portal Browser Client support”; please wait.
=> installed “Monitoring Agent for Windows OS V06.30.03.00 for Tivoli Enterprise Portal Browser Client support”.
… Initializing component Monitoring Agent for Windows OS V06.30.03.00 for Tivoli Enterprise Portal Browser Client support.
… Monitoring Agent for Windows OS V06.30.03.00 for Tivoli Enterprise Portal Browser Client support initialized.
… installing “Monitoring Agent for i5/OS V06.30.03.00 for Tivoli Enterprise Portal Browser Client support”; please wait.
=> installed “Monitoring Agent for i5/OS V06.30.03.00 for Tivoli Enterprise Portal Browser Client support”.
… Initializing component Monitoring Agent for i5/OS V06.30.03.00 for Tivoli Enterprise Portal Browser Client support.
… Monitoring Agent for i5/OS V06.30.03.00 for Tivoli Enterprise Portal Browser Client support initialized.
… installing “Summarization and Pruning Agent V06.30.03.00 for Tivoli Enterprise Portal Browser Client support”; please wait.
=> installed “Summarization and Pruning Agent V06.30.03.00 for Tivoli Enterprise Portal Browser Client support”.
… Initializing component Summarization and Pruning Agent V06.30.03.00 for Tivoli Enterprise Portal Browser Client support.
… Summarization and Pruning Agent V06.30.03.00 for Tivoli Enterprise Portal Browser Client support initialized.
… installing “TEC GUI Integration V06.30.03.00 for Tivoli Enterprise Portal Browser Client support”; please wait.
=> installed “TEC GUI Integration V06.30.03.00 for Tivoli Enterprise Portal Browser Client support”.
… Initializing component TEC GUI Integration V06.30.03.00 for Tivoli Enterprise Portal Browser Client support.
… TEC GUI Integration V06.30.03.00 for Tivoli Enterprise Portal Browser Client support initialized.
… installing “Tivoli Performance Analyzer V06.30.03.00 for Tivoli Enterprise Portal Browser Client support”; please wait.
=> installed “Tivoli Performance Analyzer V06.30.03.00 for Tivoli Enterprise Portal Browser Client support”.
… Initializing component Tivoli Performance Analyzer V06.30.03.00 for Tivoli Enterprise Portal Browser Client support.
… Tivoli Performance Analyzer V06.30.03.00 for Tivoli Enterprise Portal Browser Client support initialized.
… installing “Universal Agent V06.23.05.00 for Tivoli Enterprise Portal Browser Client support”; please wait.
=> installed “Universal Agent V06.23.05.00 for Tivoli Enterprise Portal Browser Client support”.
… Initializing component Universal Agent V06.23.05.00 for Tivoli Enterprise Portal Browser Client support.
… Universal Agent V06.23.05.00 for Tivoli Enterprise Portal Browser Client support initialized.
… installing “Warehouse Proxy V06.30.03.00 for Tivoli Enterprise Portal Browser Client support”; please wait.
=> installed “Warehouse Proxy V06.30.03.00 for Tivoli Enterprise Portal Browser Client support”.
… Initializing component Warehouse Proxy V06.30.03.00 for Tivoli Enterprise Portal Browser Client support.
… Warehouse Proxy V06.30.03.00 for Tivoli Enterprise Portal Browser Client support initialized.
Do you want to install additional products or product support packages [ 1=Yes, 2=No ; default is “2” ] ? 1
Product packages are available for this operating system and component support categories:
1) IBM Tivoli Monitoring components for this operating system
2) Tivoli Enterprise Portal Browser Client support
3) Tivoli Enterprise Portal Desktop Client support
4) Tivoli Enterprise Portal Server support
5) Tivoli Enterprise Monitoring Server support
6) Other operating systems
Type the number or type “q” to quit selection
[ number “1” or “IBM Tivoli Monitoring components for this operating system” is default ]: 3
You selected number “3” or “Tivoli Enterprise Portal Desktop Client support”
Is the selection correct [ 1=Yes, 2=No ; default is “1” ] ? 1
The following application supports are available for installation:
1) Agentless Monitoring for AIX Operating Systems V06.30.03.00
2) Agentless Monitoring for HP-UX Operating Systems V06.30.03.00
3) Agentless Monitoring for Linux Operating Systems V06.30.03.00
4) Agentless Monitoring for Solaris Operating Systems V06.30.03.00
5) Agentless Monitoring for Windows Operating Systems V06.30.03.00
6) Monitoring Agent for Linux OS V06.30.03.00
7) Monitoring Agent for UNIX Logs V06.23.05.00
8) Monitoring Agent for UNIX OS V06.30.03.00
9) Monitoring Agent for Windows OS V06.30.03.00
10) Monitoring Agent for i5/OS V06.30.03.00
11) Summarization and Pruning Agent V06.30.03.00
12) TEC GUI Integration V06.30.03.00
13) Tivoli Performance Analyzer V06.30.03.00
14) Universal Agent V06.23.05.00
15) Warehouse Proxy V06.30.03.00
16) all of the above
Type the numbers that correspond to the products that you want to install. Type “b” to change operating system, or type “q” to quit selection.
If you enter more than one number, separate the numbers by a comma or a space.
Type your selections here: 16
The following products will be installed:
Agentless Monitoring for AIX Operating Systems V06.30.03.00
Agentless Monitoring for HP-UX Operating Systems V06.30.03.00
Agentless Monitoring for Linux Operating Systems V06.30.03.00
Agentless Monitoring for Solaris Operating Systems V06.30.03.00
Agentless Monitoring for Windows Operating Systems V06.30.03.00
Monitoring Agent for Linux OS V06.30.03.00
Monitoring Agent for UNIX Logs V06.23.05.00
Monitoring Agent for UNIX OS V06.30.03.00
Monitoring Agent for Windows OS V06.30.03.00
Monitoring Agent for i5/OS V06.30.03.00
Summarization and Pruning Agent V06.30.03.00
TEC GUI Integration V06.30.03.00
Tivoli Performance Analyzer V06.30.03.00
Universal Agent V06.23.05.00
Warehouse Proxy V06.30.03.00
Are your selections correct [ 1=Yes, 2=No ; default is “1” ] ? 1
… installing “Agentless Monitoring for AIX Operating Systems V06.30.03.00 for Tivoli Enterprise Portal Desktop Client support”; please wait.
=> installed “Agentless Monitoring for AIX Operating Systems V06.30.03.00 for Tivoli Enterprise Portal Desktop Client support”.
… Initializing component Agentless Monitoring for AIX Operating Systems V06.30.03.00 for Tivoli Enterprise Portal Desktop Client support.
… Agentless Monitoring for AIX Operating Systems V06.30.03.00 for Tivoli Enterprise Portal Desktop Client support initialized.
… installing “Agentless Monitoring for HP-UX Operating Systems V06.30.03.00 for Tivoli Enterprise Portal Desktop Client support”; please wait.
=> installed “Agentless Monitoring for HP-UX Operating Systems V06.30.03.00 for Tivoli Enterprise Portal Desktop Client support”.
… Initializing component Agentless Monitoring for HP-UX Operating Systems V06.30.03.00 for Tivoli Enterprise Portal Desktop Client support.
… Agentless Monitoring for HP-UX Operating Systems V06.30.03.00 for Tivoli Enterprise Portal Desktop Client support initialized.
… installing “Agentless Monitoring for Linux Operating Systems V06.30.03.00 for Tivoli Enterprise Portal Desktop Client support”; please wait.
=> installed “Agentless Monitoring for Linux Operating Systems V06.30.03.00 for Tivoli Enterprise Portal Desktop Client support”.
… Initializing component Agentless Monitoring for Linux Operating Systems V06.30.03.00 for Tivoli Enterprise Portal Desktop Client support.
… Agentless Monitoring for Linux Operating Systems V06.30.03.00 for Tivoli Enterprise Portal Desktop Client support initialized.
… installing “Agentless Monitoring for Solaris Operating Systems V06.30.03.00 for Tivoli Enterprise Portal Desktop Client support”; please wait.
=> installed “Agentless Monitoring for Solaris Operating Systems V06.30.03.00 for Tivoli Enterprise Portal Desktop Client support”.
… Initializing component Agentless Monitoring for Solaris Operating Systems V06.30.03.00 for Tivoli Enterprise Portal Desktop Client support.
… Agentless Monitoring for Solaris Operating Systems V06.30.03.00 for Tivoli Enterprise Portal Desktop Client support initialized.
… installing “Agentless Monitoring for Windows Operating Systems V06.30.03.00 for Tivoli Enterprise Portal Desktop Client support”; please wait.
=> installed “Agentless Monitoring for Windows Operating Systems V06.30.03.00 for Tivoli Enterprise Portal Desktop Client support”.
… Initializing component Agentless Monitoring for Windows Operating Systems V06.30.03.00 for Tivoli Enterprise Portal Desktop Client support.
… Agentless Monitoring for Windows Operating Systems V06.30.03.00 for Tivoli Enterprise Portal Desktop Client support initialized.
… installing “Monitoring Agent for Linux OS V06.30.03.00 for Tivoli Enterprise Portal Desktop Client support”; please wait.
=> installed “Monitoring Agent for Linux OS V06.30.03.00 for Tivoli Enterprise Portal Desktop Client support”.
… Initializing component Monitoring Agent for Linux OS V06.30.03.00 for Tivoli Enterprise Portal Desktop Client support.
… Monitoring Agent for Linux OS V06.30.03.00 for Tivoli Enterprise Portal Desktop Client support initialized.
… installing “Monitoring Agent for UNIX Logs V06.23.05.00 for Tivoli Enterprise Portal Desktop Client support”; please wait.
=> installed “Monitoring Agent for UNIX Logs V06.23.05.00 for Tivoli Enterprise Portal Desktop Client support”.
… Initializing component Monitoring Agent for UNIX Logs V06.23.05.00 for Tivoli Enterprise Portal Desktop Client support.
… Monitoring Agent for UNIX Logs V06.23.05.00 for Tivoli Enterprise Portal Desktop Client support initialized.
… installing “Monitoring Agent for UNIX OS V06.30.03.00 for Tivoli Enterprise Portal Desktop Client support”; please wait.
=> installed “Monitoring Agent for UNIX OS V06.30.03.00 for Tivoli Enterprise Portal Desktop Client support”.
… Initializing component Monitoring Agent for UNIX OS V06.30.03.00 for Tivoli Enterprise Portal Desktop Client support.
… Monitoring Agent for UNIX OS V06.30.03.00 for Tivoli Enterprise Portal Desktop Client support initialized.
… installing “Monitoring Agent for Windows OS V06.30.03.00 for Tivoli Enterprise Portal Desktop Client support”; please wait.
=> installed “Monitoring Agent for Windows OS V06.30.03.00 for Tivoli Enterprise Portal Desktop Client support”.
… Initializing component Monitoring Agent for Windows OS V06.30.03.00 for Tivoli Enterprise Portal Desktop Client support.
… Monitoring Agent for Windows OS V06.30.03.00 for Tivoli Enterprise Portal Desktop Client support initialized.
… installing “Monitoring Agent for i5/OS V06.30.03.00 for Tivoli Enterprise Portal Desktop Client support”; please wait.
=> installed “Monitoring Agent for i5/OS V06.30.03.00 for Tivoli Enterprise Portal Desktop Client support”.
… Initializing component Monitoring Agent for i5/OS V06.30.03.00 for Tivoli Enterprise Portal Desktop Client support.
… Monitoring Agent for i5/OS V06.30.03.00 for Tivoli Enterprise Portal Desktop Client support initialized.
… installing “Summarization and Pruning Agent V06.30.03.00 for Tivoli Enterprise Portal Desktop Client support”; please wait.
=> installed “Summarization and Pruning Agent V06.30.03.00 for Tivoli Enterprise Portal Desktop Client support”.
… Initializing component Summarization and Pruning Agent V06.30.03.00 for Tivoli Enterprise Portal Desktop Client support.
… Summarization and Pruning Agent V06.30.03.00 for Tivoli Enterprise Portal Desktop Client support initialized.
… installing “TEC GUI Integration V06.30.03.00 for Tivoli Enterprise Portal Desktop Client support”; please wait.
=> installed “TEC GUI Integration V06.30.03.00 for Tivoli Enterprise Portal Desktop Client support”.
… Initializing component TEC GUI Integration V06.30.03.00 for Tivoli Enterprise Portal Desktop Client support.
… TEC GUI Integration V06.30.03.00 for Tivoli Enterprise Portal Desktop Client support initialized.
… installing “Tivoli Performance Analyzer V06.30.03.00 for Tivoli Enterprise Portal Desktop Client support”; please wait.
=> installed “Tivoli Performance Analyzer V06.30.03.00 for Tivoli Enterprise Portal Desktop Client support”.
… Initializing component Tivoli Performance Analyzer V06.30.03.00 for Tivoli Enterprise Portal Desktop Client support.
… Tivoli Performance Analyzer V06.30.03.00 for Tivoli Enterprise Portal Desktop Client support initialized.
… installing “Universal Agent V06.23.05.00 for Tivoli Enterprise Portal Desktop Client support”; please wait.
=> installed “Universal Agent V06.23.05.00 for Tivoli Enterprise Portal Desktop Client support”.
… Initializing component Universal Agent V06.23.05.00 for Tivoli Enterprise Portal Desktop Client support.
… Universal Agent V06.23.05.00 for Tivoli Enterprise Portal Desktop Client support initialized.
… installing “Warehouse Proxy V06.30.03.00 for Tivoli Enterprise Portal Desktop Client support”; please wait.
=> installed “Warehouse Proxy V06.30.03.00 for Tivoli Enterprise Portal Desktop Client support”.
… Initializing component Warehouse Proxy V06.30.03.00 for Tivoli Enterprise Portal Desktop Client support.
… Warehouse Proxy V06.30.03.00 for Tivoli Enterprise Portal Desktop Client support initialized.
Do you want to install additional products or product support packages [ 1=Yes, 2=No ; default is “2” ] ? 1
Product packages are available for this operating system and component support categories:
1) IBM Tivoli Monitoring components for this operating system
2) Tivoli Enterprise Portal Browser Client support
3) Tivoli Enterprise Portal Desktop Client support
4) Tivoli Enterprise Portal Server support
5) Tivoli Enterprise Monitoring Server support
6) Other operating systems
Type the number or type “q” to quit selection
[ number “1” or “IBM Tivoli Monitoring components for this operating system” is default ]: 4
You selected number “4” or “Tivoli Enterprise Portal Server support”
Is the selection correct [ 1=Yes, 2=No ; default is “1” ] ? 1
The following application supports are available for installation:
1) Agentless Monitoring for AIX Operating Systems V06.30.03.00
2) Agentless Monitoring for HP-UX Operating Systems V06.30.03.00
3) Agentless Monitoring for Linux Operating Systems V06.30.03.00
4) Agentless Monitoring for Solaris Operating Systems V06.30.03.00
5) Agentless Monitoring for Windows Operating Systems V06.30.03.00
6) Monitoring Agent for IBM Tivoli Monitoring 5.x Endpoint V06.23.05.00
7) Monitoring Agent for Linux OS V06.30.03.00
8) Monitoring Agent for UNIX Logs V06.23.05.00
9) Monitoring Agent for UNIX OS V06.30.03.00
10) Monitoring Agent for Windows OS V06.30.03.00
11) Monitoring Agent for i5/OS V06.30.03.00
12) Summarization and Pruning Agent V06.30.03.00
13) TEC GUI Integration V06.30.03.00
14) Tivoli Performance Analyzer V06.30.03.00
15) Universal Agent V06.23.05.00
16) Warehouse Proxy V06.30.03.00
17) all of the above
Type the numbers that correspond to the products that you want to install. Type “b” to change operating system, or type “q” to quit selection.
If you enter more than one number, separate the numbers by a comma or a space.
Type your selections here: 17
The following products will be installed:
Agentless Monitoring for AIX Operating Systems V06.30.03.00
Agentless Monitoring for HP-UX Operating Systems V06.30.03.00
Agentless Monitoring for Linux Operating Systems V06.30.03.00
Agentless Monitoring for Solaris Operating Systems V06.30.03.00
Agentless Monitoring for Windows Operating Systems V06.30.03.00
Monitoring Agent for IBM Tivoli Monitoring 5.x Endpoint V06.23.05.00
Monitoring Agent for Linux OS V06.30.03.00
Monitoring Agent for UNIX Logs V06.23.05.00
Monitoring Agent for UNIX OS V06.30.03.00
Monitoring Agent for Windows OS V06.30.03.00
Monitoring Agent for i5/OS V06.30.03.00
Summarization and Pruning Agent V06.30.03.00
TEC GUI Integration V06.30.03.00
Tivoli Performance Analyzer V06.30.03.00
Universal Agent V06.23.05.00
Warehouse Proxy V06.30.03.00
Are your selections correct [ 1=Yes, 2=No ; default is “1” ] ? 1
… installing “Agentless Monitoring for AIX Operating Systems V06.30.03.00 for Tivoli Enterprise Portal Server support”; please wait.
=> installed “Agentless Monitoring for AIX Operating Systems V06.30.03.00 for Tivoli Enterprise Portal Server support”.
… Initializing component Agentless Monitoring for AIX Operating Systems V06.30.03.00 for Tivoli Enterprise Portal Server support.
… Agentless Monitoring for AIX Operating Systems V06.30.03.00 for Tivoli Enterprise Portal Server support initialized.
… installing “Agentless Monitoring for HP-UX Operating Systems V06.30.03.00 for Tivoli Enterprise Portal Server support”; please wait.
=> installed “Agentless Monitoring for HP-UX Operating Systems V06.30.03.00 for Tivoli Enterprise Portal Server support”.
… Initializing component Agentless Monitoring for HP-UX Operating Systems V06.30.03.00 for Tivoli Enterprise Portal Server support.
… Agentless Monitoring for HP-UX Operating Systems V06.30.03.00 for Tivoli Enterprise Portal Server support initialized.
… installing “Agentless Monitoring for Linux Operating Systems V06.30.03.00 for Tivoli Enterprise Portal Server support”; please wait.
=> installed “Agentless Monitoring for Linux Operating Systems V06.30.03.00 for Tivoli Enterprise Portal Server support”.
… Initializing component Agentless Monitoring for Linux Operating Systems V06.30.03.00 for Tivoli Enterprise Portal Server support.
… Agentless Monitoring for Linux Operating Systems V06.30.03.00 for Tivoli Enterprise Portal Server support initialized.
… installing “Agentless Monitoring for Solaris Operating Systems V06.30.03.00 for Tivoli Enterprise Portal Server support”; please wait.
=> installed “Agentless Monitoring for Solaris Operating Systems V06.30.03.00 for Tivoli Enterprise Portal Server support”.
… Initializing component Agentless Monitoring for Solaris Operating Systems V06.30.03.00 for Tivoli Enterprise Portal Server support.
… Agentless Monitoring for Solaris Operating Systems V06.30.03.00 for Tivoli Enterprise Portal Server support initialized.
… installing “Agentless Monitoring for Windows Operating Systems V06.30.03.00 for Tivoli Enterprise Portal Server support”; please wait.
=> installed “Agentless Monitoring for Windows Operating Systems V06.30.03.00 for Tivoli Enterprise Portal Server support”.
… Initializing component Agentless Monitoring for Windows Operating Systems V06.30.03.00 for Tivoli Enterprise Portal Server support.
… Agentless Monitoring for Windows Operating Systems V06.30.03.00 for Tivoli Enterprise Portal Server support initialized.
… installing “Monitoring Agent for IBM Tivoli Monitoring 5.x Endpoint V06.23.05.00 for Tivoli Enterprise Portal Server support”; please wait.
=> installed “Monitoring Agent for IBM Tivoli Monitoring 5.x Endpoint V06.23.05.00 for Tivoli Enterprise Portal Server support”.
… Initializing component Monitoring Agent for IBM Tivoli Monitoring 5.x Endpoint V06.23.05.00 for Tivoli Enterprise Portal Server support.
… Monitoring Agent for IBM Tivoli Monitoring 5.x Endpoint V06.23.05.00 for Tivoli Enterprise Portal Server support initialized.
… installing “Monitoring Agent for Linux OS V06.30.03.00 for Tivoli Enterprise Portal Server support”; please wait.
=> installed “Monitoring Agent for Linux OS V06.30.03.00 for Tivoli Enterprise Portal Server support”.
… Initializing component Monitoring Agent for Linux OS V06.30.03.00 for Tivoli Enterprise Portal Server support.
… Monitoring Agent for Linux OS V06.30.03.00 for Tivoli Enterprise Portal Server support initialized.
… installing “Monitoring Agent for UNIX Logs V06.23.05.00 for Tivoli Enterprise Portal Server support”; please wait.
=> installed “Monitoring Agent for UNIX Logs V06.23.05.00 for Tivoli Enterprise Portal Server support”.
… Initializing component Monitoring Agent for UNIX Logs V06.23.05.00 for Tivoli Enterprise Portal Server support.
… Monitoring Agent for UNIX Logs V06.23.05.00 for Tivoli Enterprise Portal Server support initialized.
… installing “Monitoring Agent for UNIX OS V06.30.03.00 for Tivoli Enterprise Portal Server support”; please wait.
=> installed “Monitoring Agent for UNIX OS V06.30.03.00 for Tivoli Enterprise Portal Server support”.
… Initializing component Monitoring Agent for UNIX OS V06.30.03.00 for Tivoli Enterprise Portal Server support.
… Monitoring Agent for UNIX OS V06.30.03.00 for Tivoli Enterprise Portal Server support initialized.
… installing “Monitoring Agent for Windows OS V06.30.03.00 for Tivoli Enterprise Portal Server support”; please wait.
=> installed “Monitoring Agent for Windows OS V06.30.03.00 for Tivoli Enterprise Portal Server support”.
… Initializing component Monitoring Agent for Windows OS V06.30.03.00 for Tivoli Enterprise Portal Server support.
… Monitoring Agent for Windows OS V06.30.03.00 for Tivoli Enterprise Portal Server support initialized.
… installing “Monitoring Agent for i5/OS V06.30.03.00 for Tivoli Enterprise Portal Server support”; please wait.
=> installed “Monitoring Agent for i5/OS V06.30.03.00 for Tivoli Enterprise Portal Server support”.
… Initializing component Monitoring Agent for i5/OS V06.30.03.00 for Tivoli Enterprise Portal Server support.
… Monitoring Agent for i5/OS V06.30.03.00 for Tivoli Enterprise Portal Server support initialized.
… installing “Summarization and Pruning Agent V06.30.03.00 for Tivoli Enterprise Portal Server support”; please wait.
=> installed “Summarization and Pruning Agent V06.30.03.00 for Tivoli Enterprise Portal Server support”.
… Initializing component Summarization and Pruning Agent V06.30.03.00 for Tivoli Enterprise Portal Server support.
… Summarization and Pruning Agent V06.30.03.00 for Tivoli Enterprise Portal Server support initialized.
… installing “TEC GUI Integration V06.30.03.00 for Tivoli Enterprise Portal Server support”; please wait.
=> installed “TEC GUI Integration V06.30.03.00 for Tivoli Enterprise Portal Server support”.
… Initializing component TEC GUI Integration V06.30.03.00 for Tivoli Enterprise Portal Server support.
… TEC GUI Integration V06.30.03.00 for Tivoli Enterprise Portal Server support initialized.
… installing “Tivoli Performance Analyzer V06.30.03.00 for Tivoli Enterprise Portal Server support”; please wait.
=> installed “Tivoli Performance Analyzer V06.30.03.00 for Tivoli Enterprise Portal Server support”.
… Initializing component Tivoli Performance Analyzer V06.30.03.00 for Tivoli Enterprise Portal Server support.
… Tivoli Performance Analyzer V06.30.03.00 for Tivoli Enterprise Portal Server support initialized.
… installing “Universal Agent V06.23.05.00 for Tivoli Enterprise Portal Server support”; please wait.
=> installed “Universal Agent V06.23.05.00 for Tivoli Enterprise Portal Server support”.
… Initializing component Universal Agent V06.23.05.00 for Tivoli Enterprise Portal Server support.
… Universal Agent V06.23.05.00 for Tivoli Enterprise Portal Server support initialized.
… installing “Warehouse Proxy V06.30.03.00 for Tivoli Enterprise Portal Server support”; please wait.
=> installed “Warehouse Proxy V06.30.03.00 for Tivoli Enterprise Portal Server support”.
… Initializing component Warehouse Proxy V06.30.03.00 for Tivoli Enterprise Portal Server support.
… Warehouse Proxy V06.30.03.00 for Tivoli Enterprise Portal Server support initialized.
Do you want to install additional products or product support packages [ 1=Yes, 2=No ; default is “2” ] ? 2
… postprocessing; please wait.
… running /app/IBM/ITM/lx8266/cq/bin/helpmerg.sh
… finished postprocessing.
Installation step complete.
Automatic start at system initialization has been configured.
Automatic stop at system shutdown has been configured.
The install.sh command creates most of directories and files with world write permissions. IBM Tivoli Monitoring provides the secureMain utility to helps you keep the monitoring environment secured. You can secure this installation now or manually execute the secureMain utility later. For more information see Appendix G. Securing your IBM Tivoli Monitoring installation on Linux or UNIX in the IBM Tivoli Monitoring Installation and Setup Guide.
Do you want to secure this IBM Tivoli Monitoring installation [ 1-yes, 2-no; “2” is default ]? 2
Starting TEMS…
It can take up to ten minutes.
TEMS started…
